
- Support center home
- Machool overview
- Account setup
- Account management
- Making a shipment
- E-commerce
- Bring your own account
- Import recipients
- Shopify advanced shipping rules
- WooCommerce advanced shipping rules
- Batch shipping
- Custom package templates
- Machool Bulk Ship
- Advanced shipment notifications
- Service Provider support
- Adjustment charges
- Deliver to local pickup location
- Machool API Solution
- Schedule a Pickup
- Machool’s Analytics Center
- Presets
- Direct Print
- Machool Wallet
- Support center
- Return Portal
- Zonos Integration
Presets - How To
We’ve listened to your feedback, and in response to your interest in streamlining the shipment creation process with fewer clicks, we are excited to introduce our enhanced Presets feature!
With Presets, instead of manually selecting your shipping preferences and package sizes every time, you can pre-configure options and set preferences that are automatically applied based on your specific criteria.
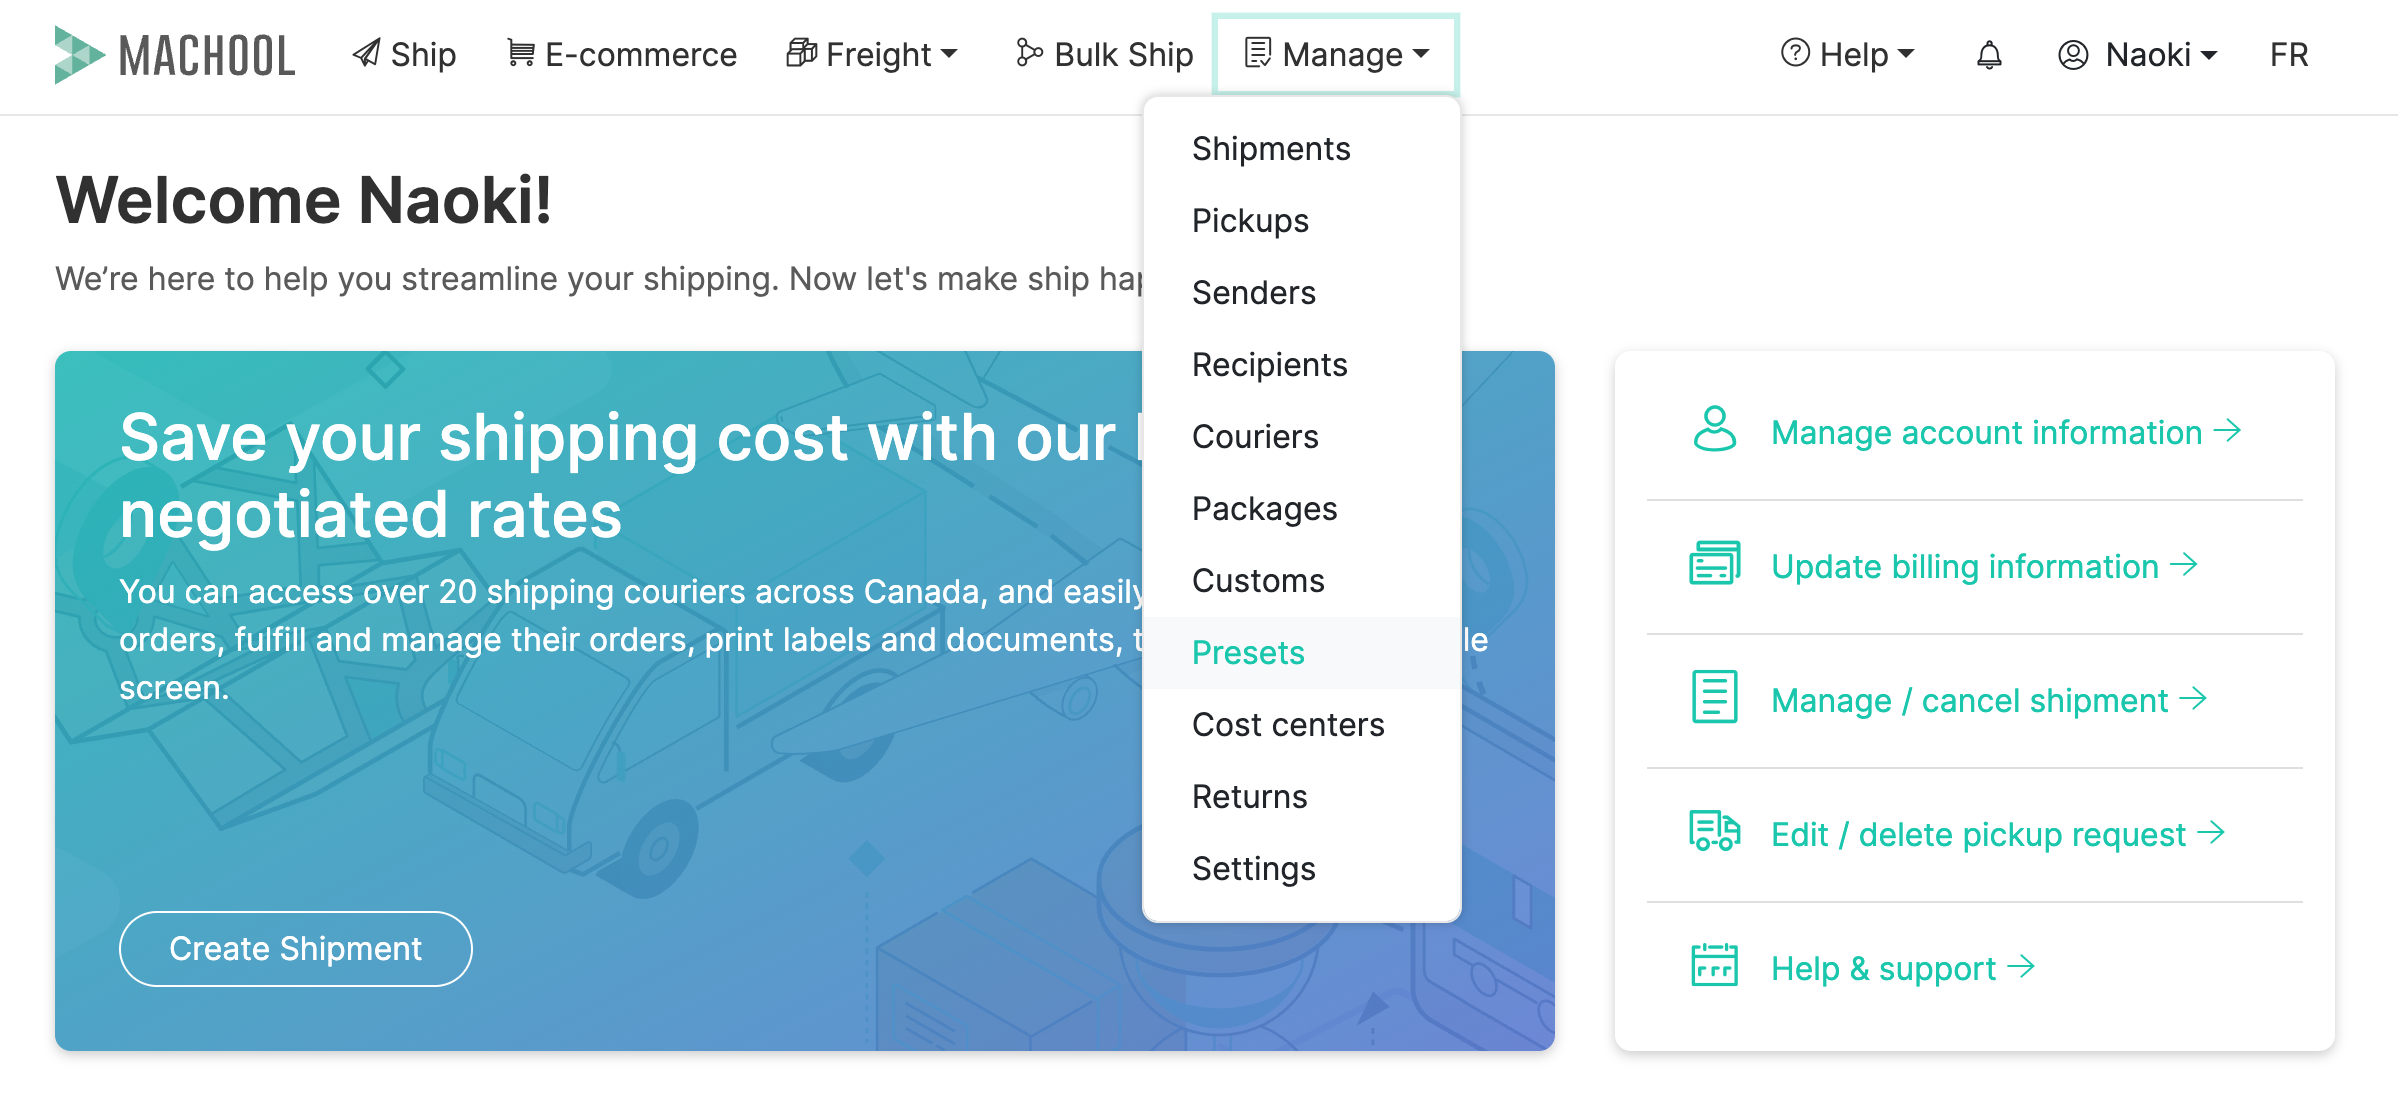
To access your Presets, navigate to the 'Manage' section in the top menu, then select 'Presets' from the list.
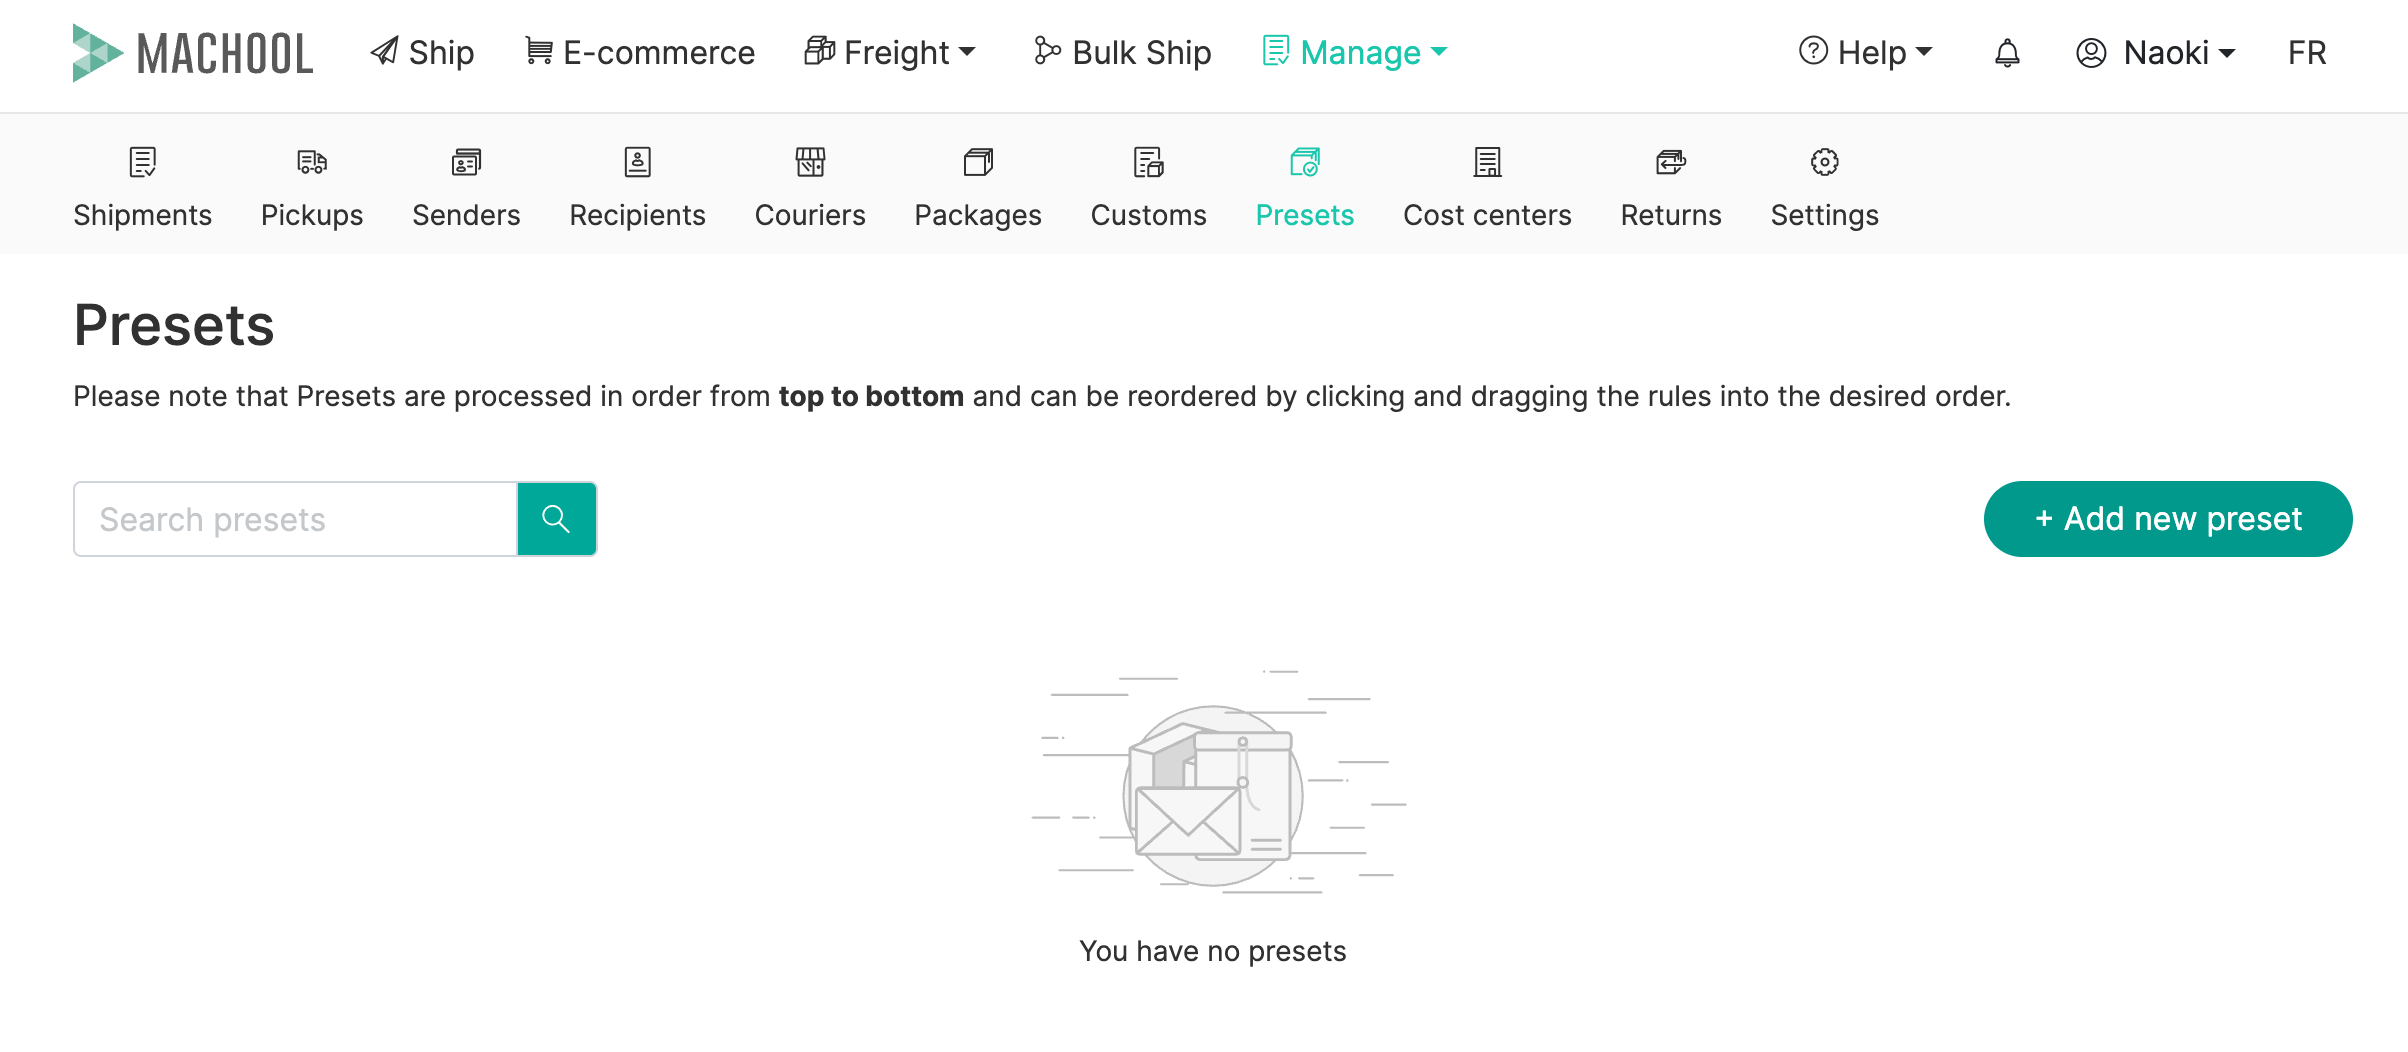
Any previously created Presets will be displayed on this list, and you can edit them if needed. To create a new one, simply click on the '+ Add new preset' button.
A pop-up will appear:
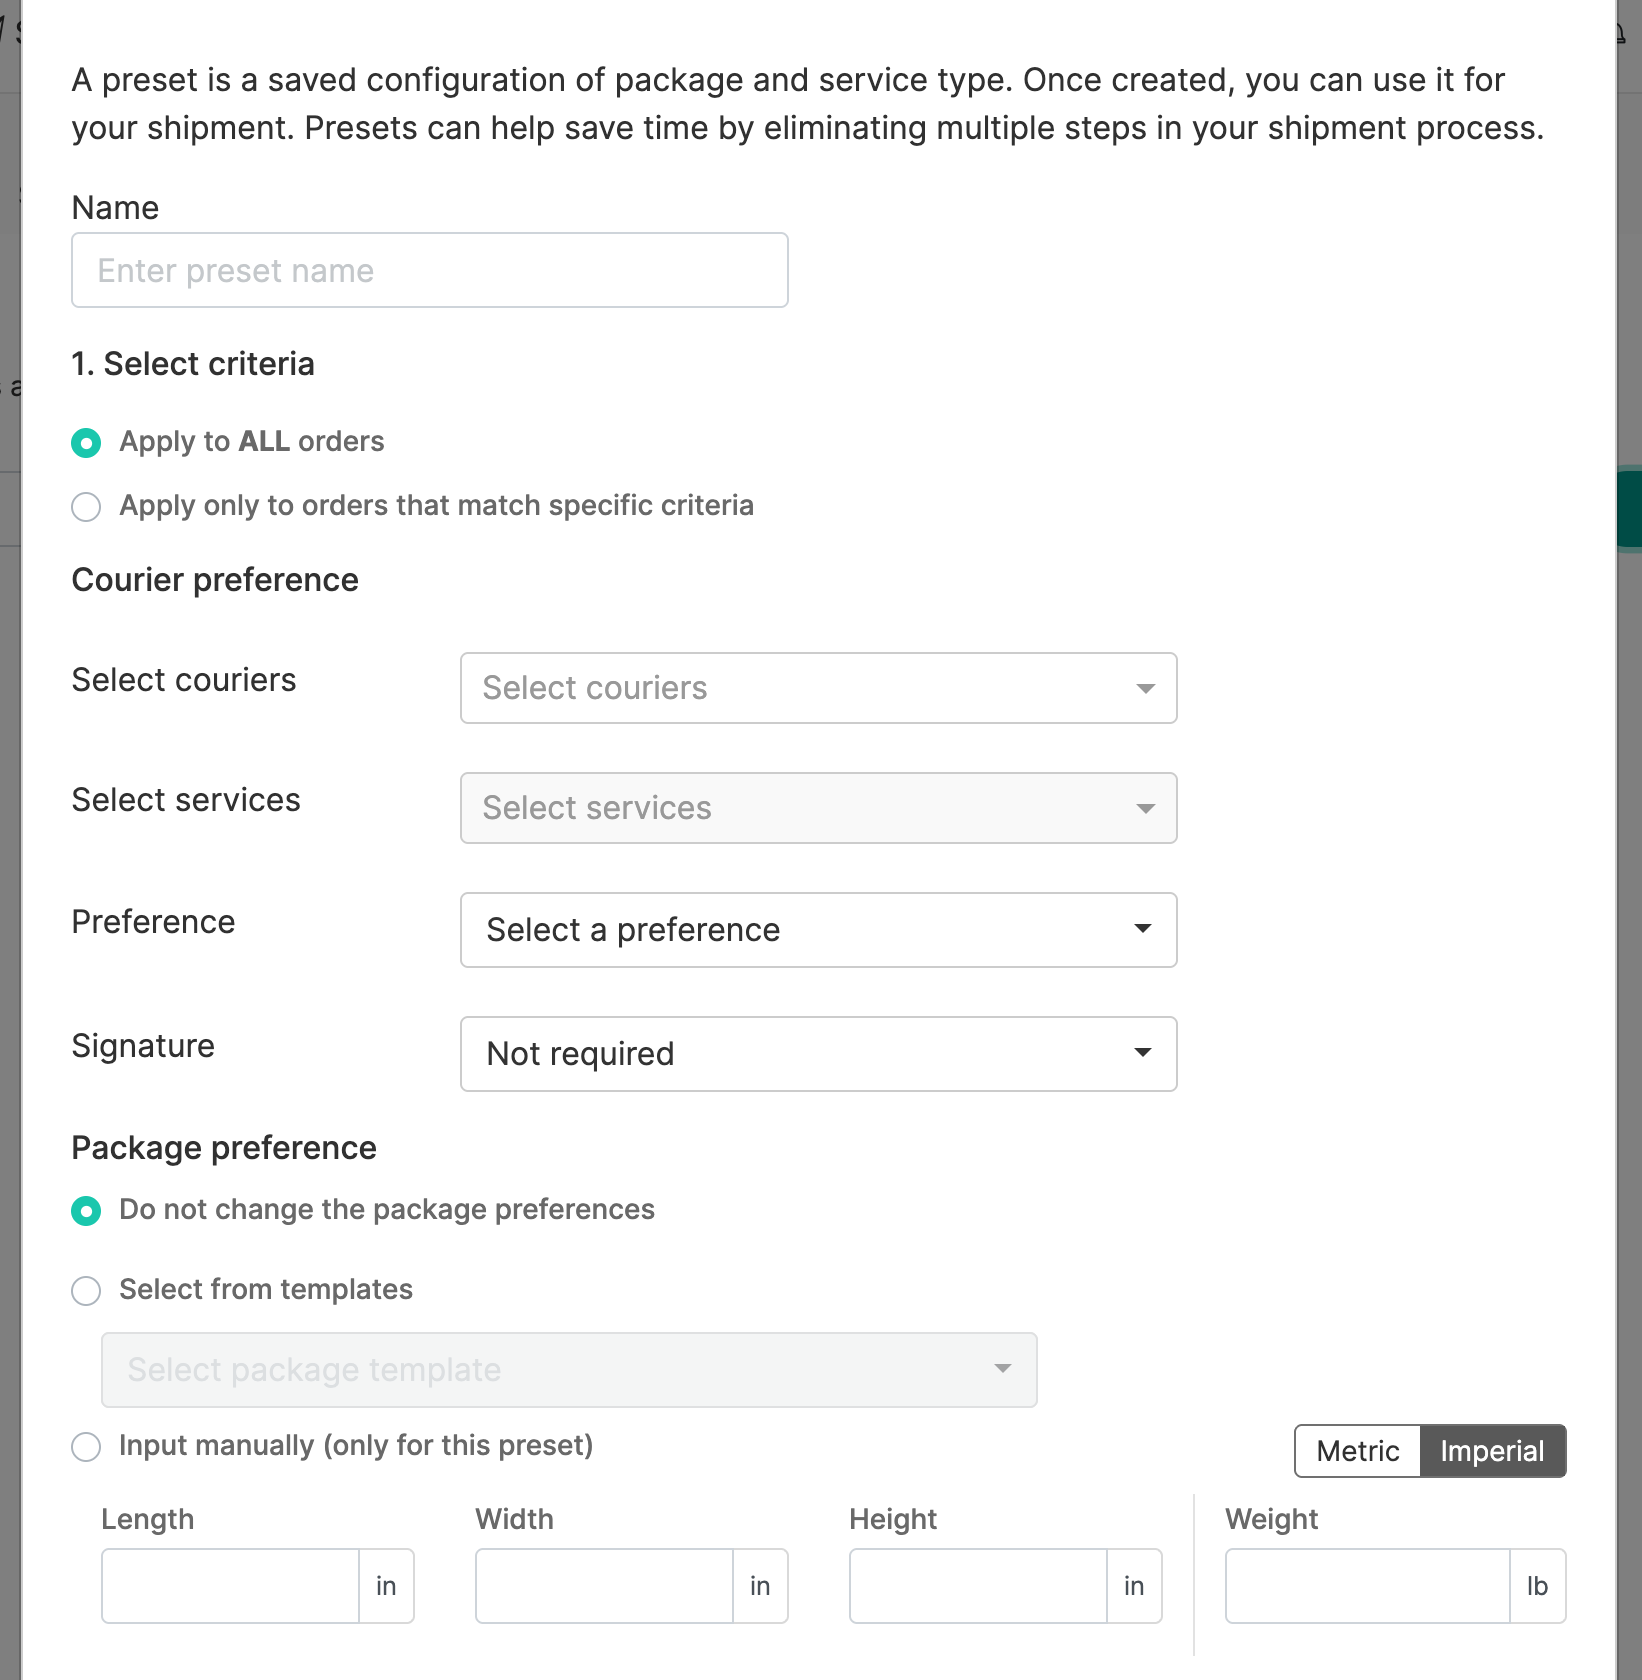
- Here, you can create as many preset combinations as needed. Start by giving your preset a clear name for easy identification. Then, select your preferred courier—or multiple couriers, if desired.
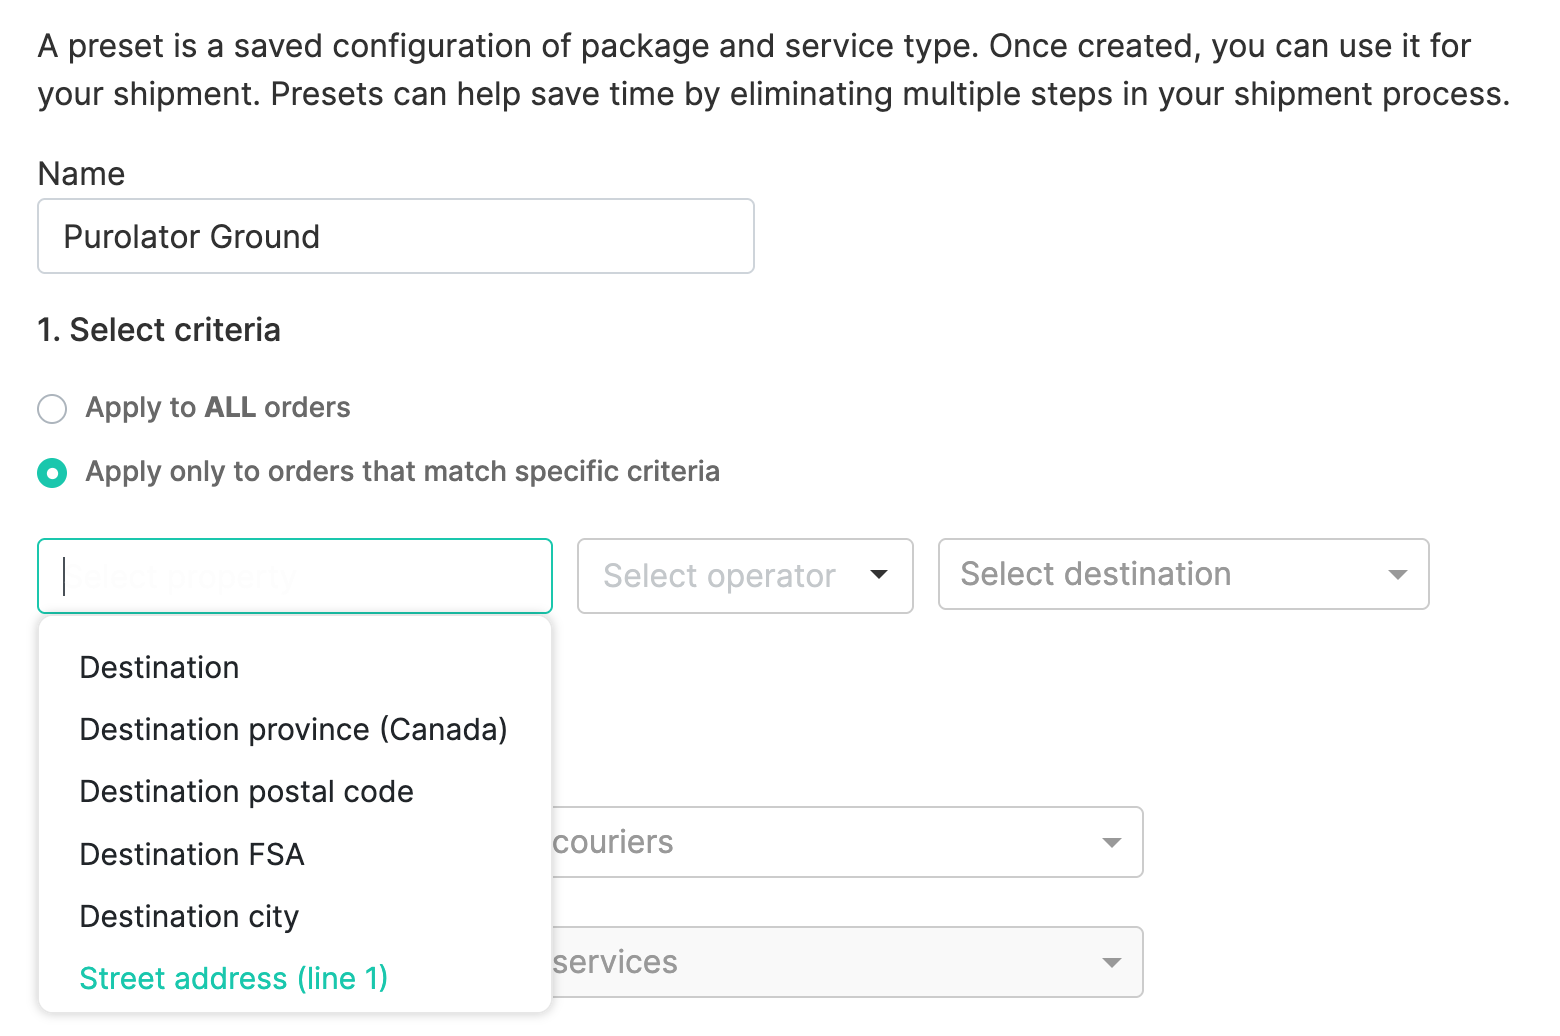
- You can choose to apply this preset to all shipments or set specific criteria based on destinations or postal areas (FSAs). For example, if you want certain couriers to handle shipments to specific regions, you can list those areas here using the pipe "|" delimiter.
3.Choose your preferred courier or multiple couriers that you want to use for this preset.
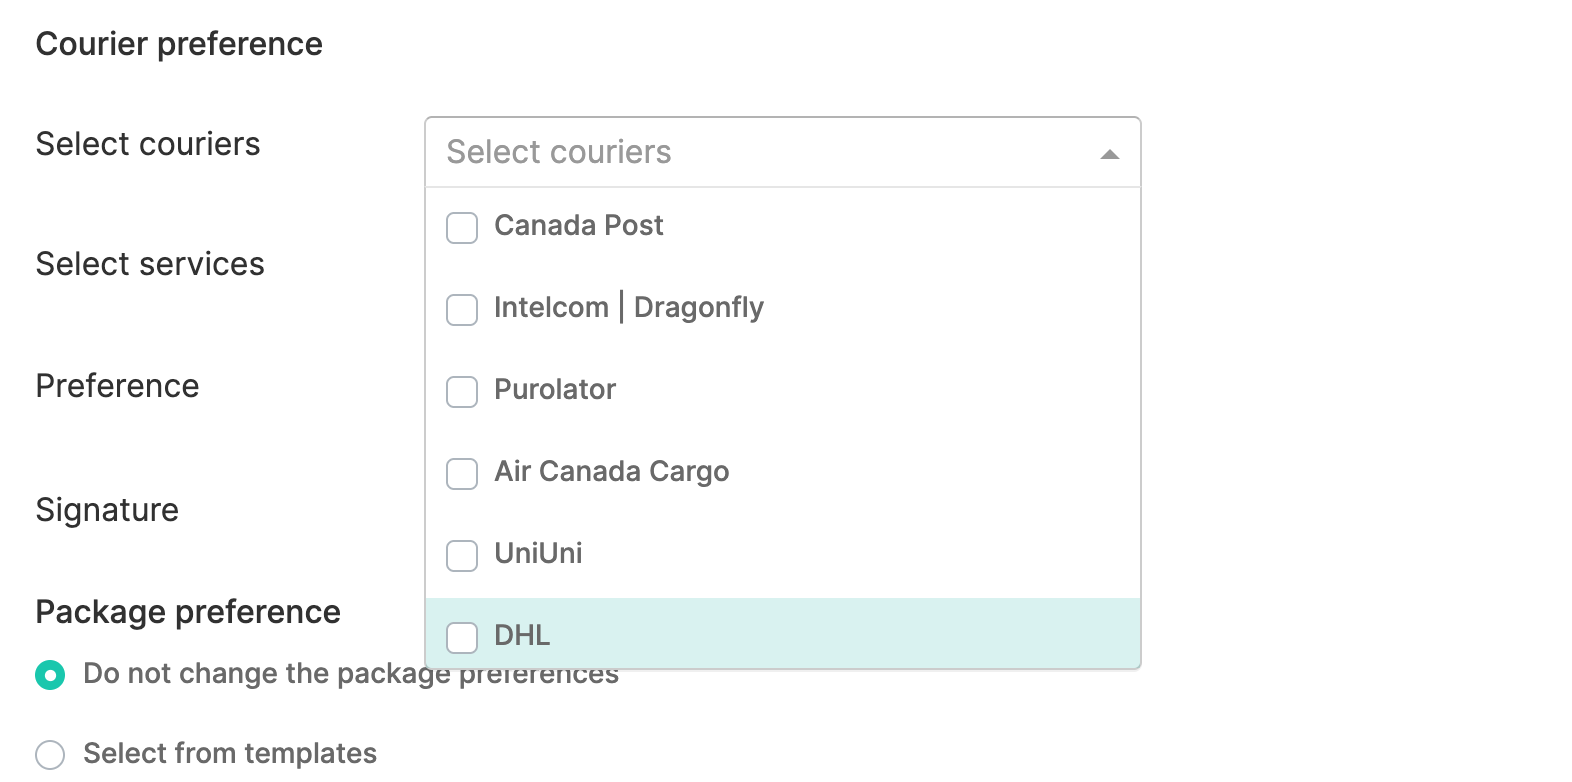
4. You have the option to select whichever courier service you wish to apply to this preset.

5. The next option is your preference - what criteria would you like Machool to filter by? Currently, you have the option to choose between the “least expensive service” or the “fastest service”. Note that this preference will be applied to all the courier you have selected in the “select couriers” section.

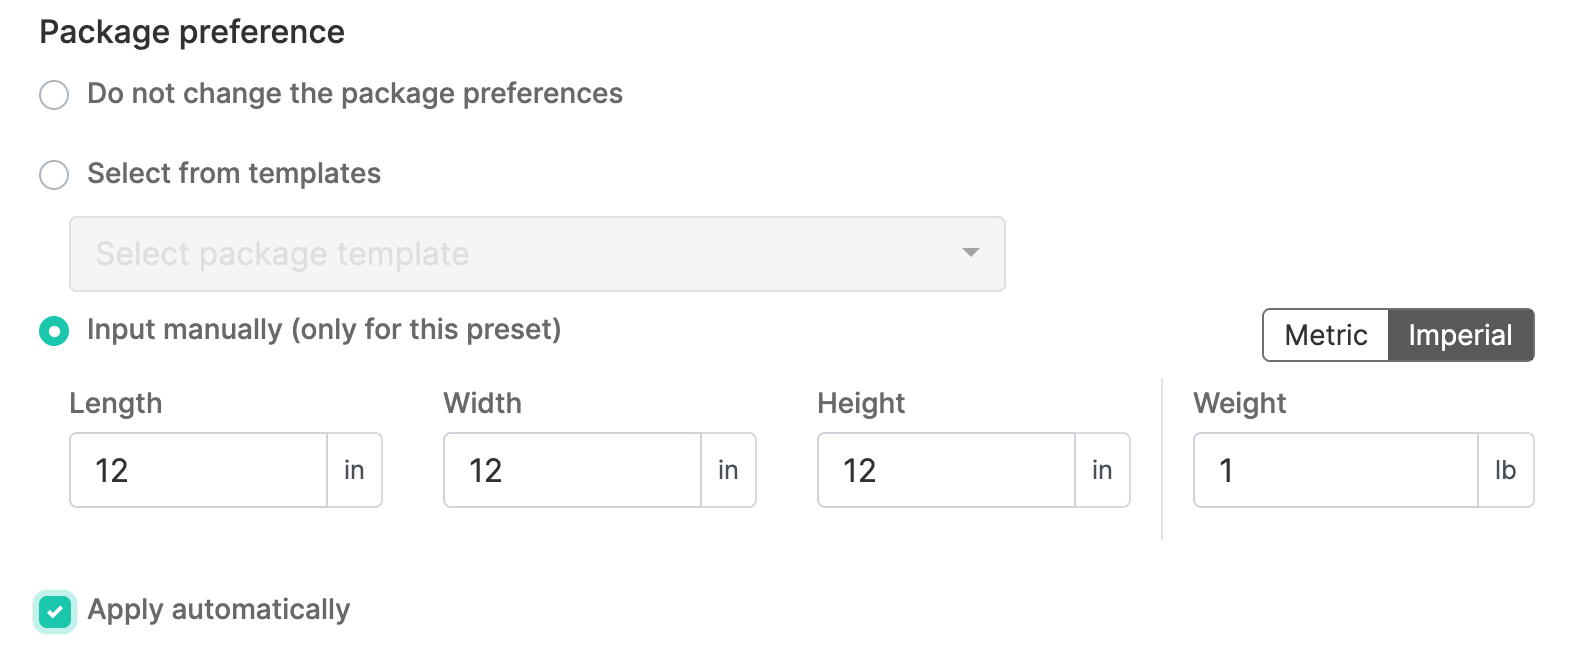
6. You then have the option to add a packaging template to this preset by either selecting from one of your existing package templates or manually input one.

7. Finally you can Automatically Apply presets to shipments based on the criteria you’ve set, such as:
- Destination Country or Province: For example, if a preset is set for Canada and province QC (Quebec), it will only apply to shipments going to Quebec.
- Couriers and Services: Choose specific couriers and services that you want to use for these presets.
Managing Preset Priority
Presets have a priority order, which means if more than one preset matches a shipment, the one with the highest priority will be applied first.
- You can change the priority by dragging presets up or down in the list.
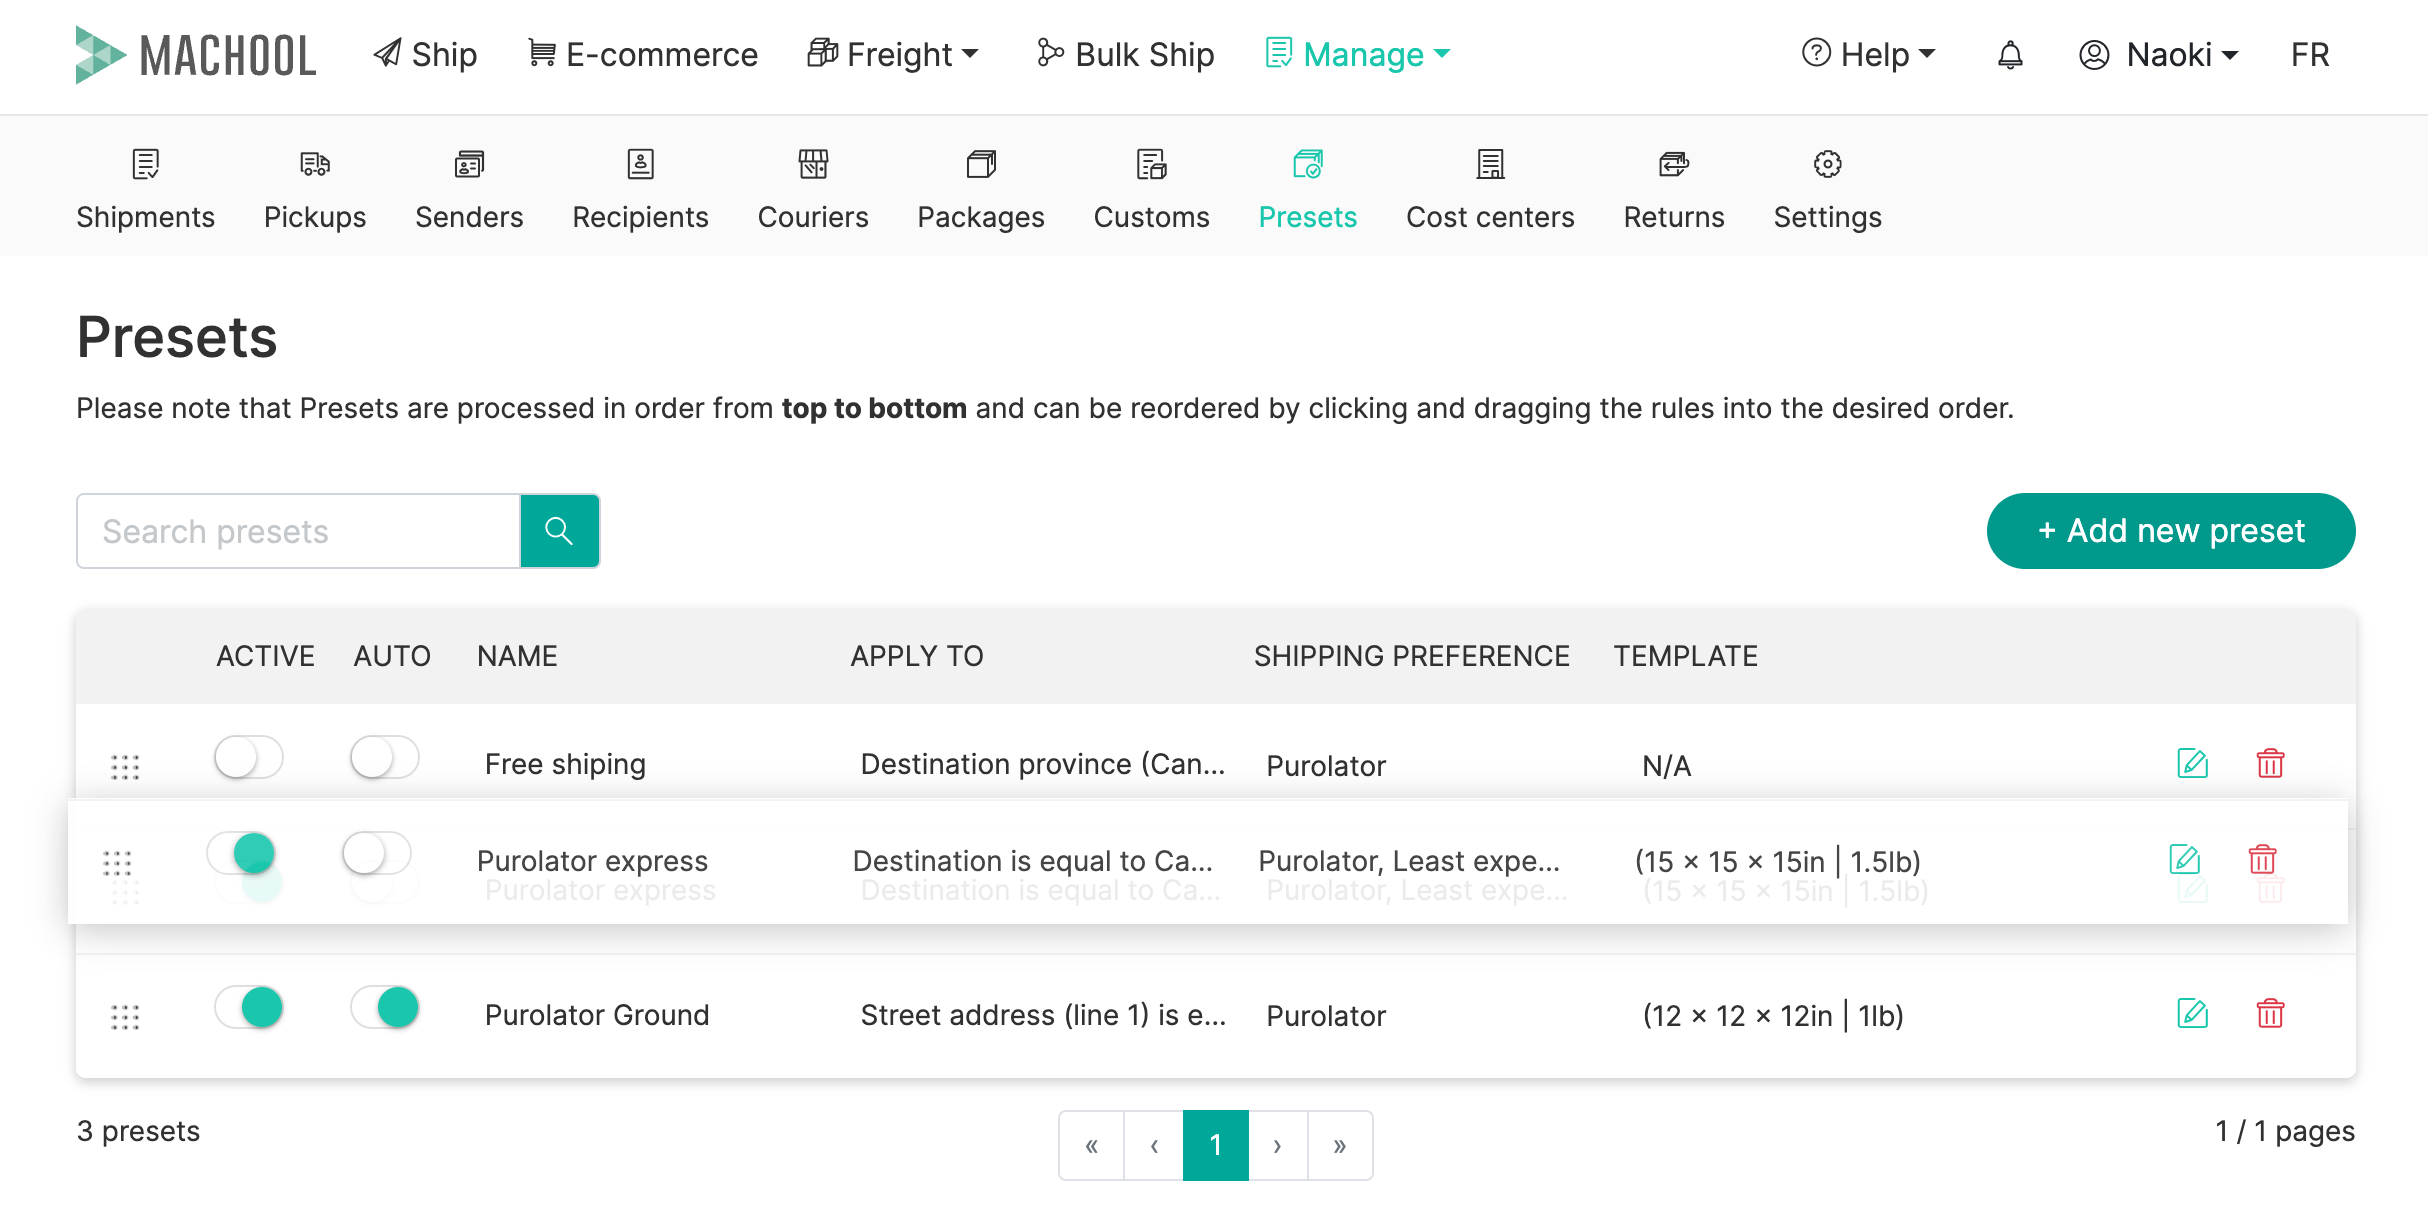
- Enabled and Disabled Presets: Disabled presets won’t be applied even if they match the criteria.
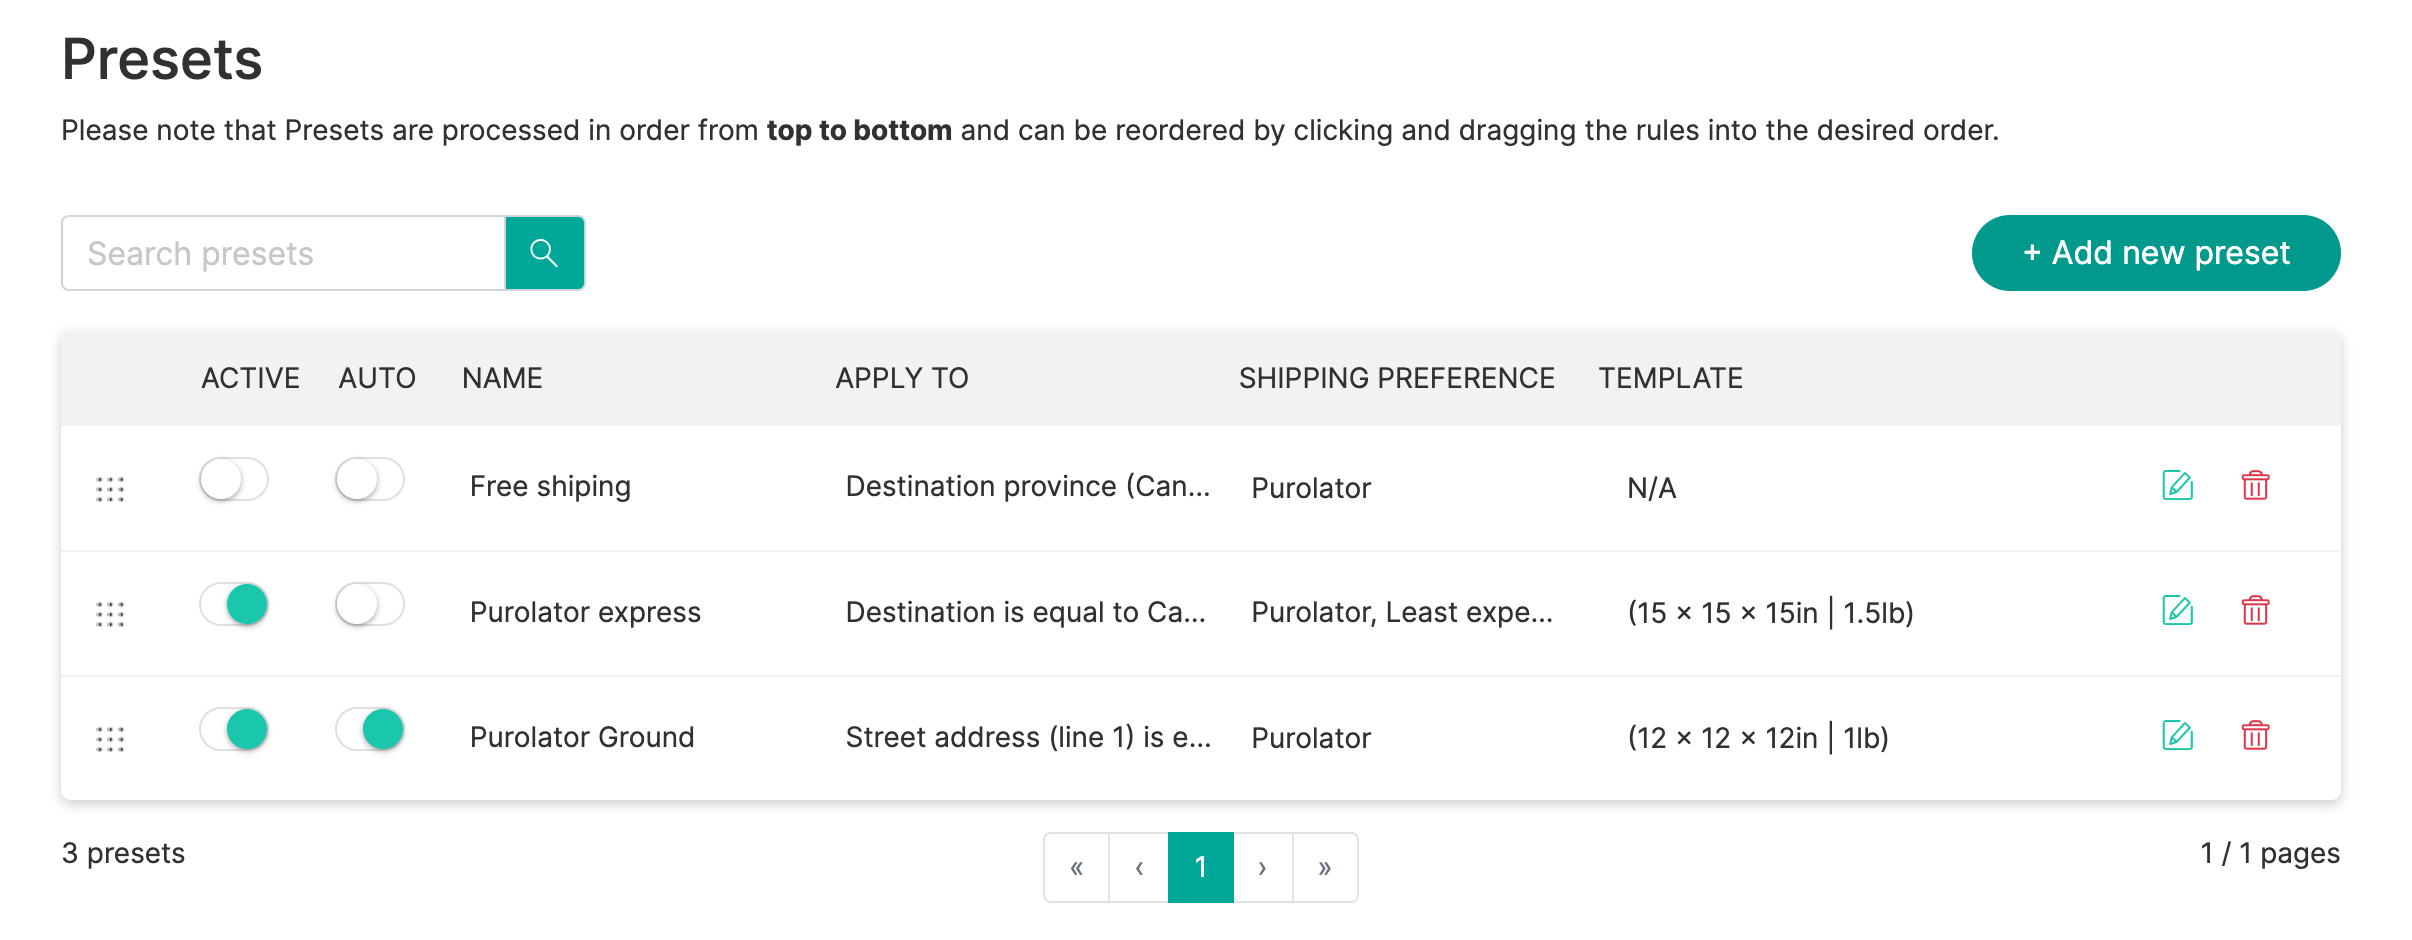
Your Presets will appear at the bottom of your page when creating shipments, making the shipping process even more streamlined and efficient.
For customers using our External API to integrate with Machool, presets can also be utilized through the API.