Shopify
How to connect your store?
Once you have logged into your account, go to Manage > E-commerce, click on the store logo. Enter your shop name and click Connect.
WooCommerce
How to connect your store?
Once you have logged into your account, go to Manage > E-commerce, click on the store logo. Enter your shop name and click Connect.
Why use Machool Live Checkout Shipping rates?
- Show real-time, accurate rate quotes to your customers
- Protect your margins by quoting accurately
- Customize your rates by dollar amount or percentage
- Boost conversion rates
- Easy to use, quick setup with no modifications required
How to activate the plugin
1. Install the plugin out of WordPress registry and activate it: Machool plugin for WooCommerce
2. Make sure your store is connected to Machool and click on the “folder +” icon.
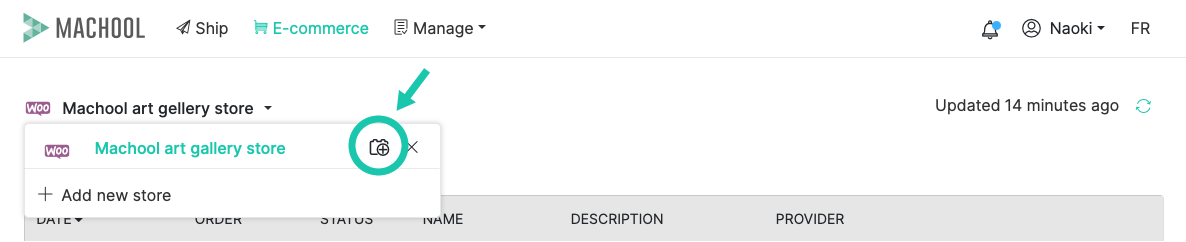
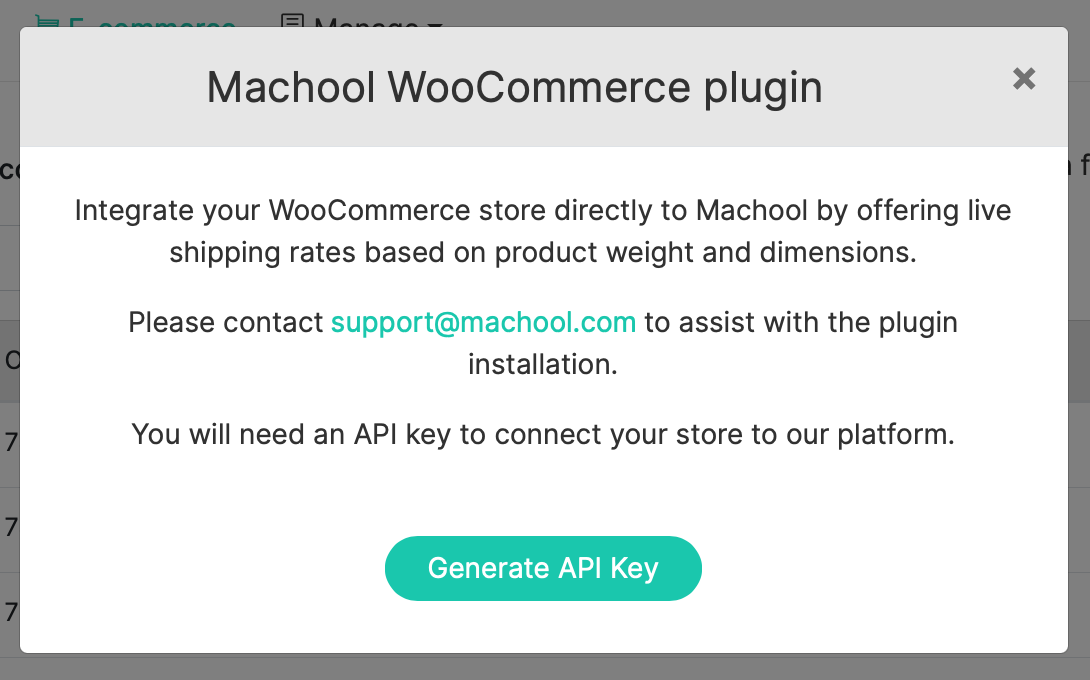
3. Generate an API key.
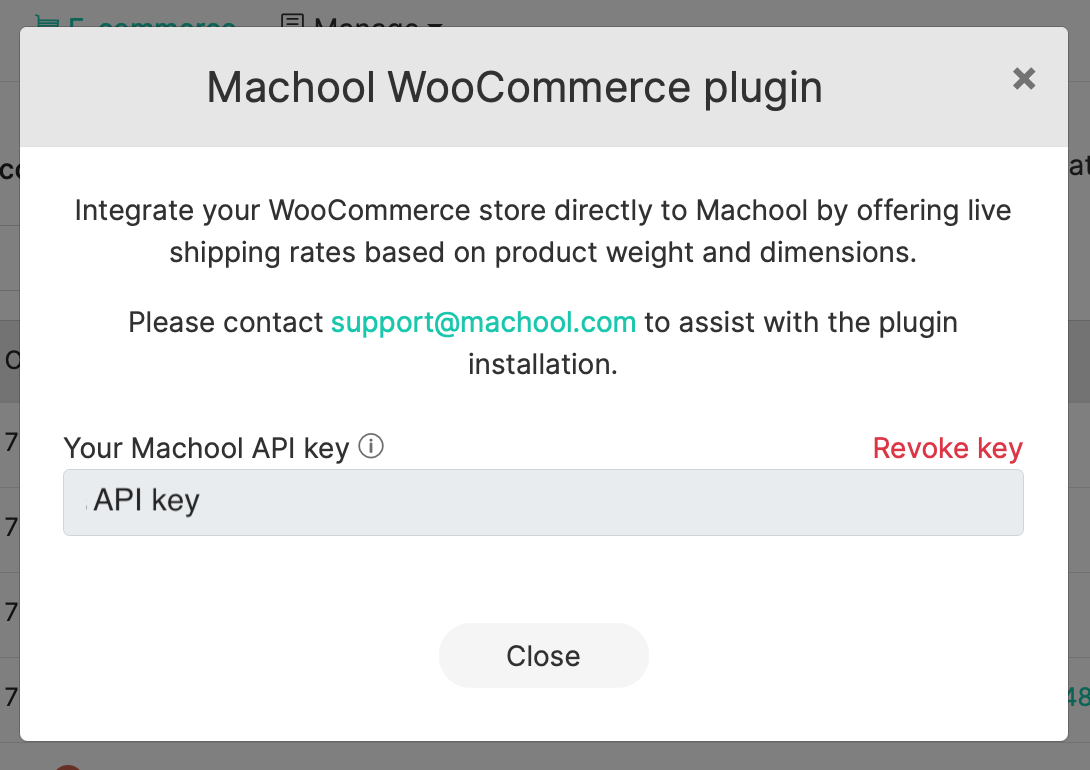
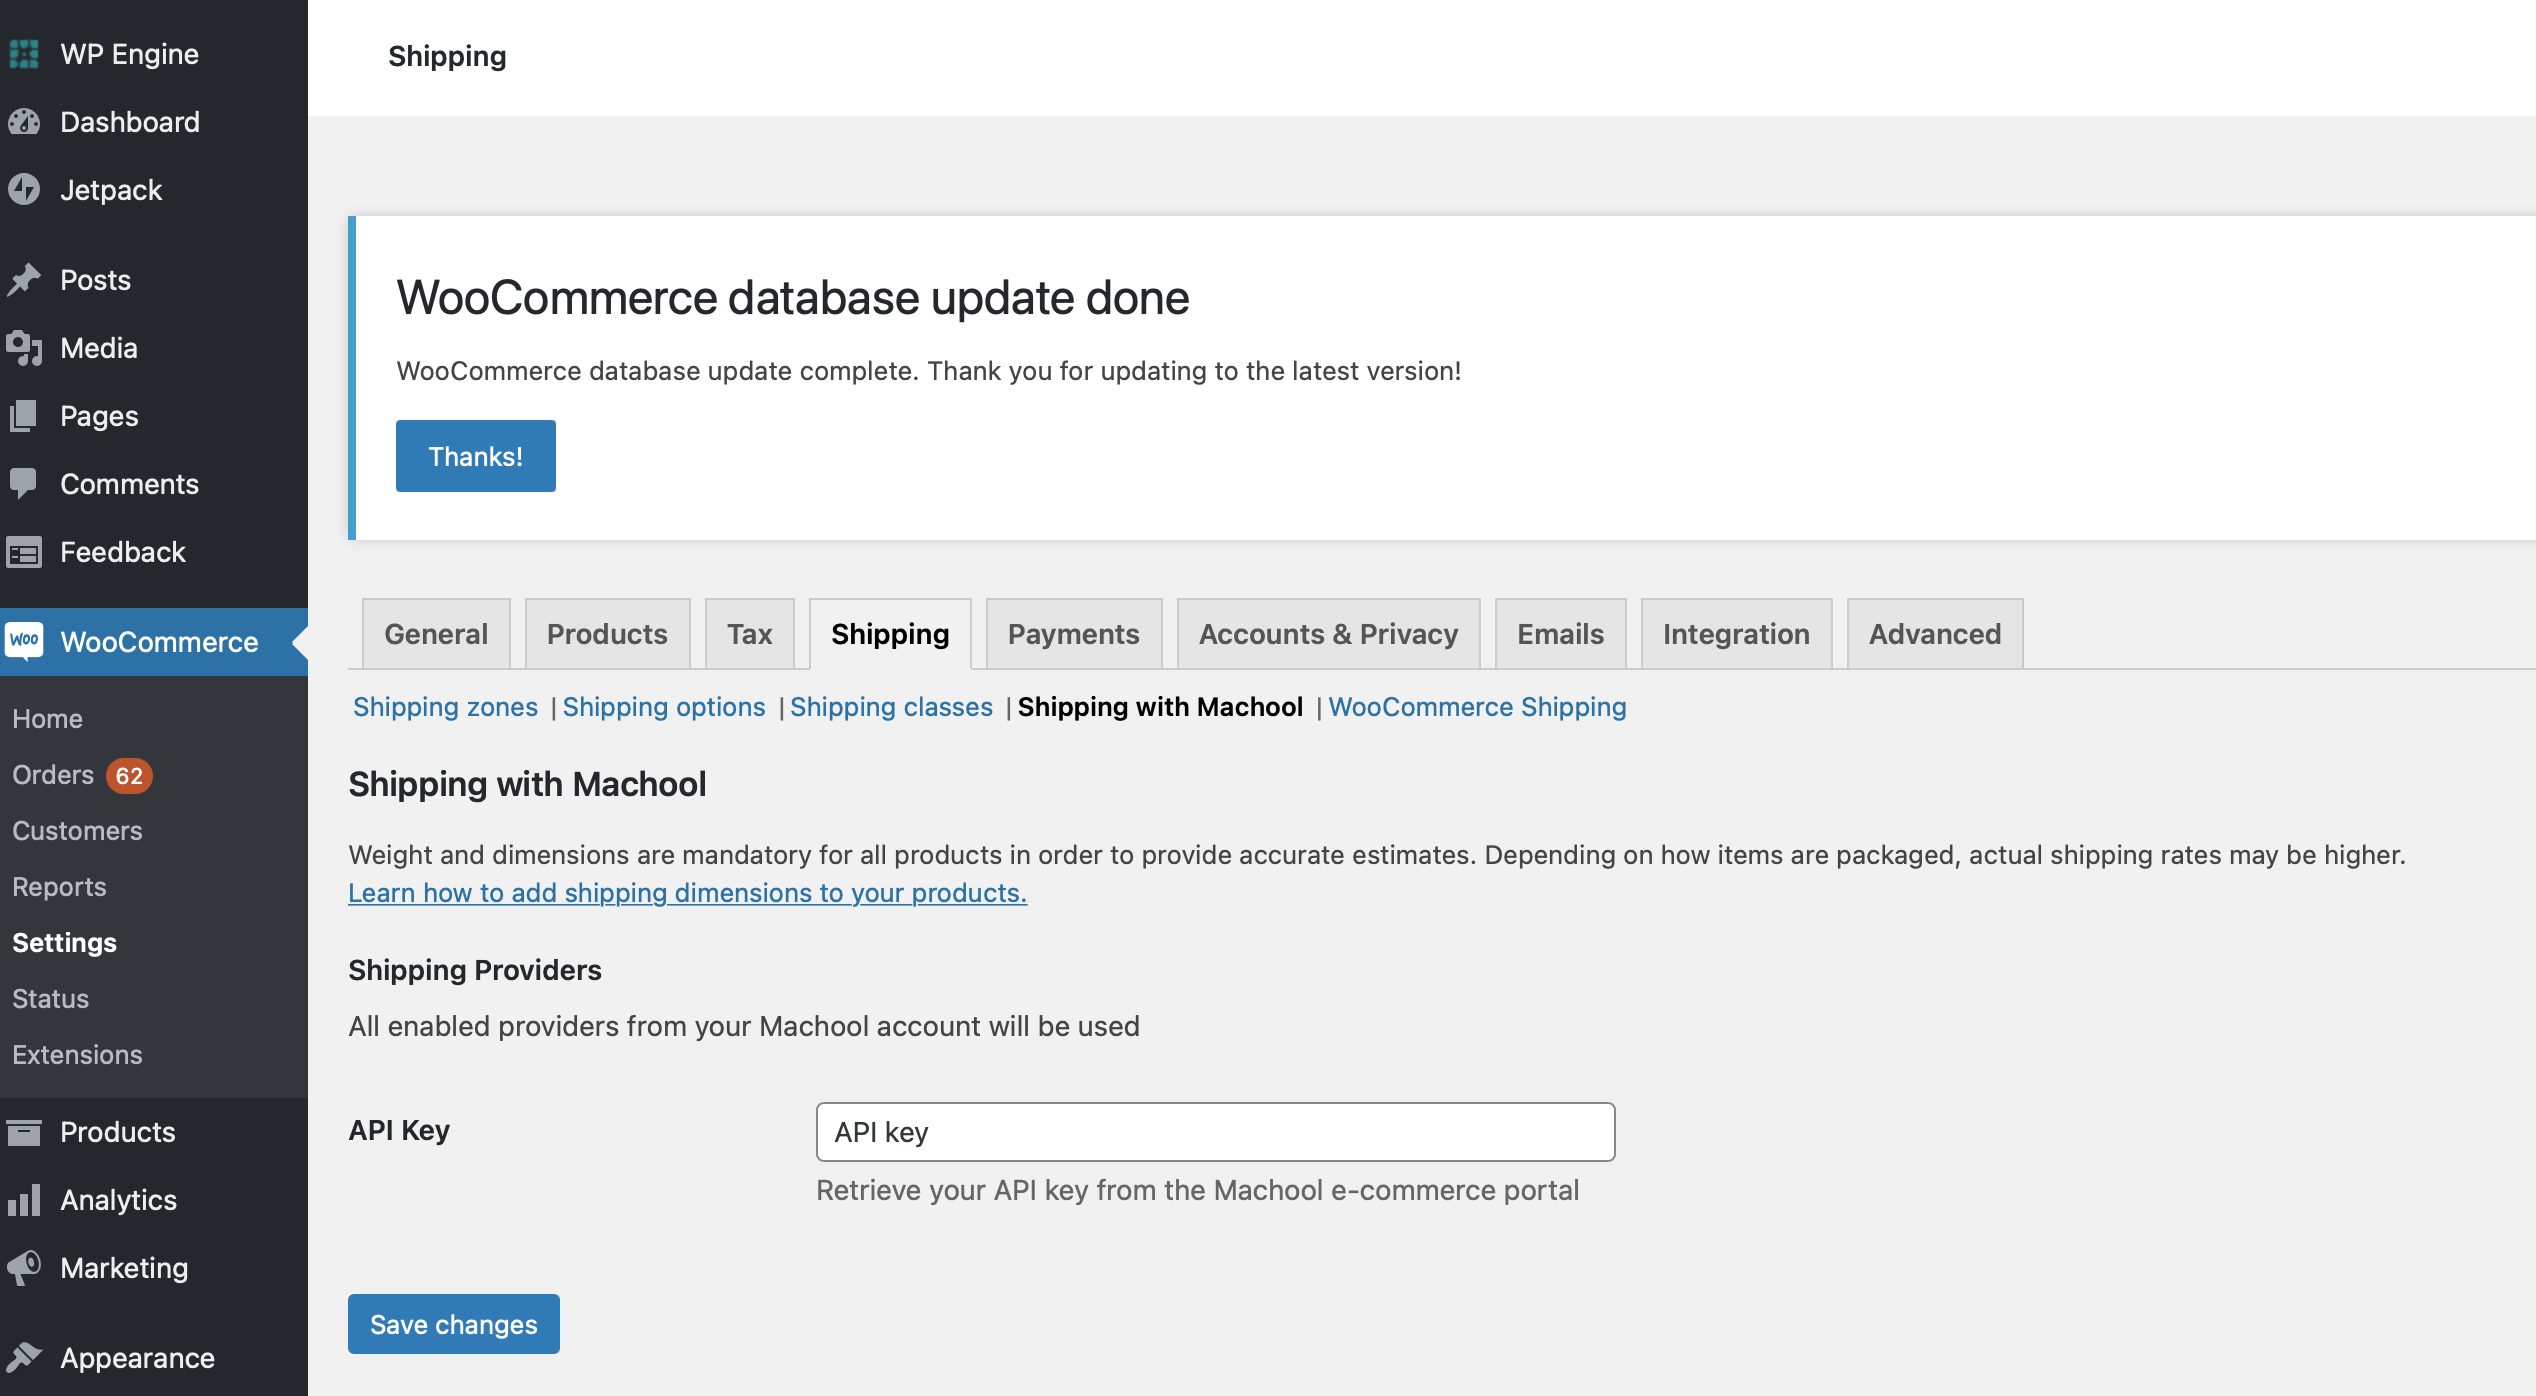
4. Paste and save the key in WooCommerce > Settings > Shipping > Shipping with Machool.
Set up your shipping zones and rates
Go to WooCommerce > Shipping > Shipping zones and customize your rates according to your shipping areas and additional costs.
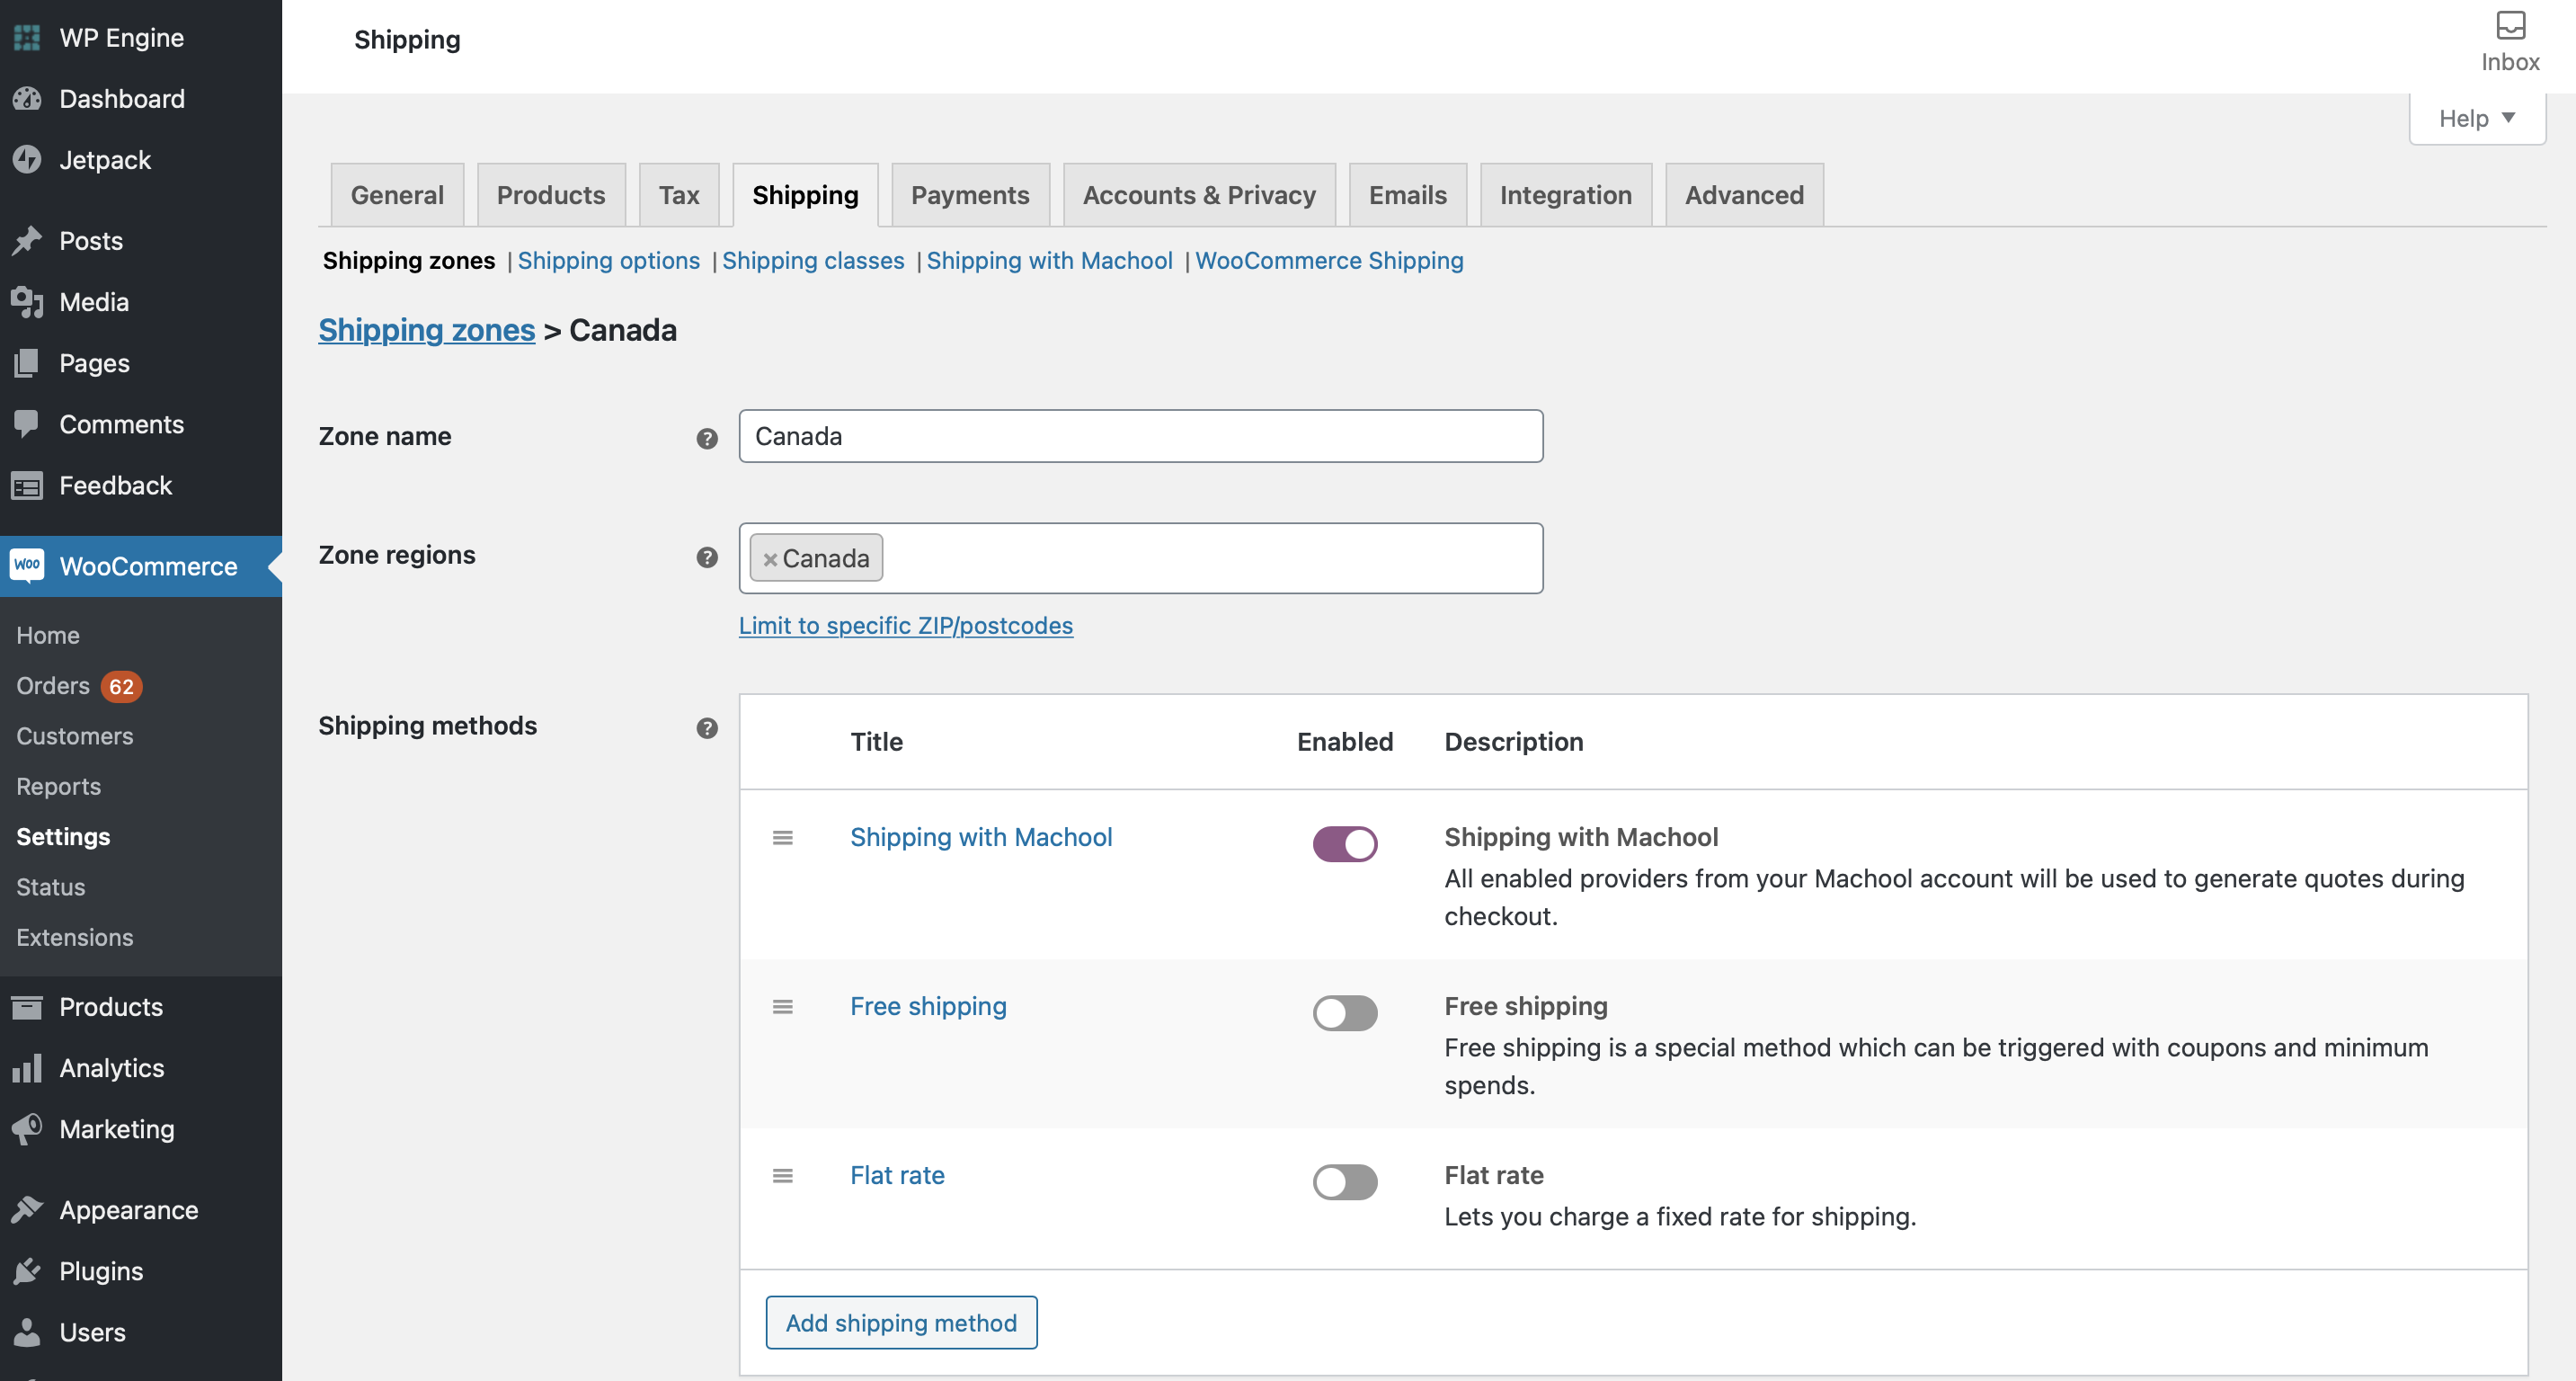
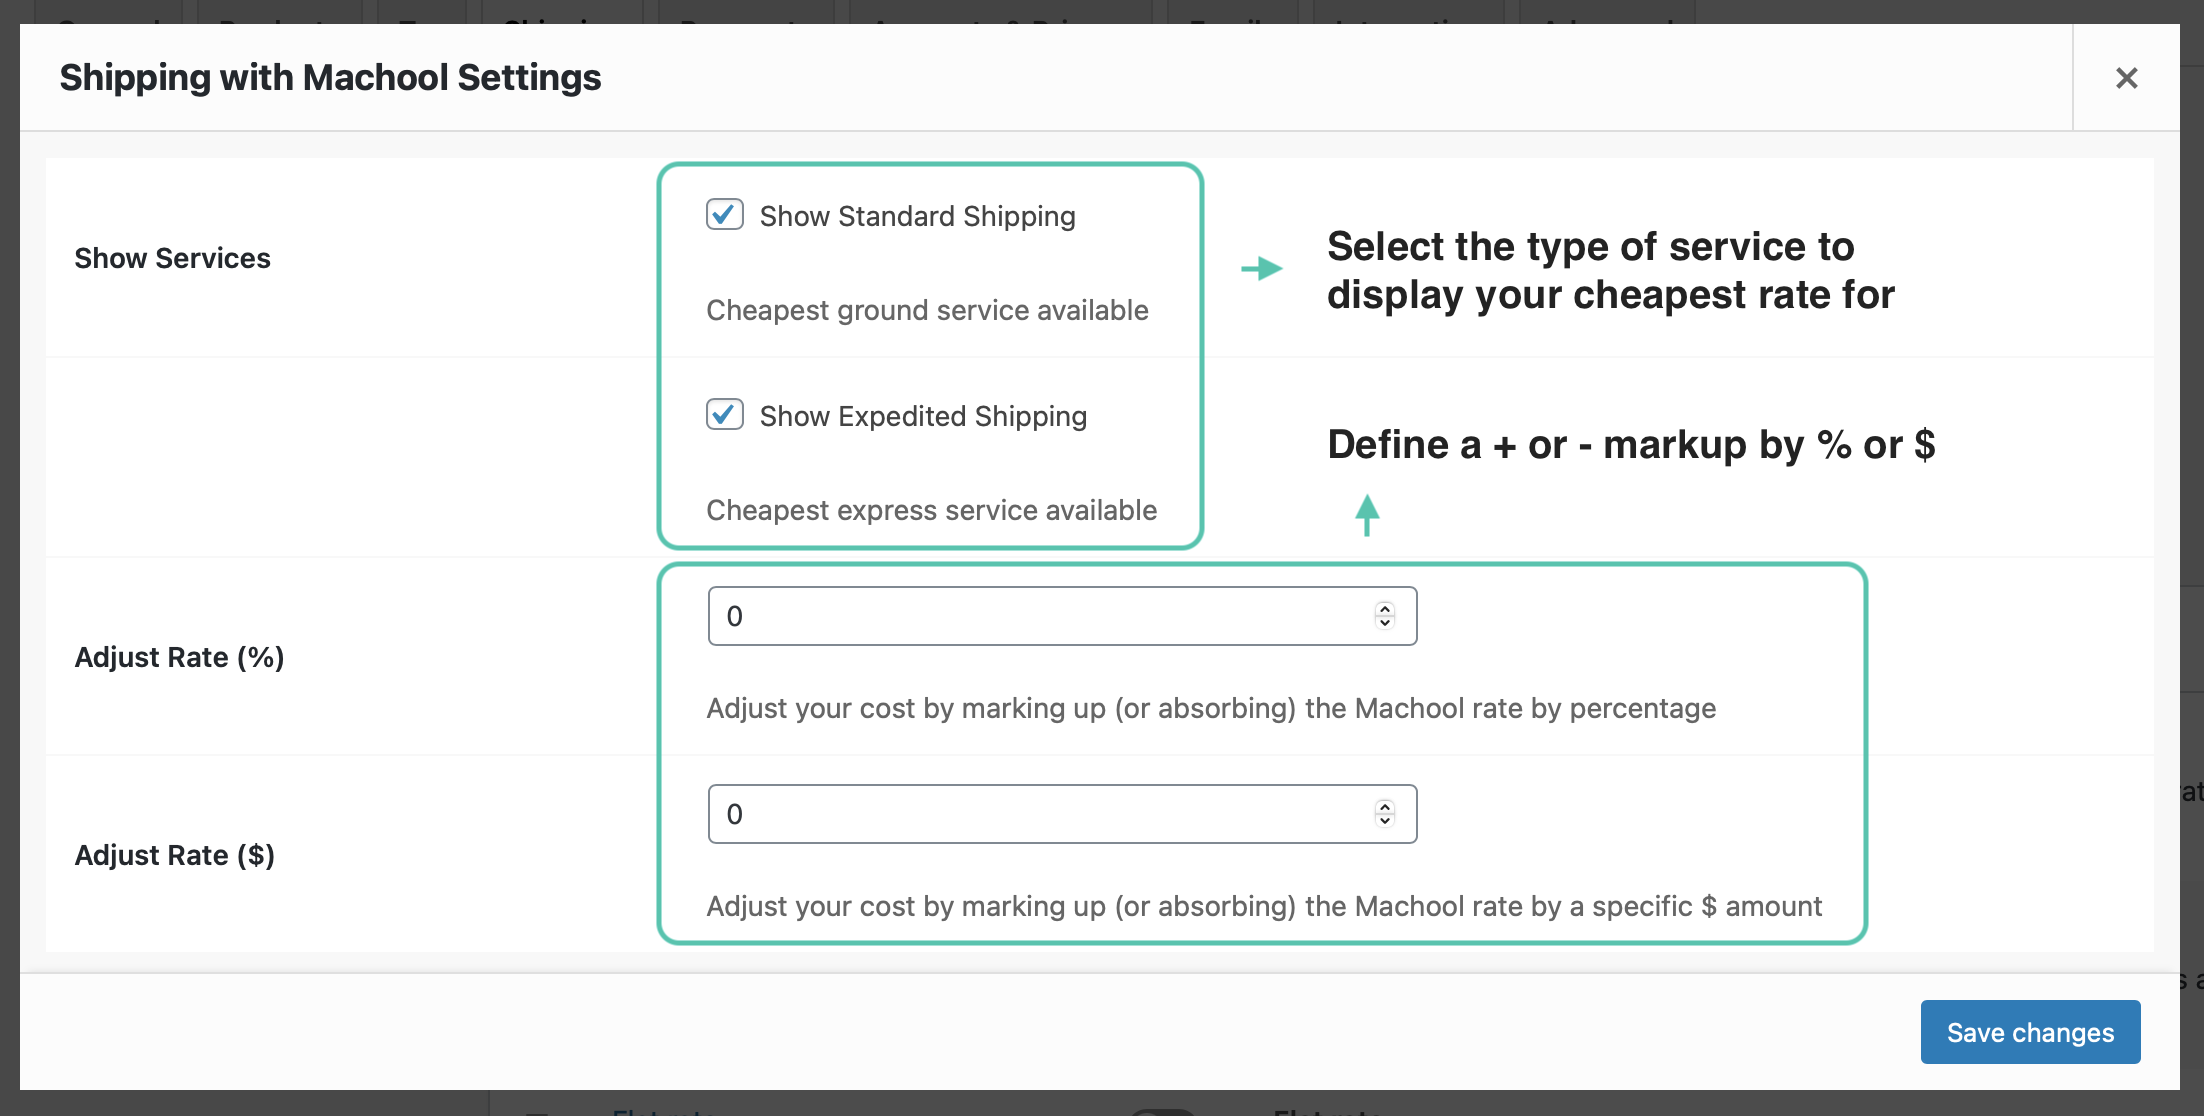
Edit your shipping details.
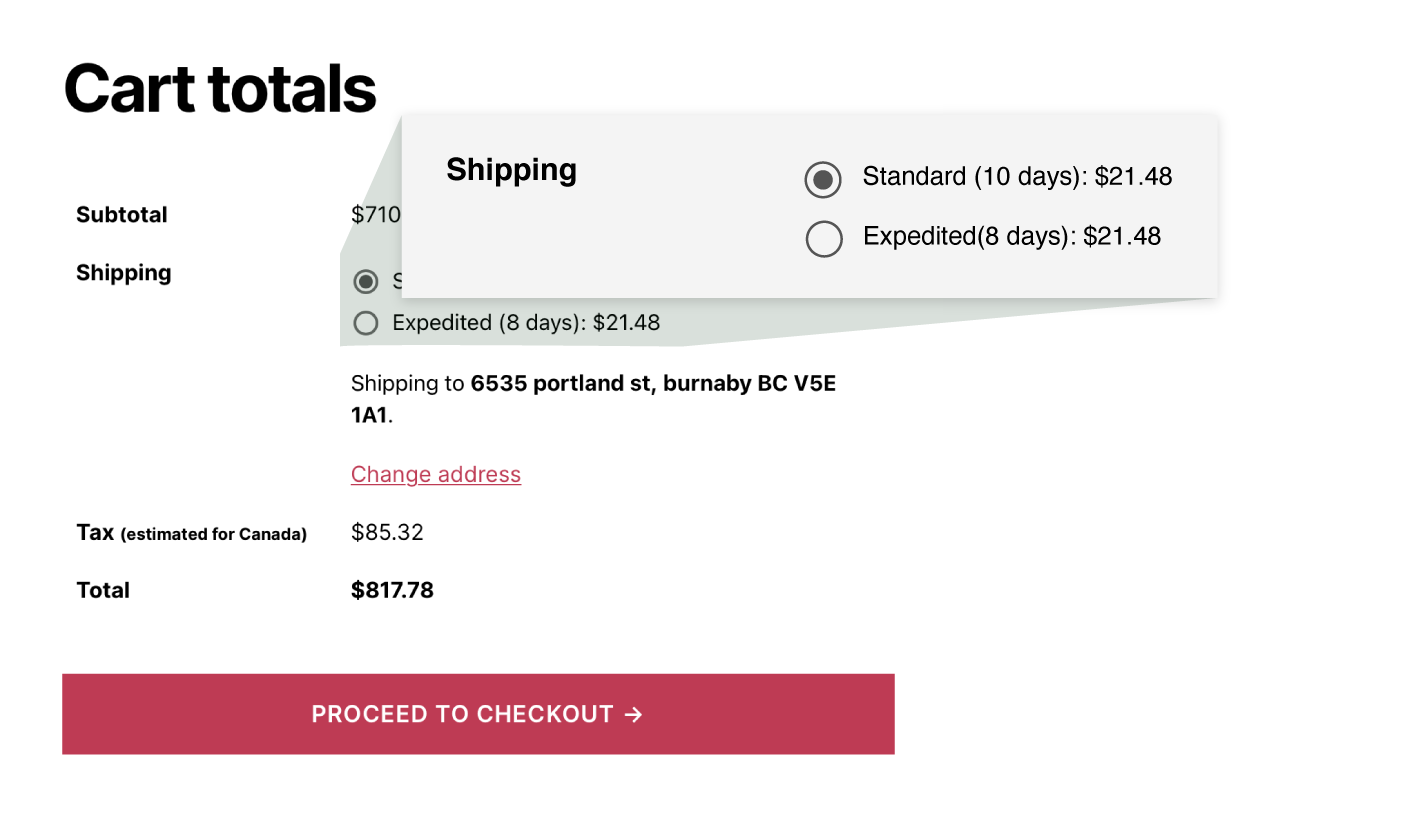
What your customer will see at checkout
The options selected in your shipping zone settings will be visible at checkout. You can choose to display, both standard and expedited or only one of those options.
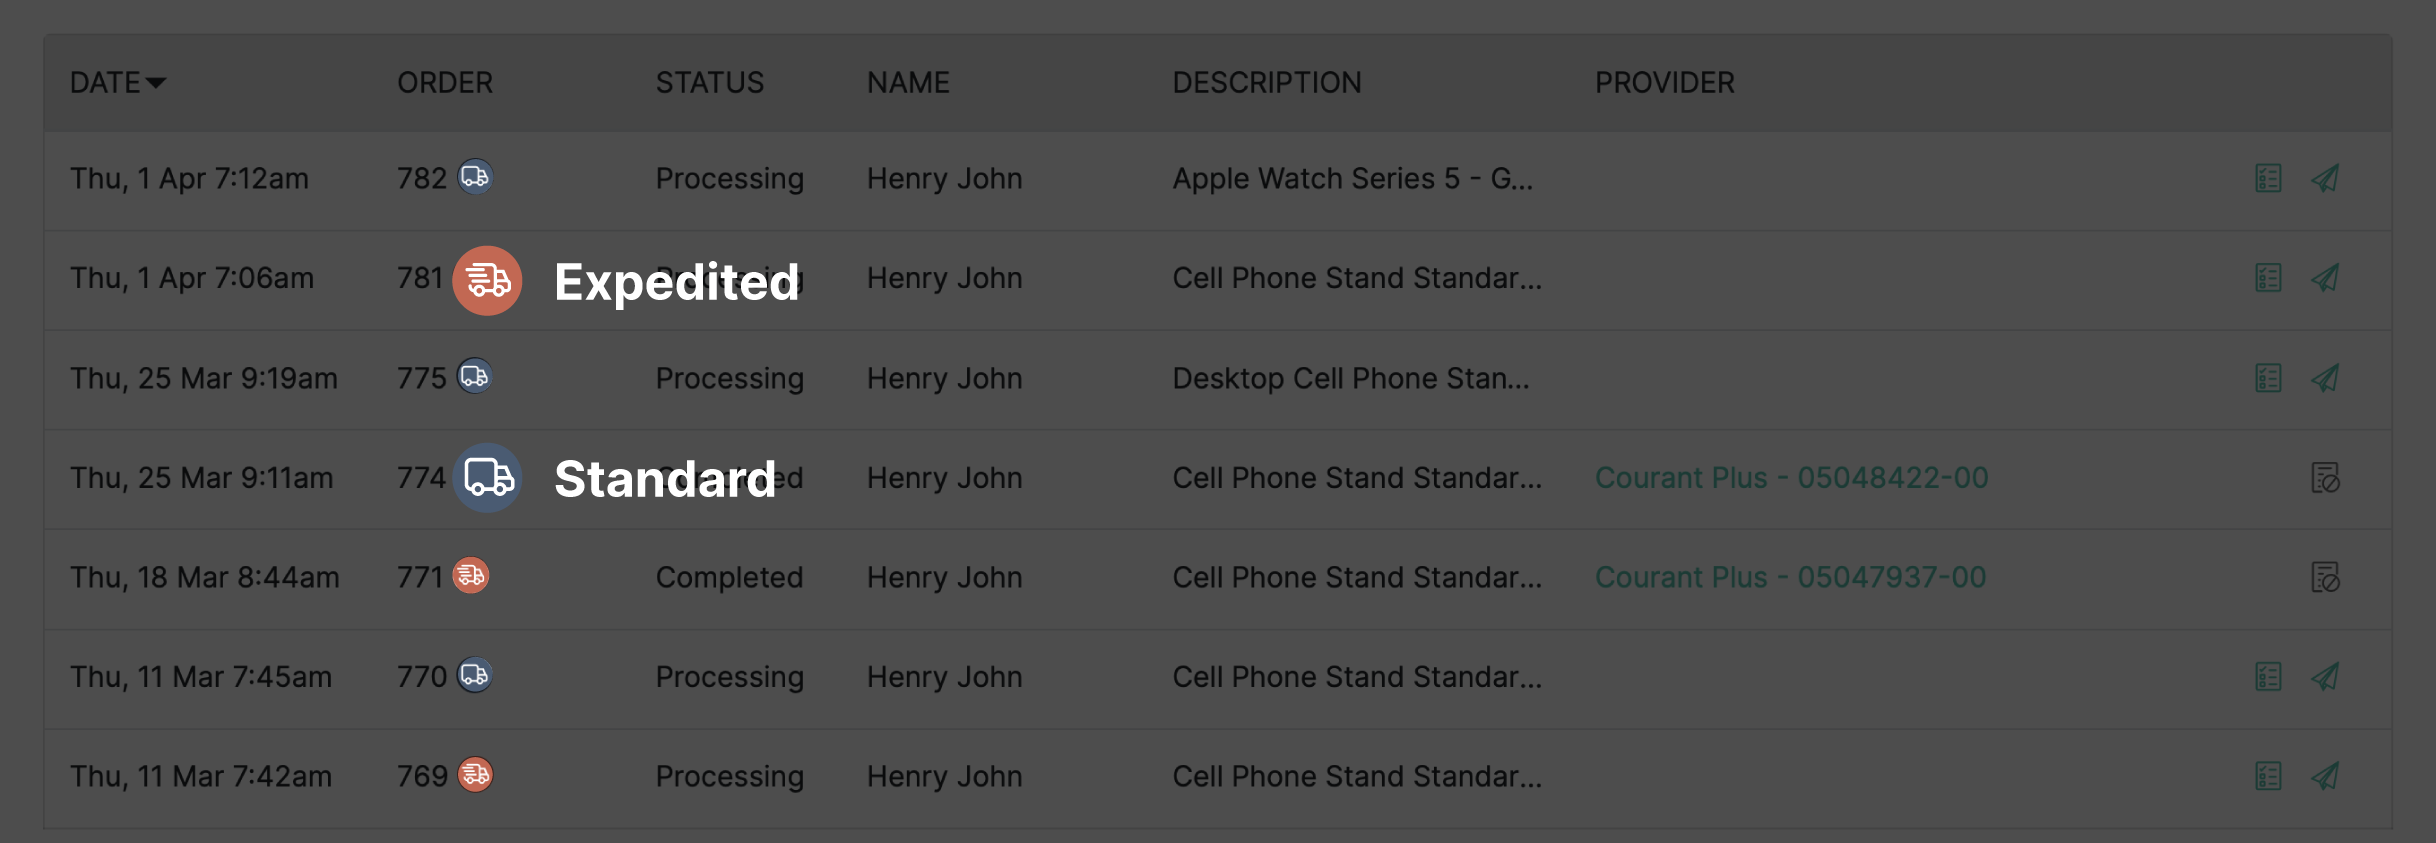
What you will see in Machool
When a customer has paid for one of the Machool shipping rates, this will be displayed on the e-commerce page with an icon showing which service was selected, as well as the amount paid for shipping:
What you should know
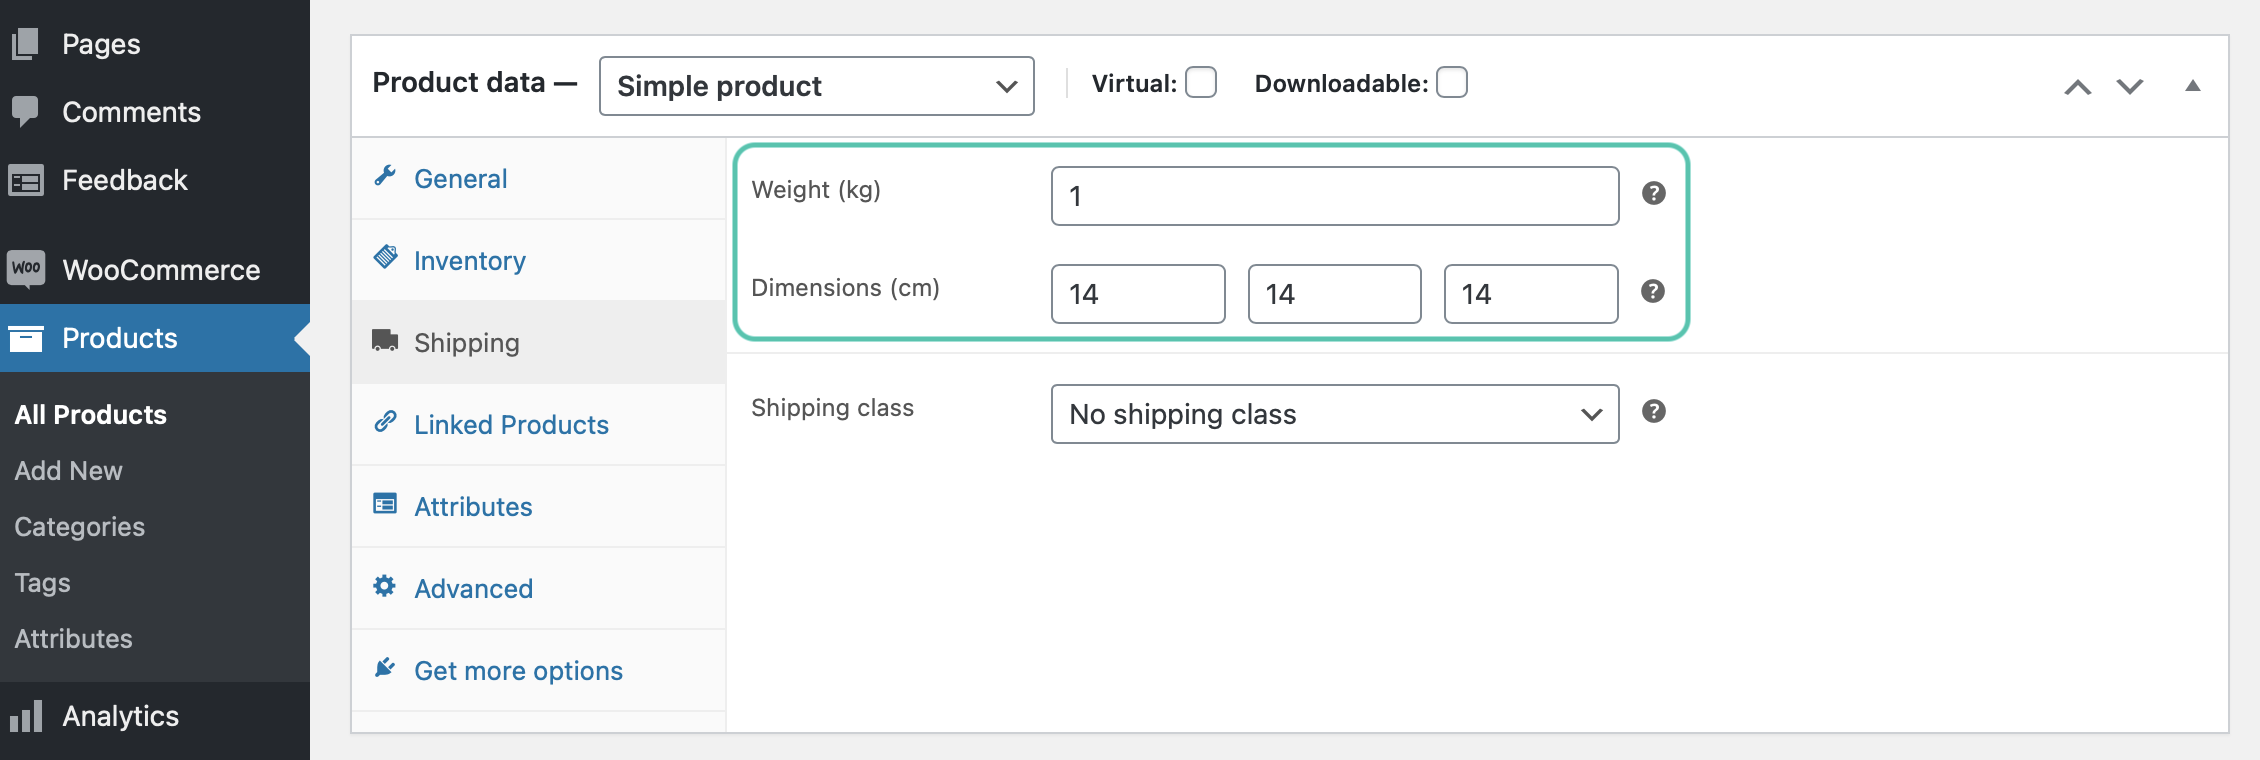
Define your product details
Our plugin requires accurate dimensions and weight to be able to provide a cost estimate.
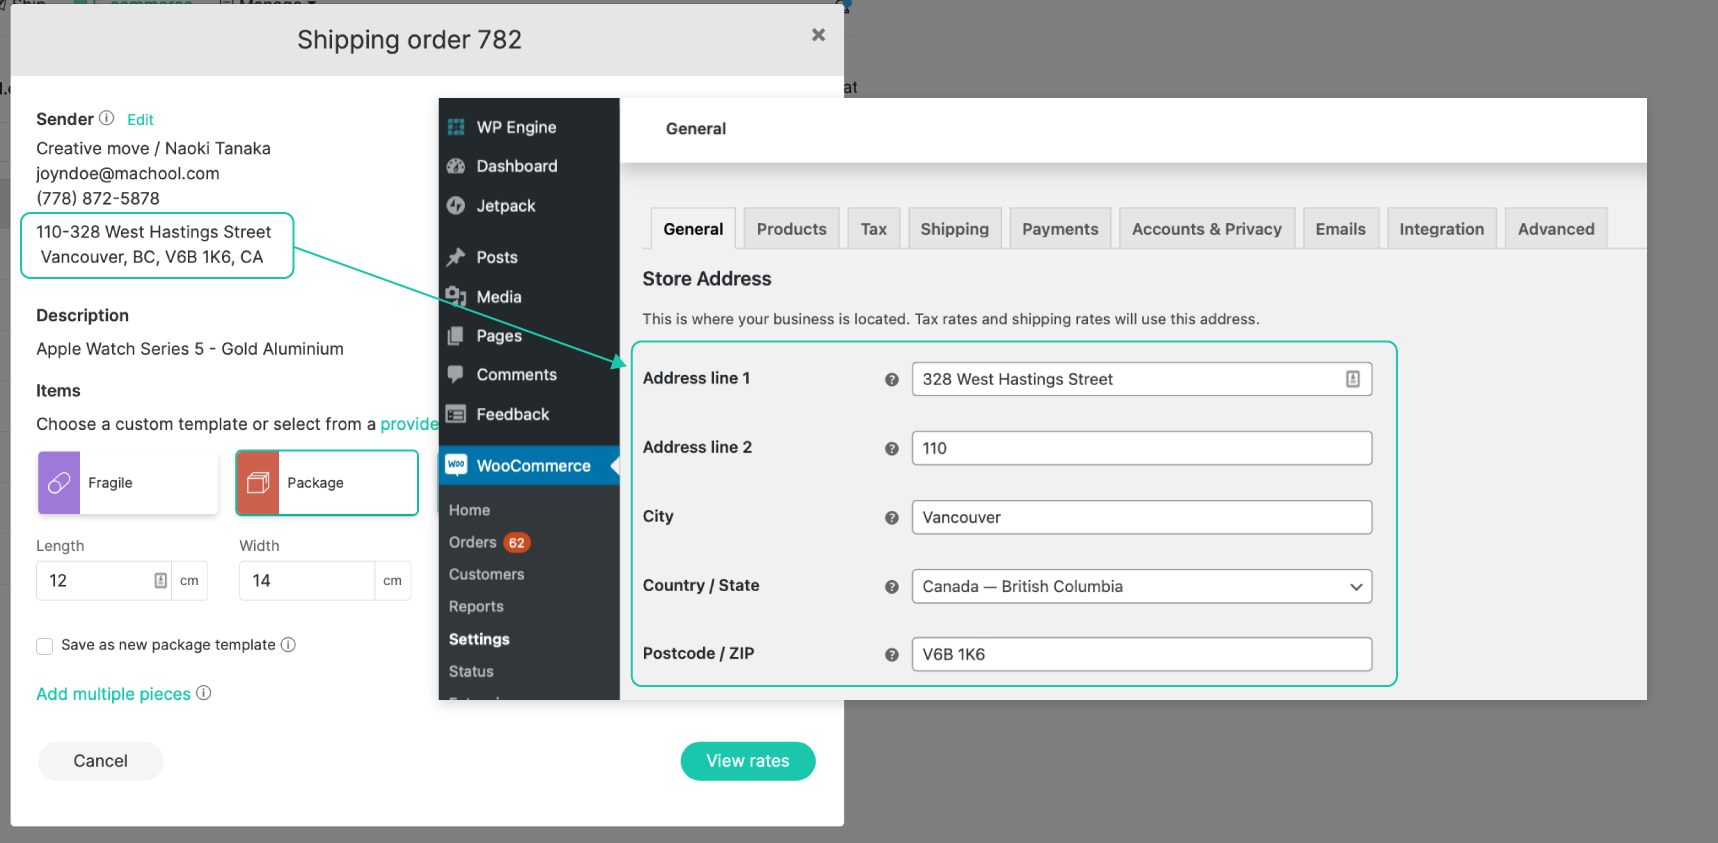
Check your store address
Make sure your store address in WooCommerce > Settings > General matches the address you are shipping from in Machool to offer accurate rates.
Check your enabled providers
The rates displayed at checkout are those you would get on Machool, taking into account the weight and the dimensions of the items based on the product descriptions in the WooCommerce administration page.
The rates displayed in WooCommerce come from the providers you have enabled on the Manage > Couriers page:

Wix
How to connect your Wix store?
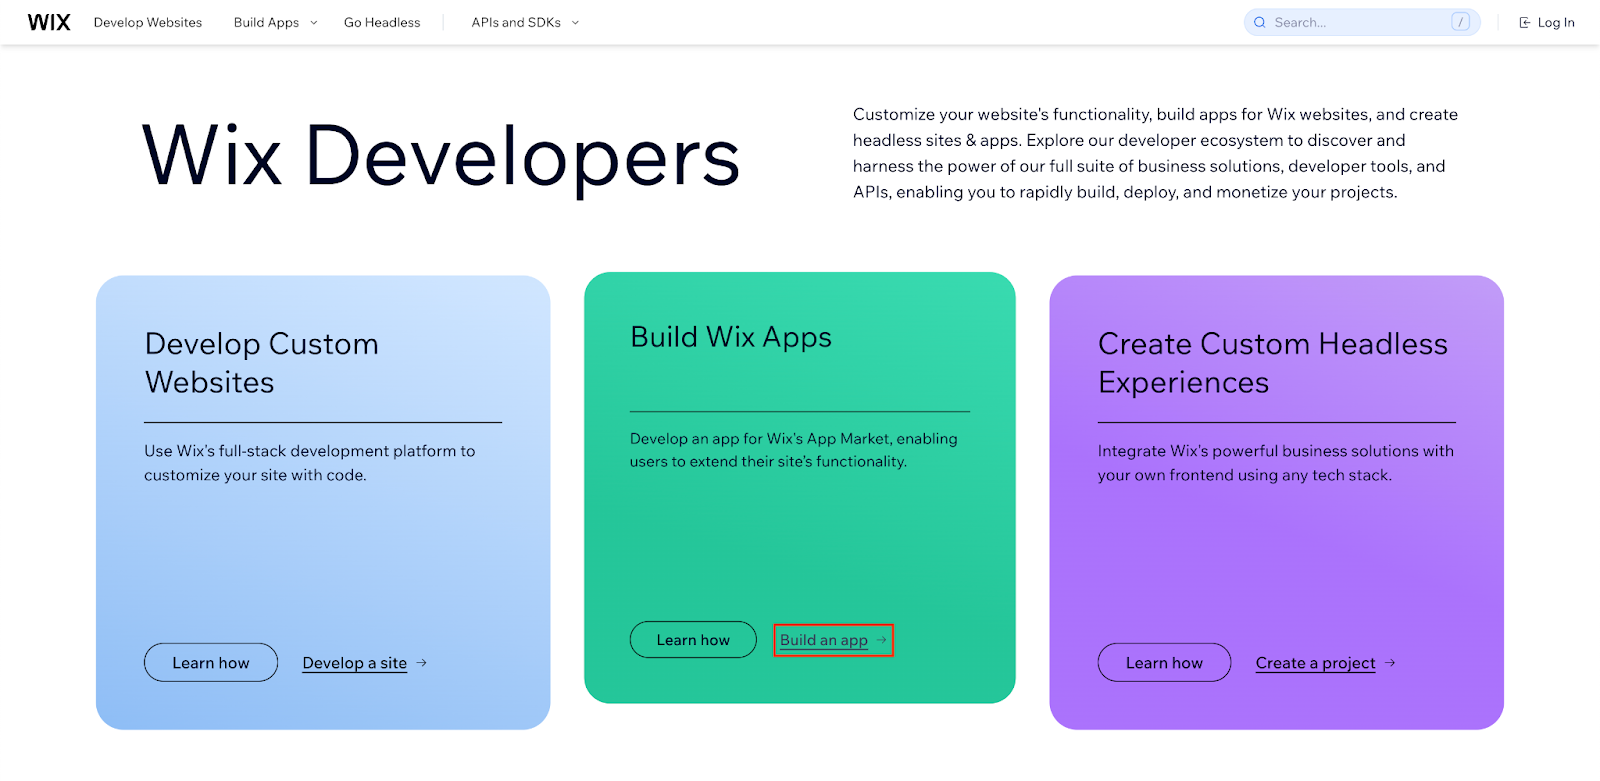
- Make sure you are currently logged in to your Wix store, then open a new browser tab and go to https://dev.wix.com/.
- Click the Build an app link. This will ask you to login to your Wix account if you have not already done so.

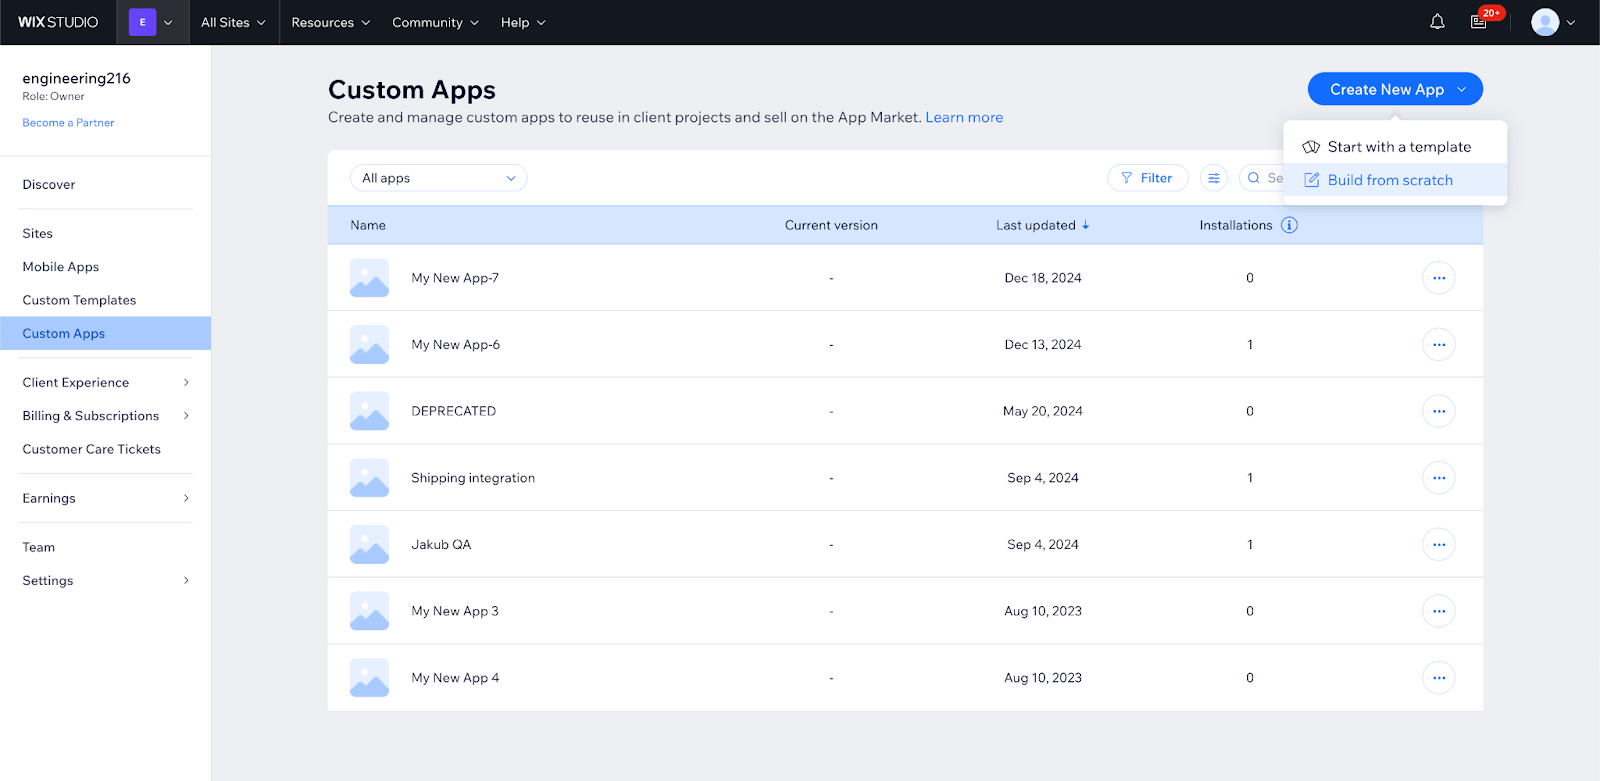
- On the left hand side, select Custom Apps. In the top right corner, click the Create New App button and select Build from scratch from the dropdown menu.
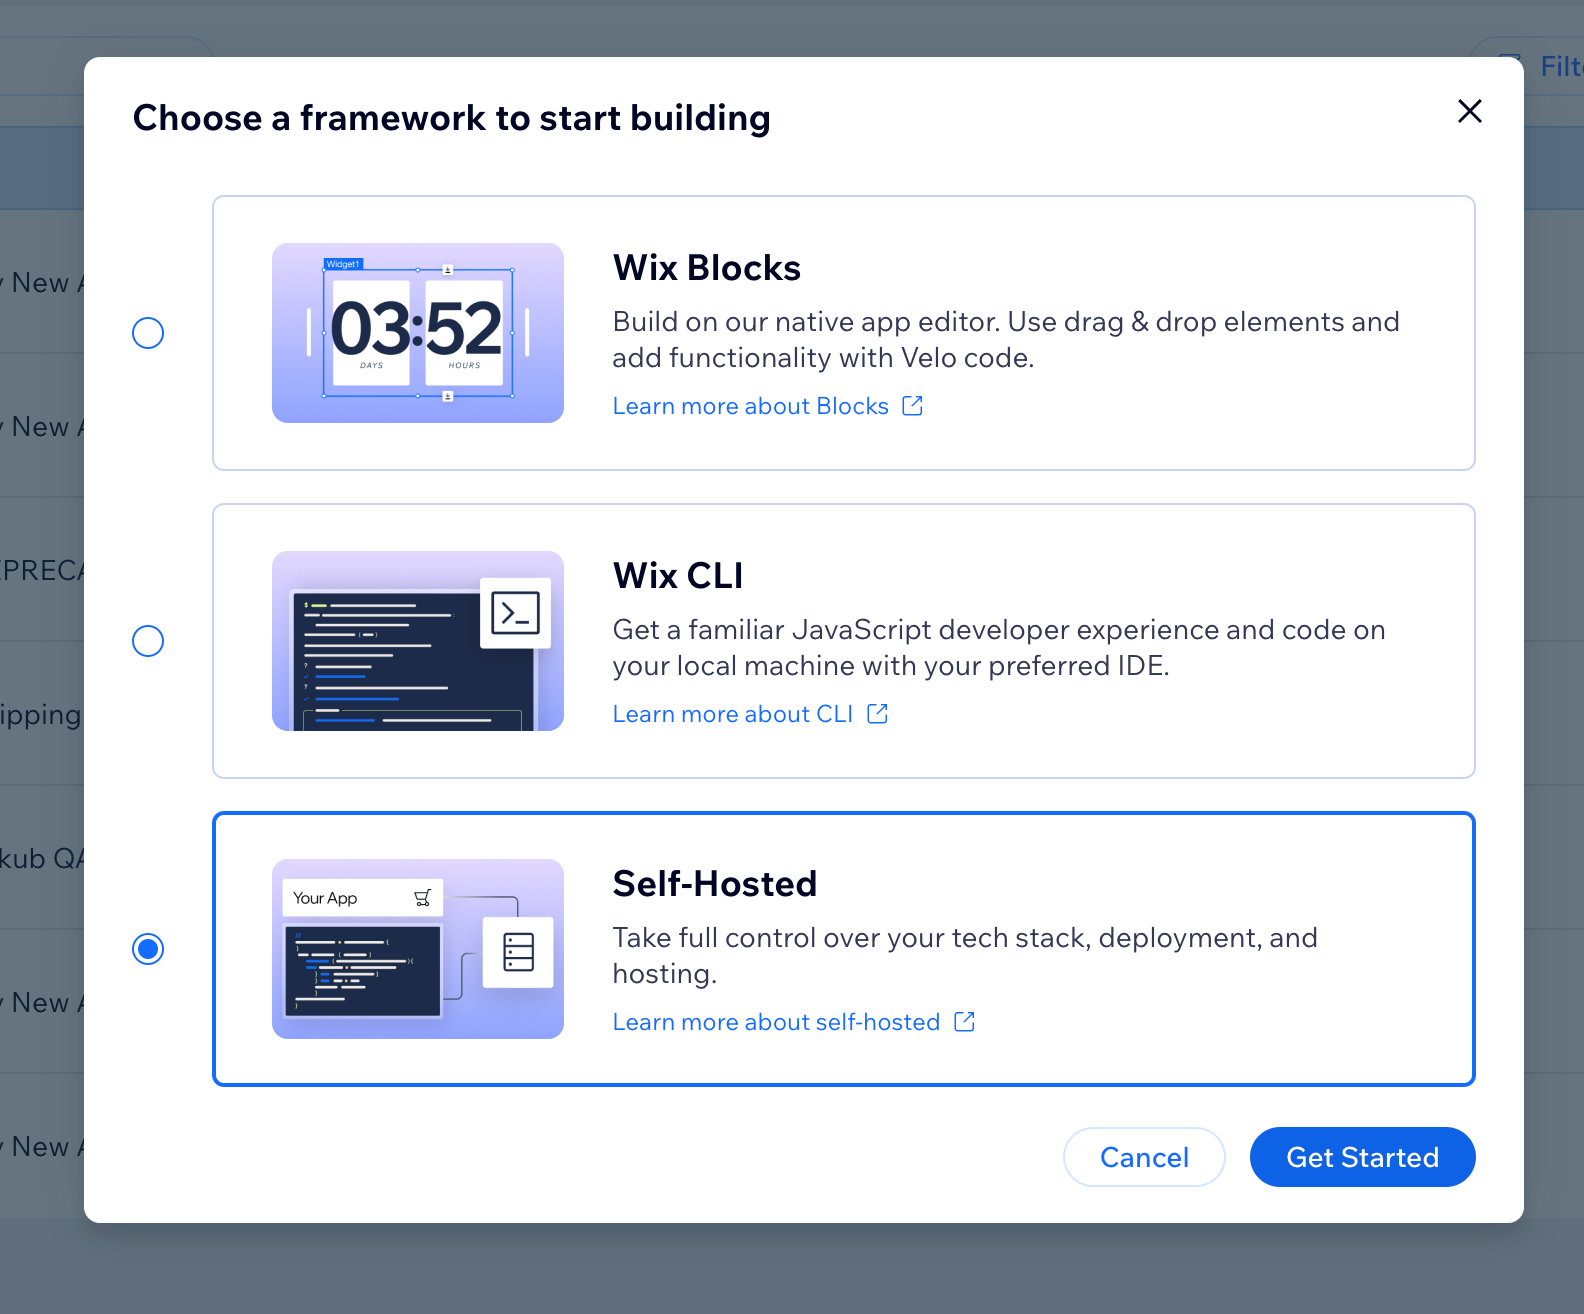
- Select Self-Hosted, then click the Get Started button.
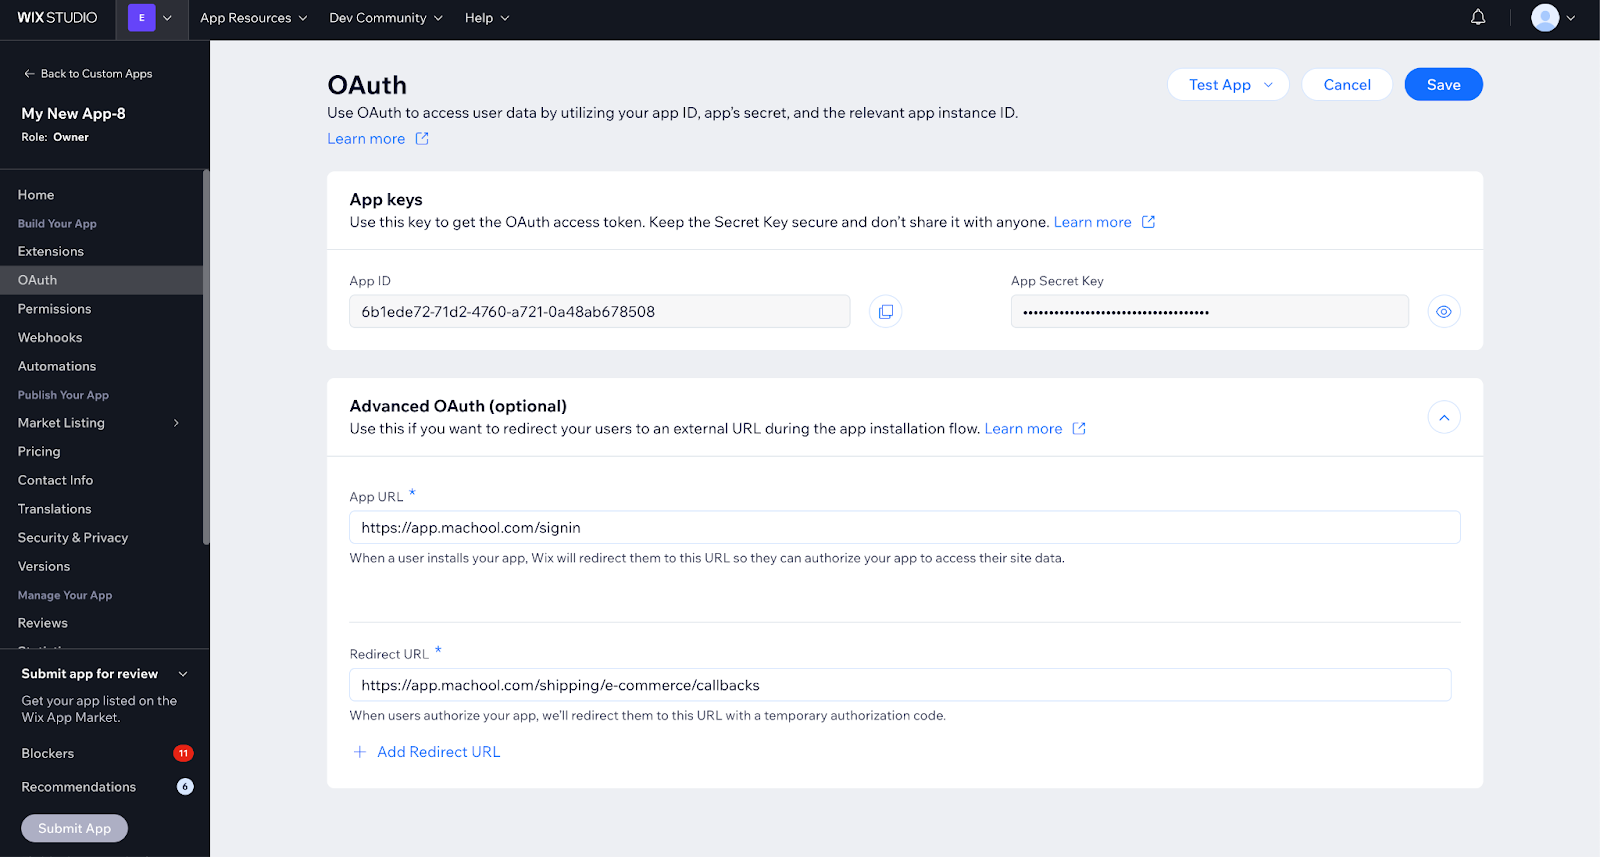
- You will be redirected to the App Dashboard for your new app. In the left-hand menu, click on “OAuth”.
- Under “Advanced OAuth (optional)”, add an App URL with the address https://app.machool.com/signin and add a Redirect URL with the address https://app.machool.com/shipping/e-commerce/callbacks. Save your changes.
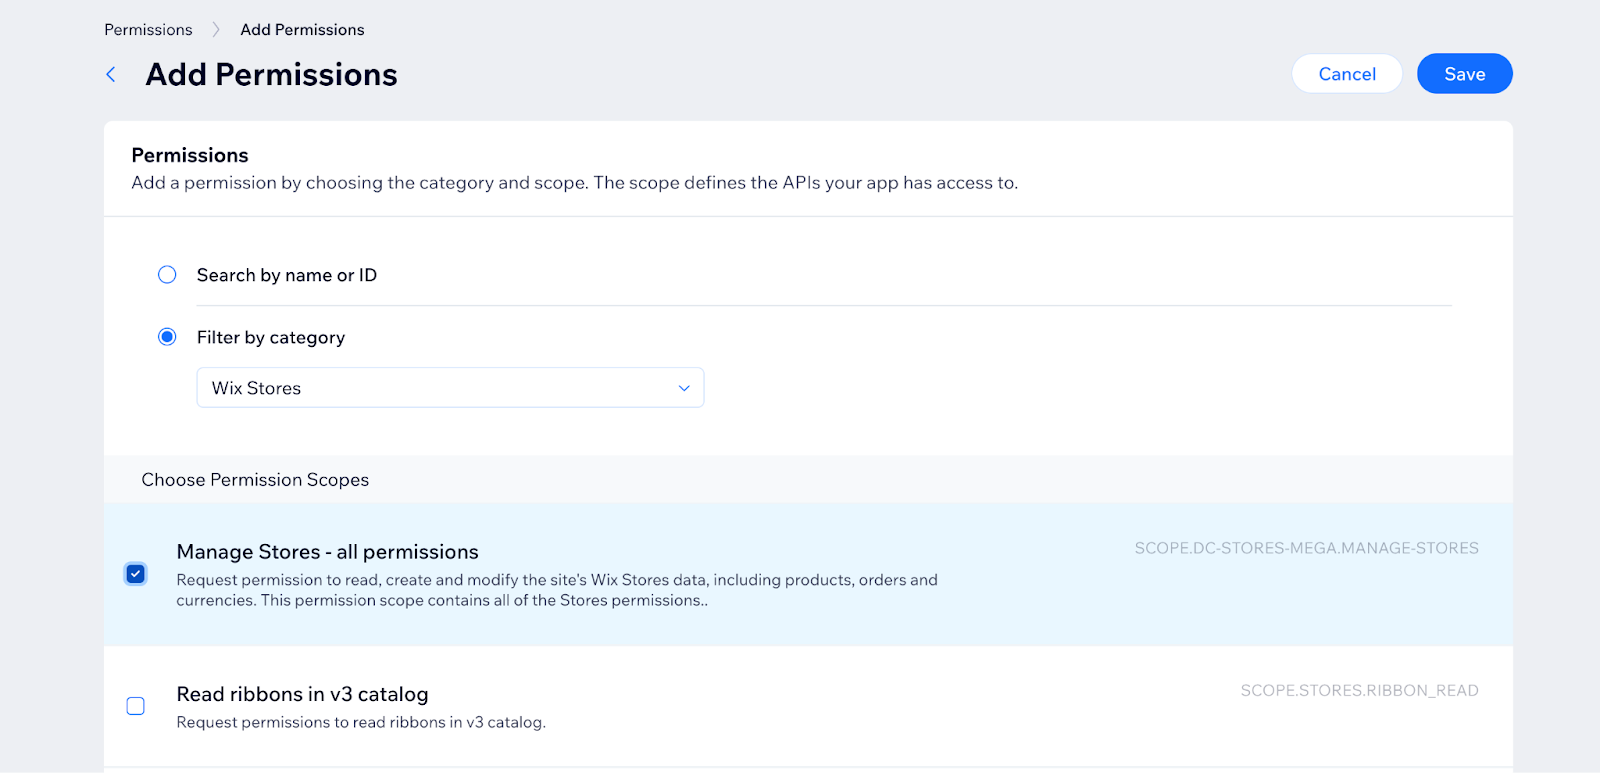
- In the left-hand menu, click on “Permissions”, then click “+ Add Permissions” in the upper right-hand corner of the screen.
- Select “Wix Stores” from the Permission Category drop-down menu, then select Manage Stores – all permissions and save your changes.
- Now, return to the “OAuth” page using the left-hand menu. Open a new browser tab and log in to your Machool account, then navigate to the E-Commerce page and click on the Wix logo. Copy your App ID and App Secret Key from the OAuth page of your Wix App, paste these in Machool and click Submit.
You should now be able to view and fulfill orders from your Wix store in Machool!
Magento
How to connect your Magento store?
In order to connect to your Magento store from Machool app, firstly you need to create a Machool integration in your Magento Store admin page. Please follow the instructions below:
- Go to your Magento store and log in as store admin.
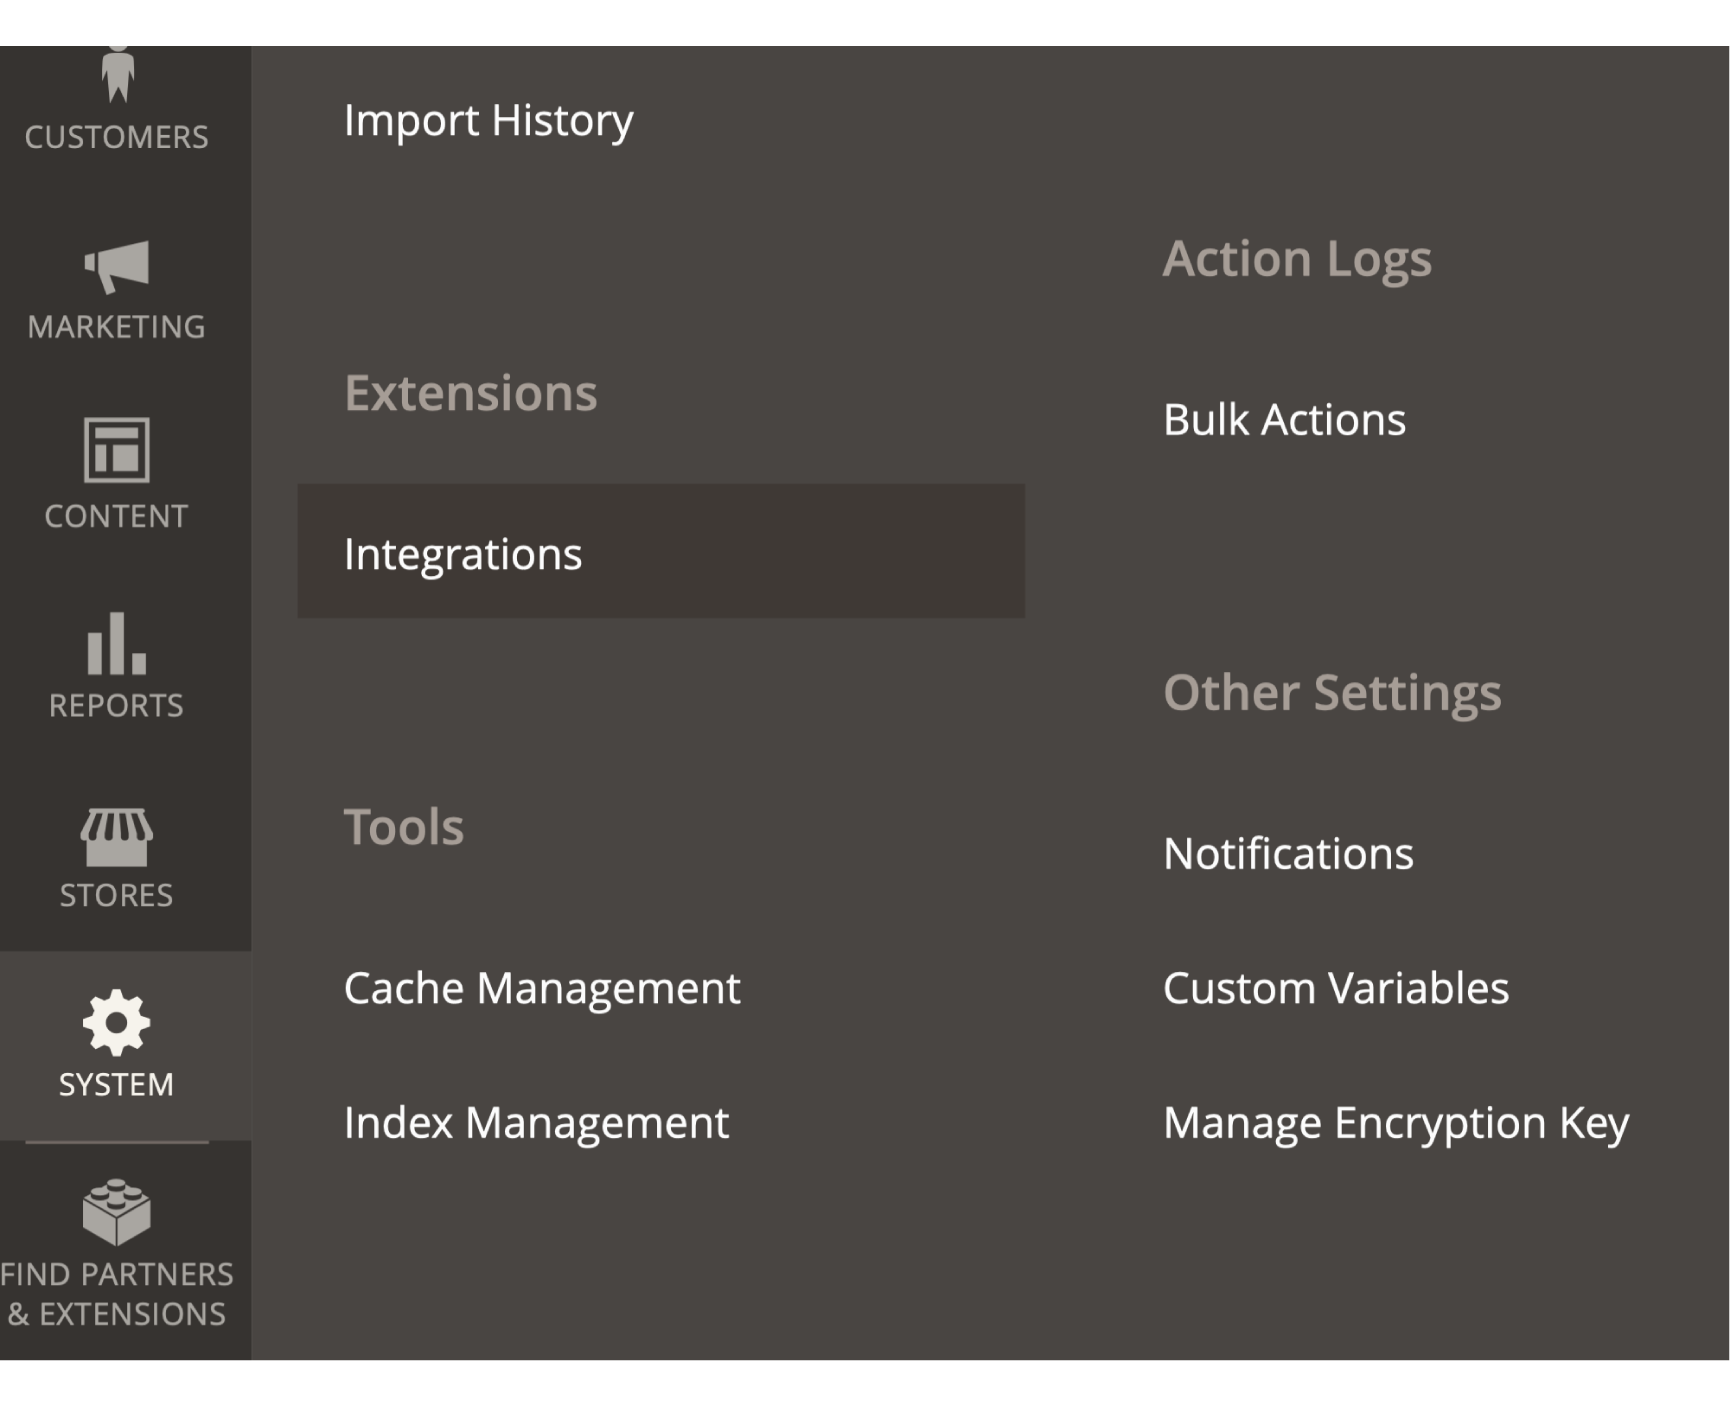
- Go to “System”, select “Integrations” under “Extensions”.
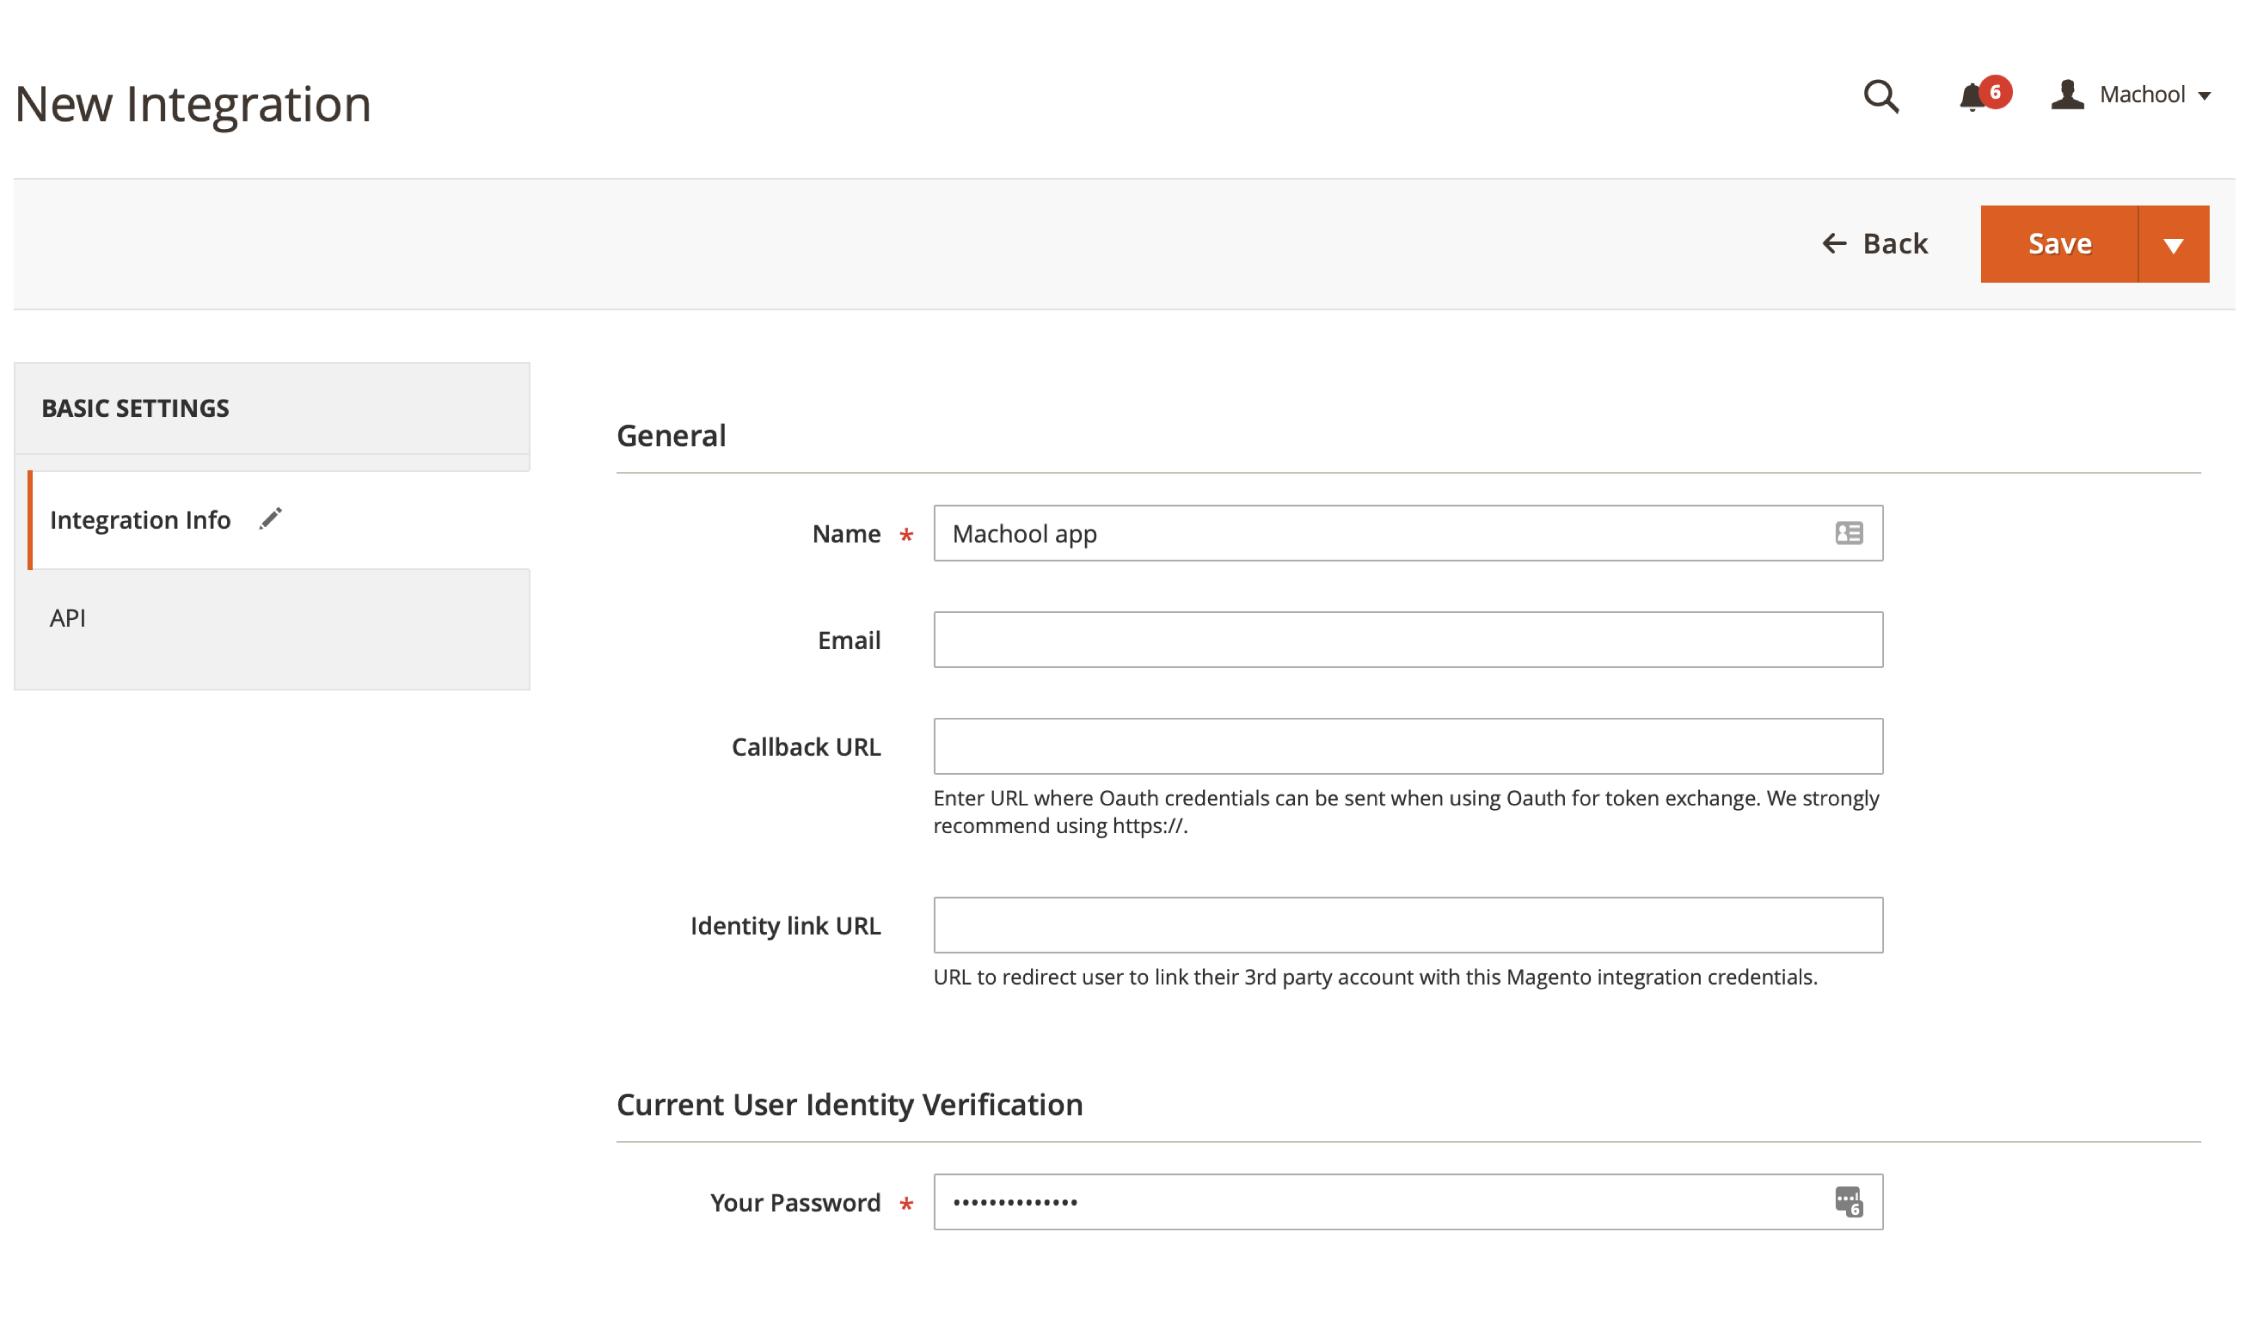
- Click the “Add New Integration” button.
- Under “General”, enter a name for this integration, for example “Machool app” (the name is only for your reference). Under “Current User Identity Verification”, enter your store admin password again.
- Click the “Save” button.
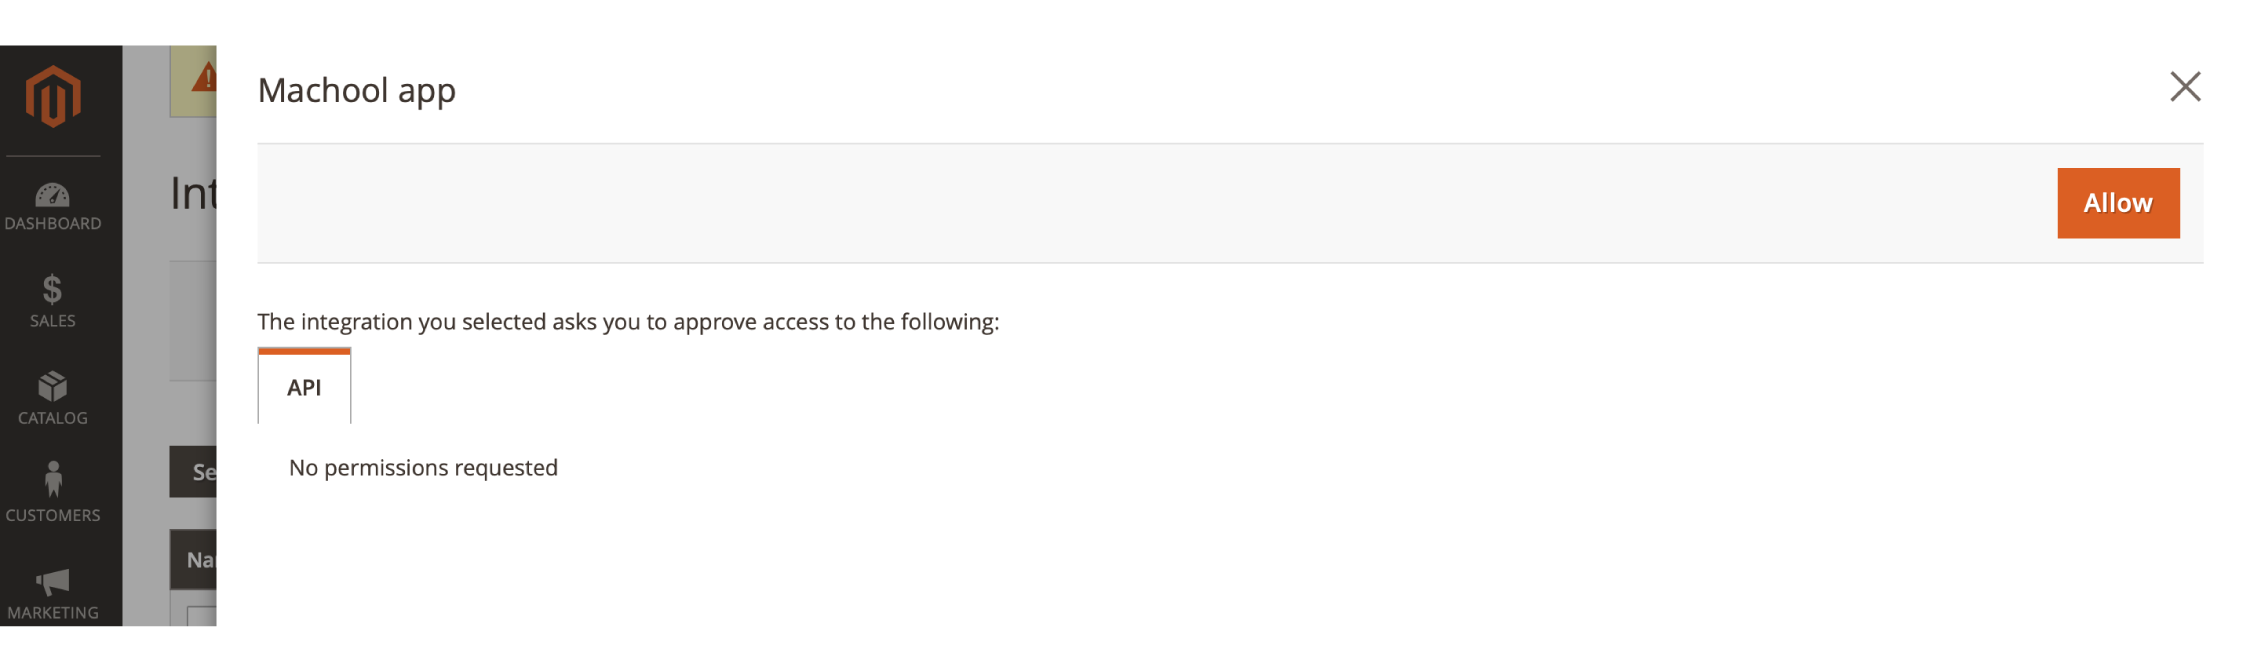
- You will be redirected to the Integrations page, where you can find the Integration you just created on the list. Click “Activate” link, and click the “Allow” button.
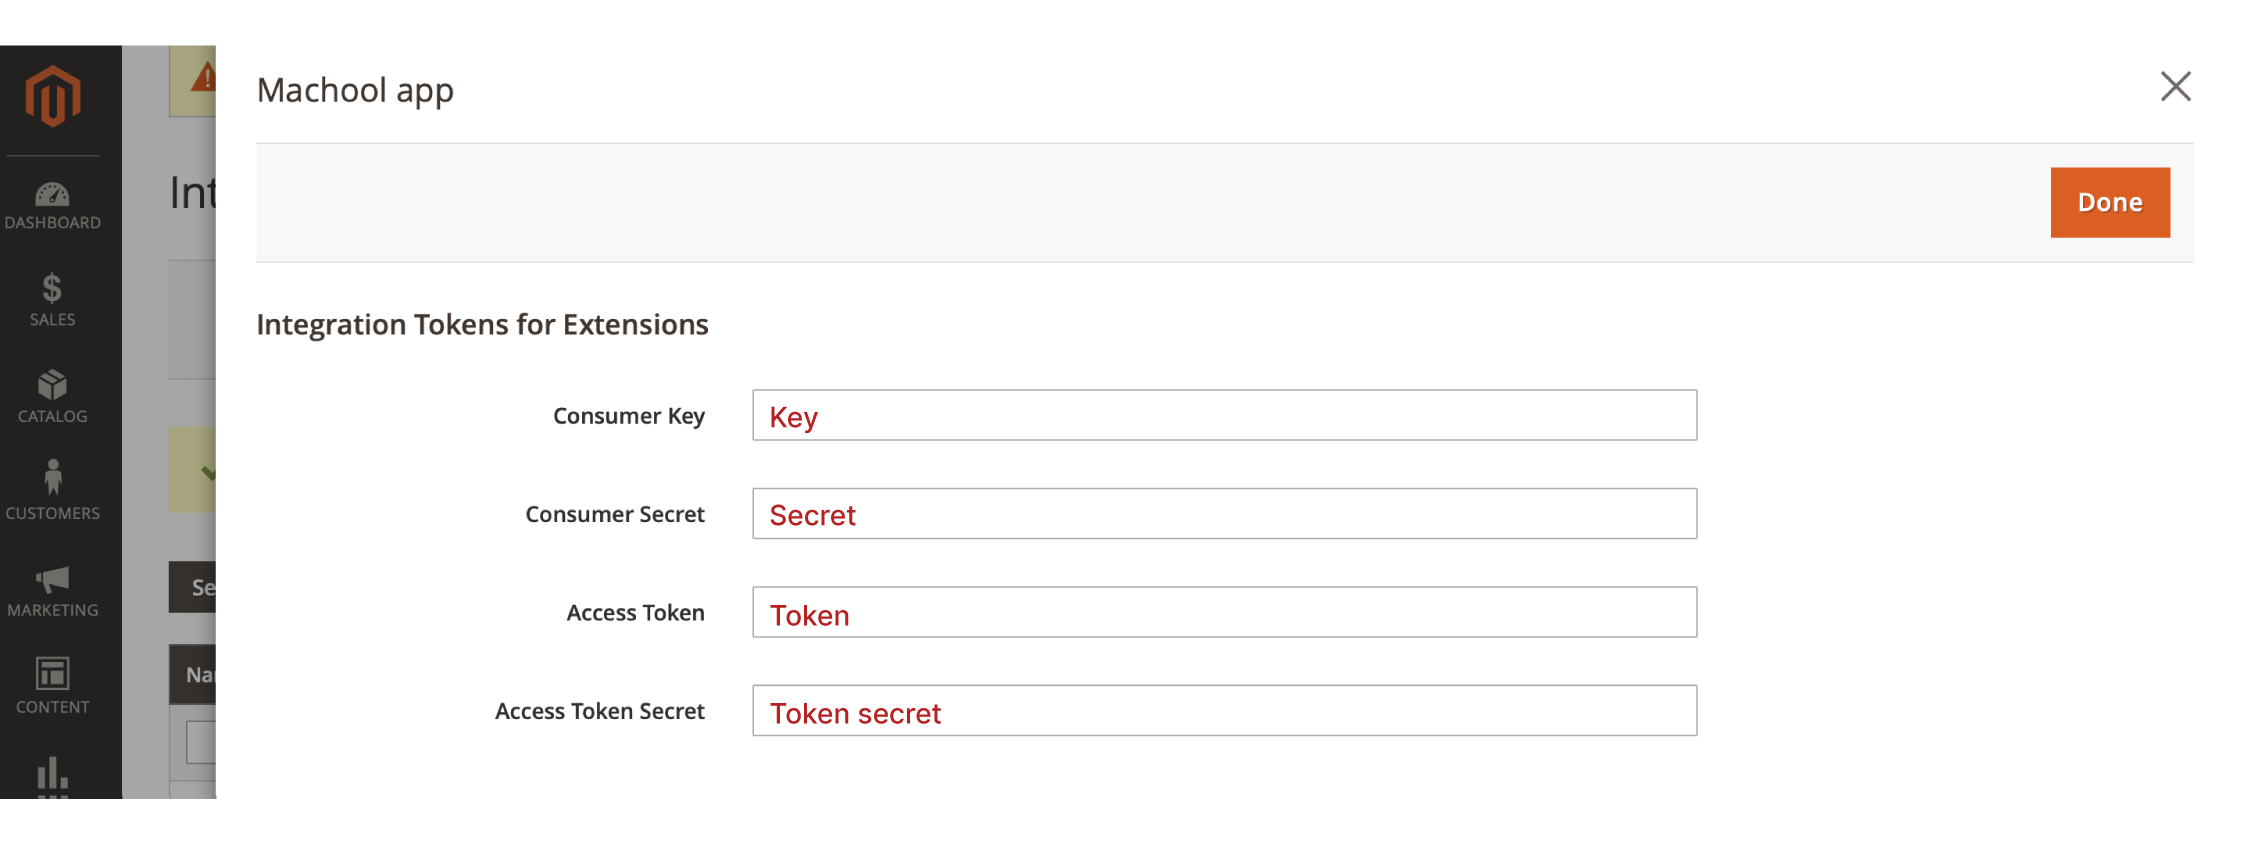
- You will see the “Integration Tokens for Extension”, copy the “Access Token”, and click the “Done” button.

Once you have the access token, login to your Machool app, and go to the E-Commerce page, click the Magento logo, paste your Access Token (together with your Magento storefront Url), and click “Connect” button.
Panierdachat
How to connect your Panierdachat store?
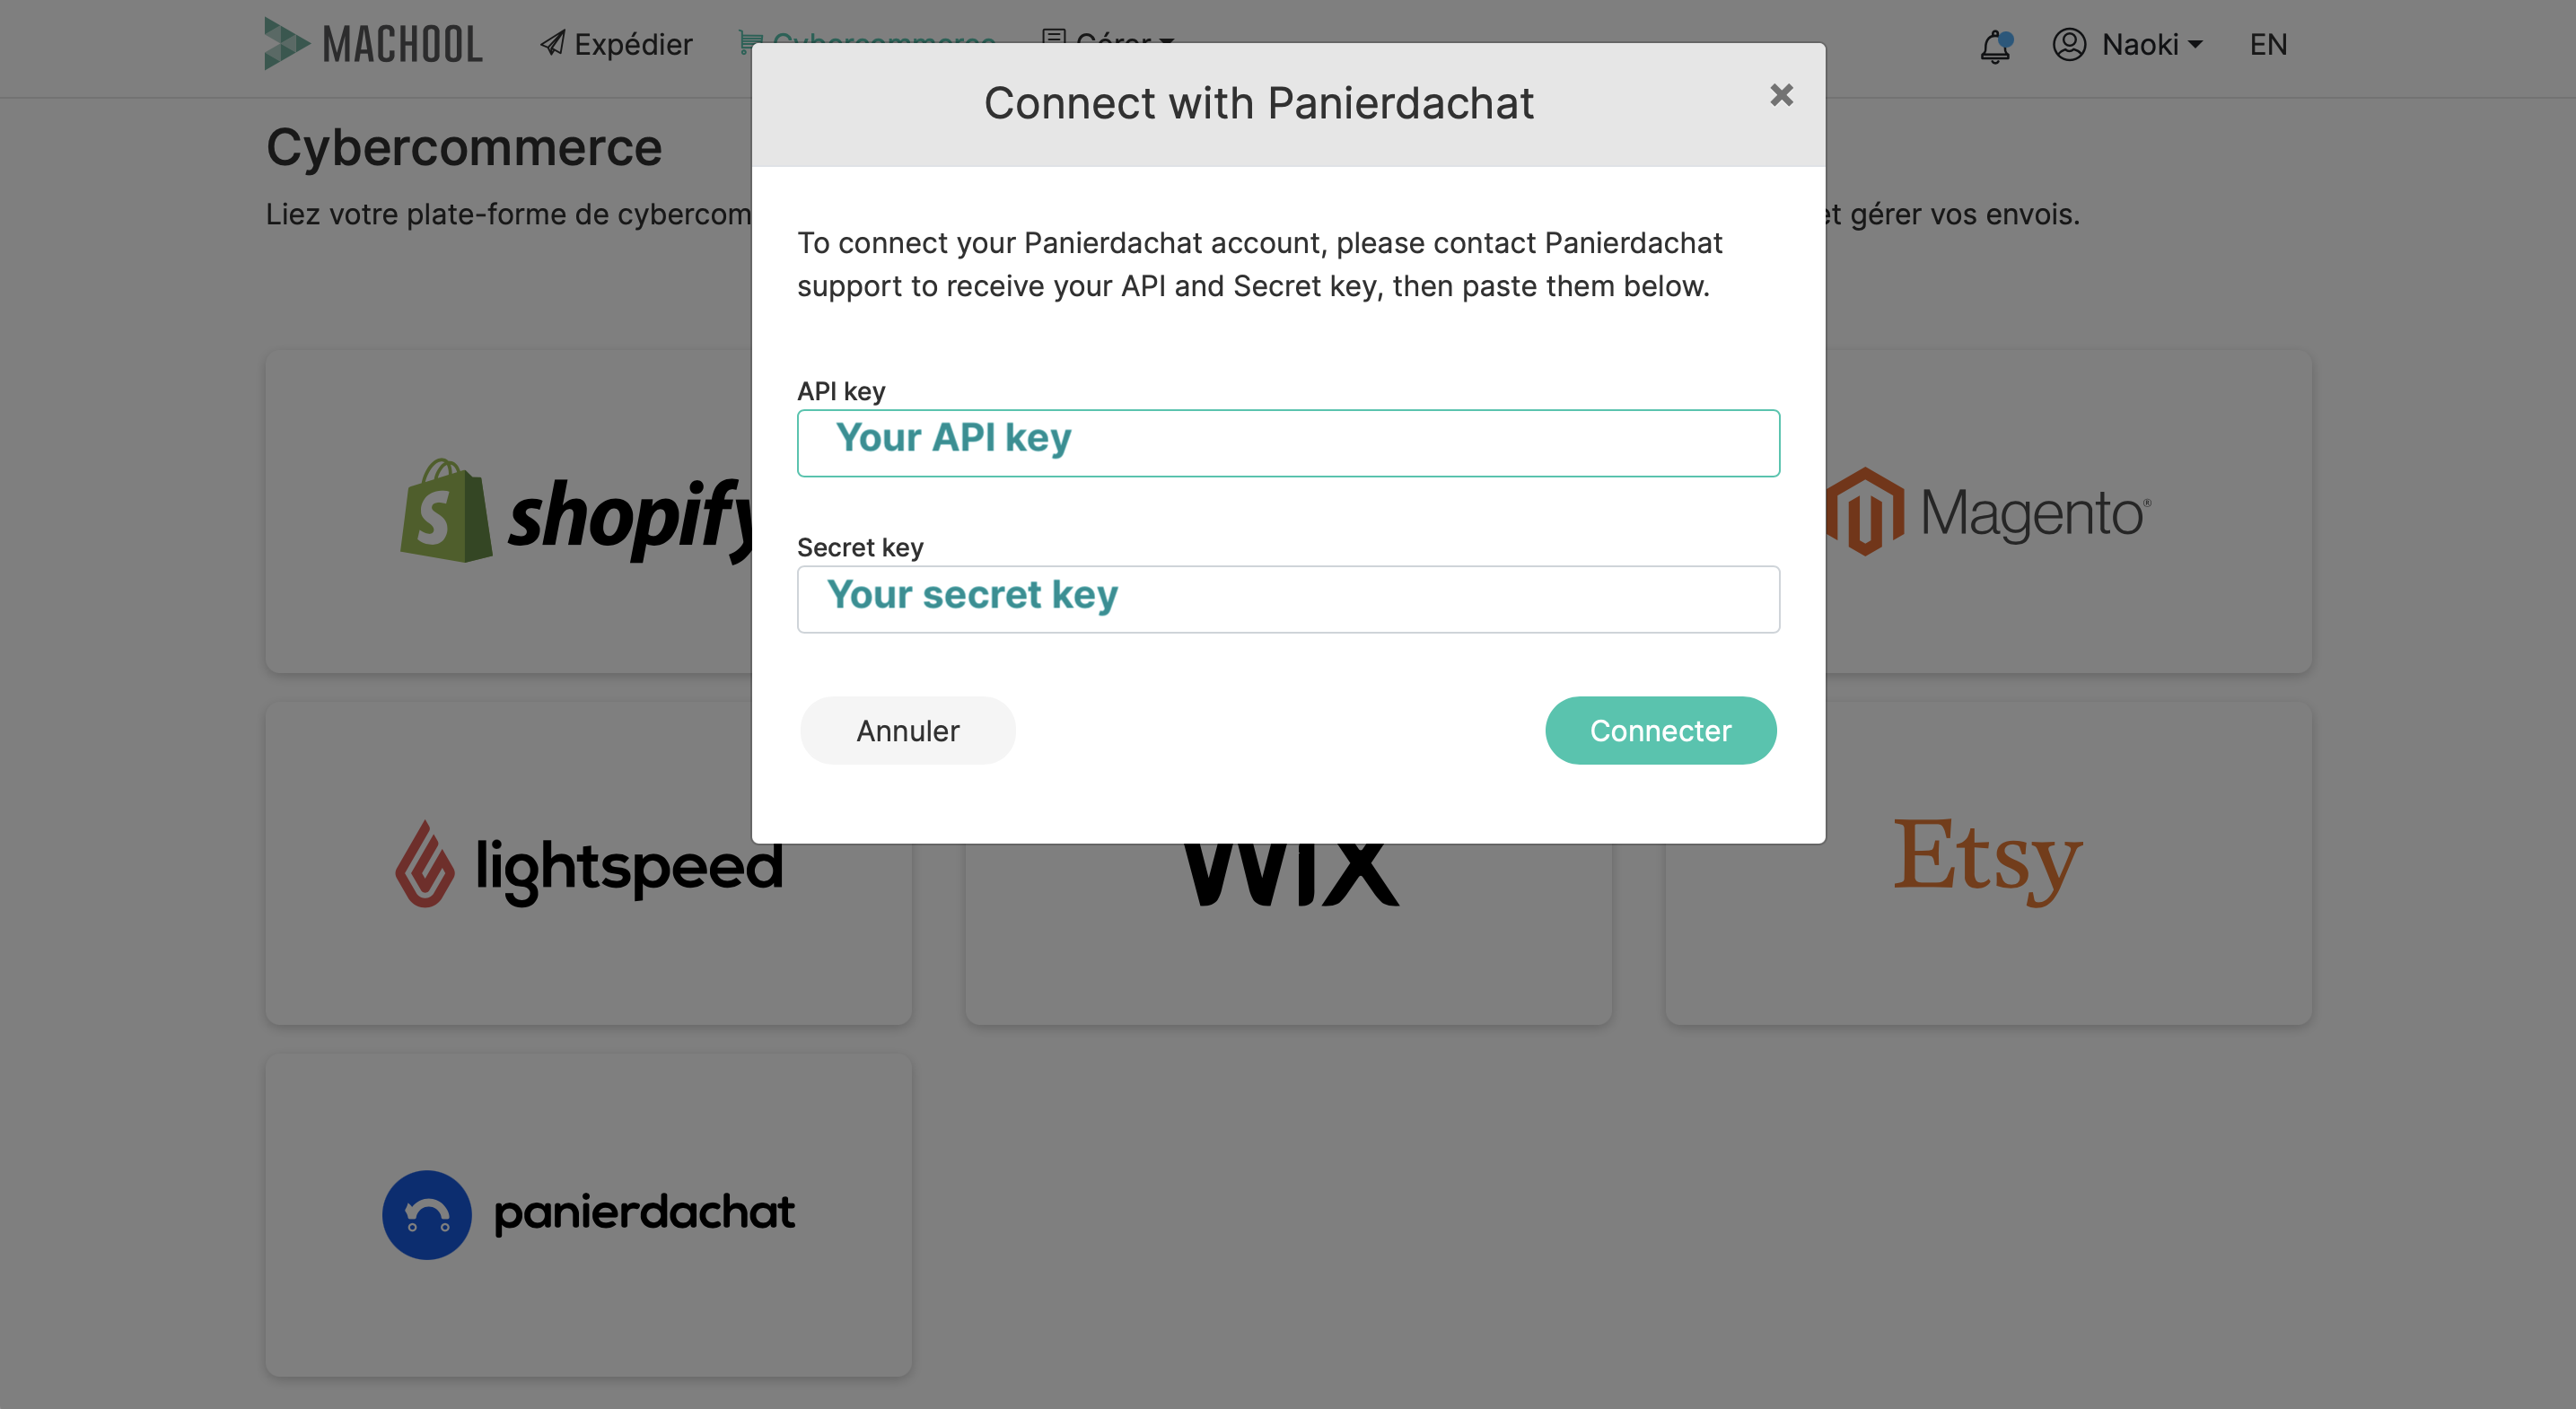
First go to your Panierdachat store administration to get the API and secret keys as described on this page.
Once you have your keys, add them in your Machool account in Manage > E-commerce > Panierdachat, and paste the 2 keys in the fields and click on Connect.
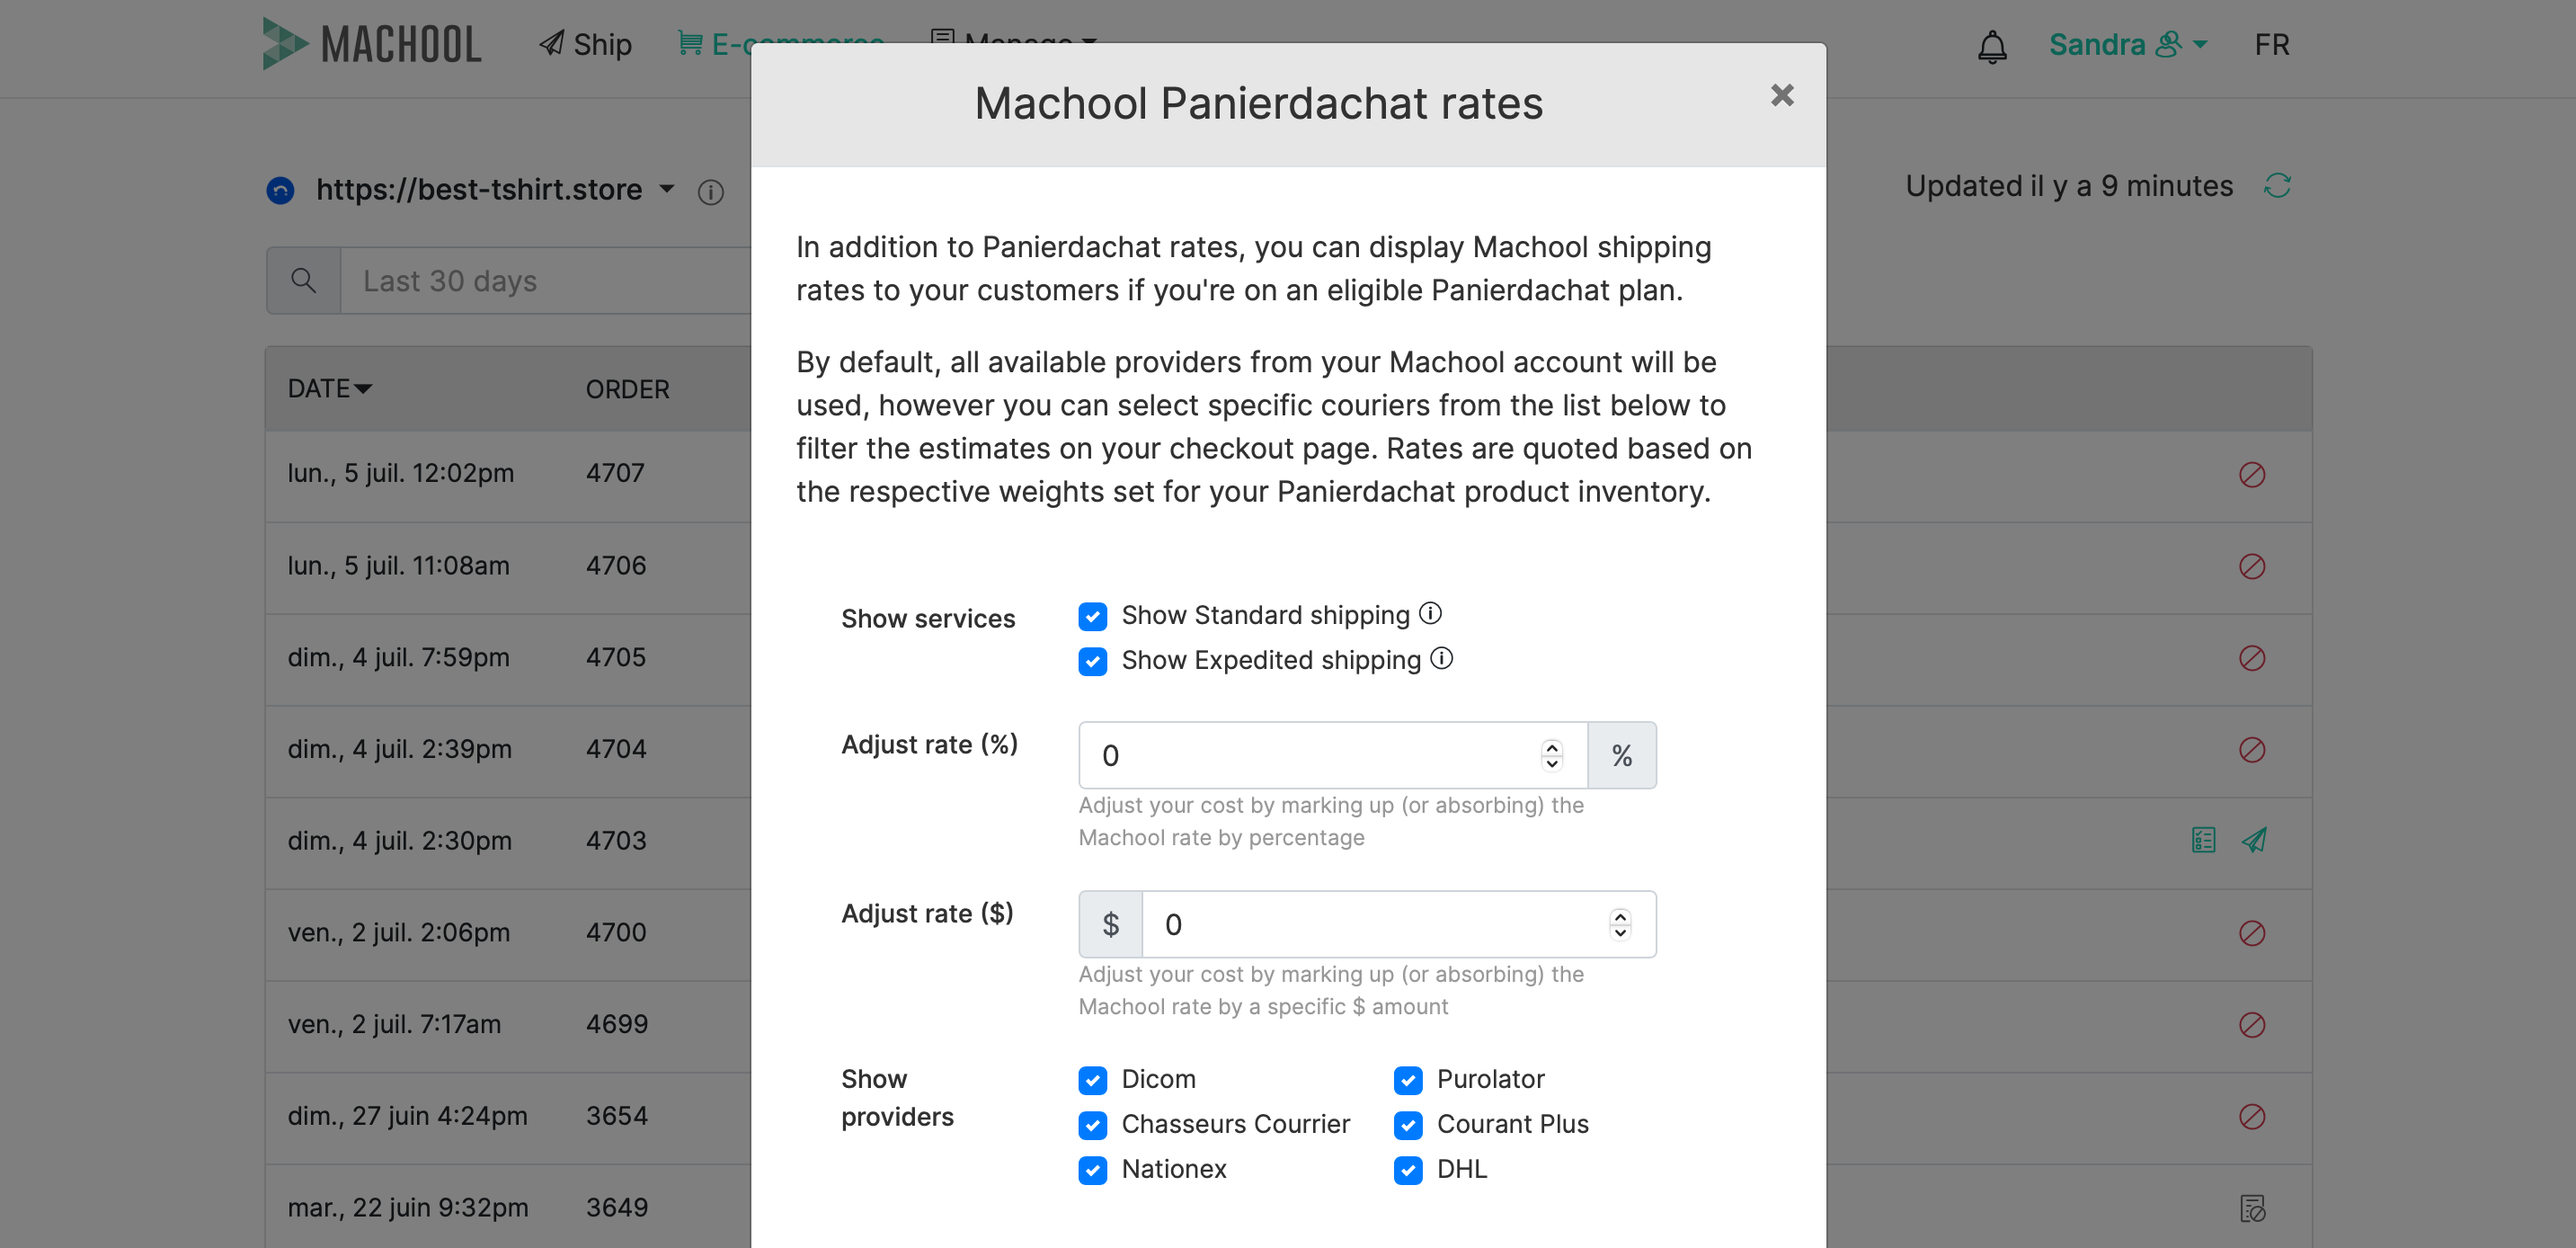
Once the store has been added in E-commerce, enable Machool rates in your Panierdachat store, by clicking on the “folder +” icon.
Adjust your rates if necessary and save the settings.
Lightspeed
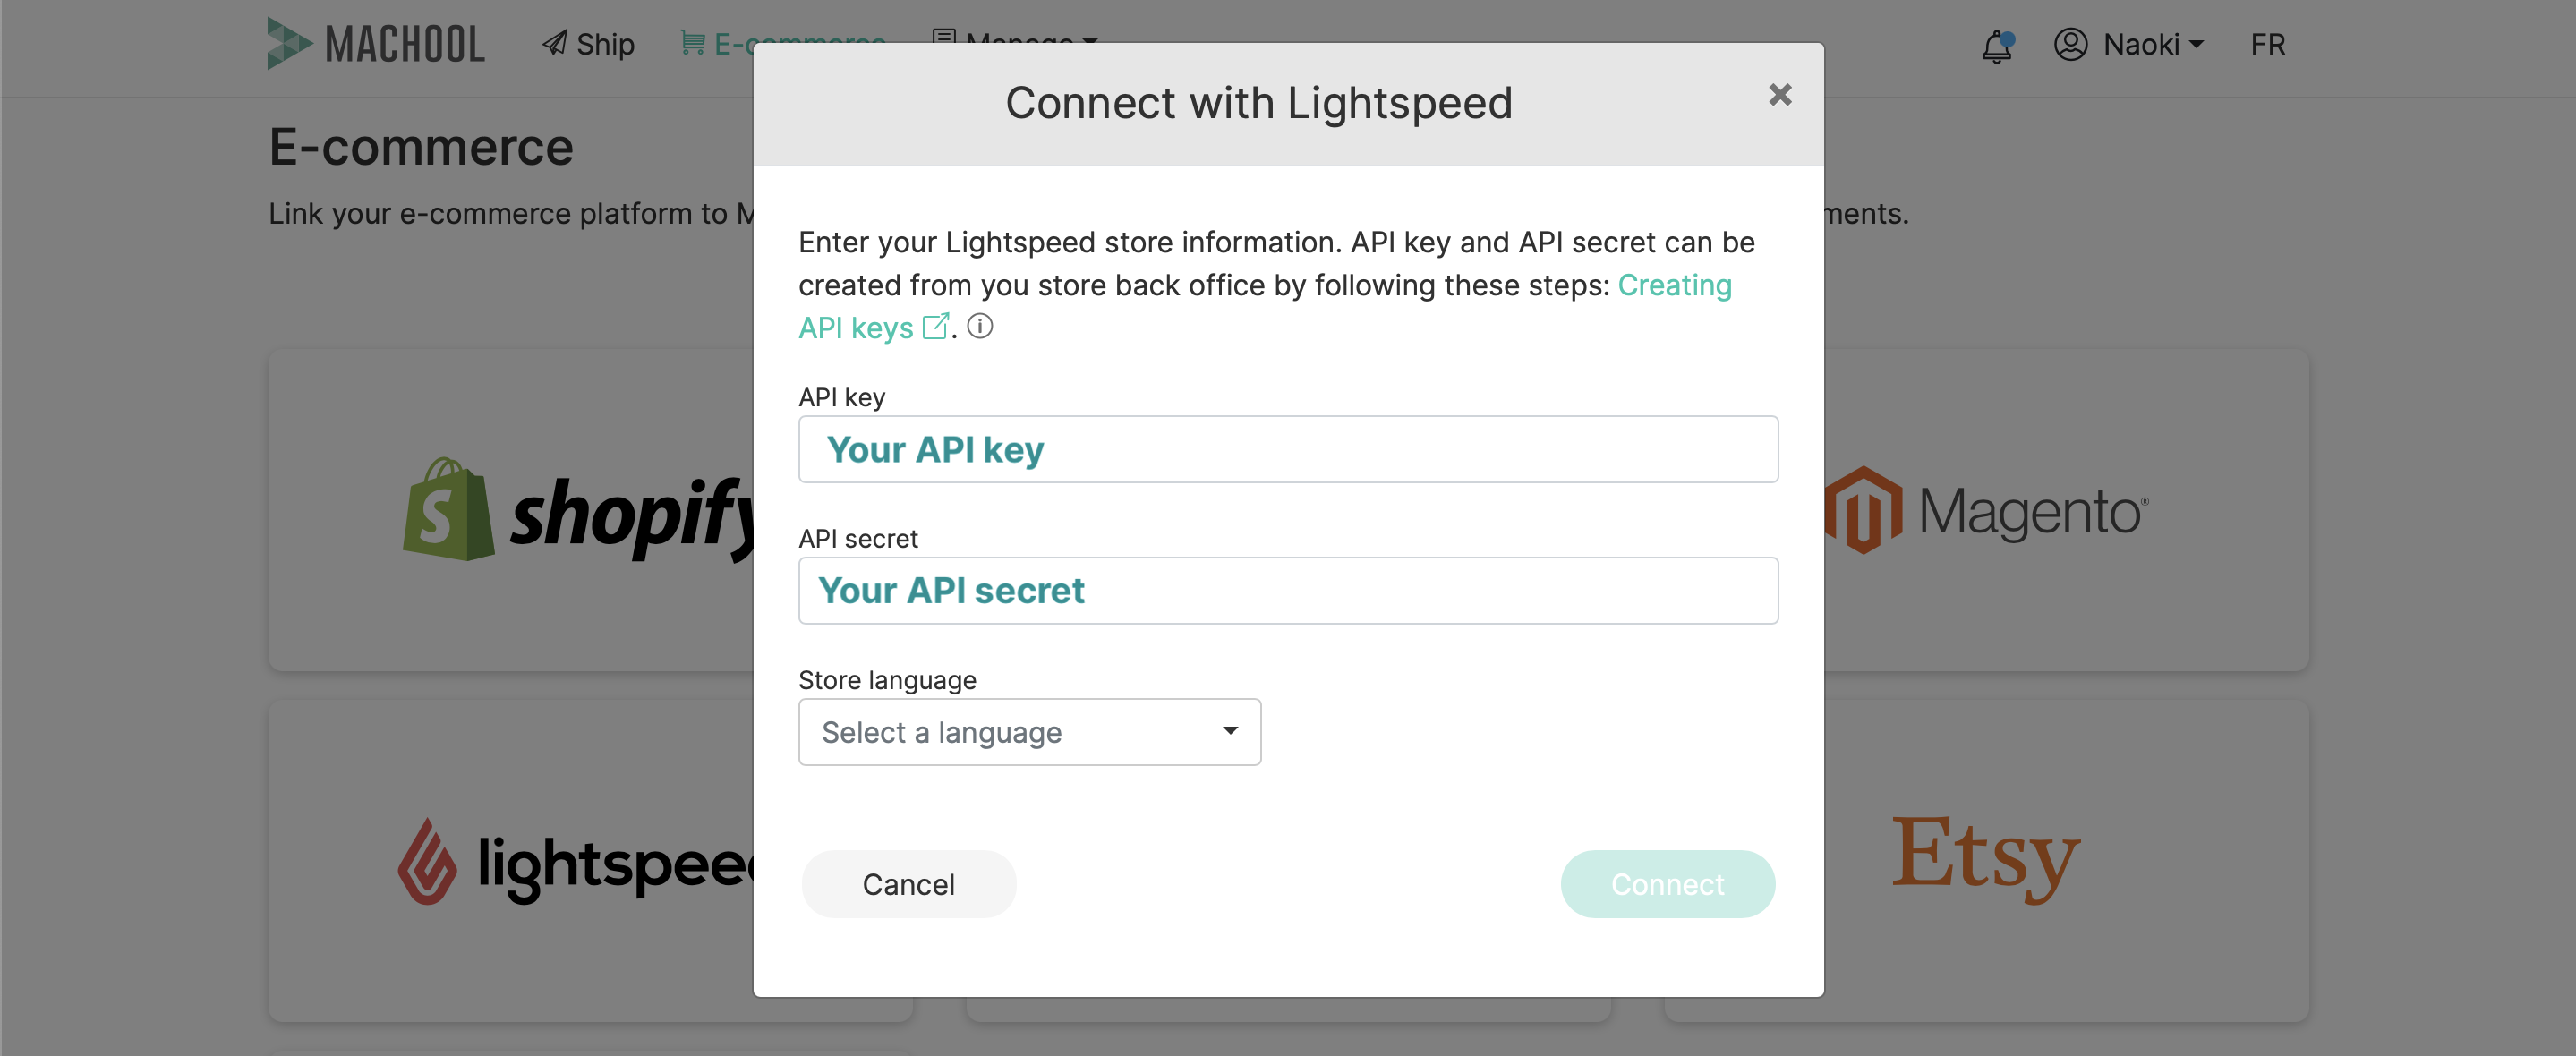
How to connect your Lightspeed store?
In the back office of your Lightspeed store, go to Settings > Store Settings > Developers in order to create an API key and secret. Detailed steps are described here.
Lightspeed E-series (Ecwid)
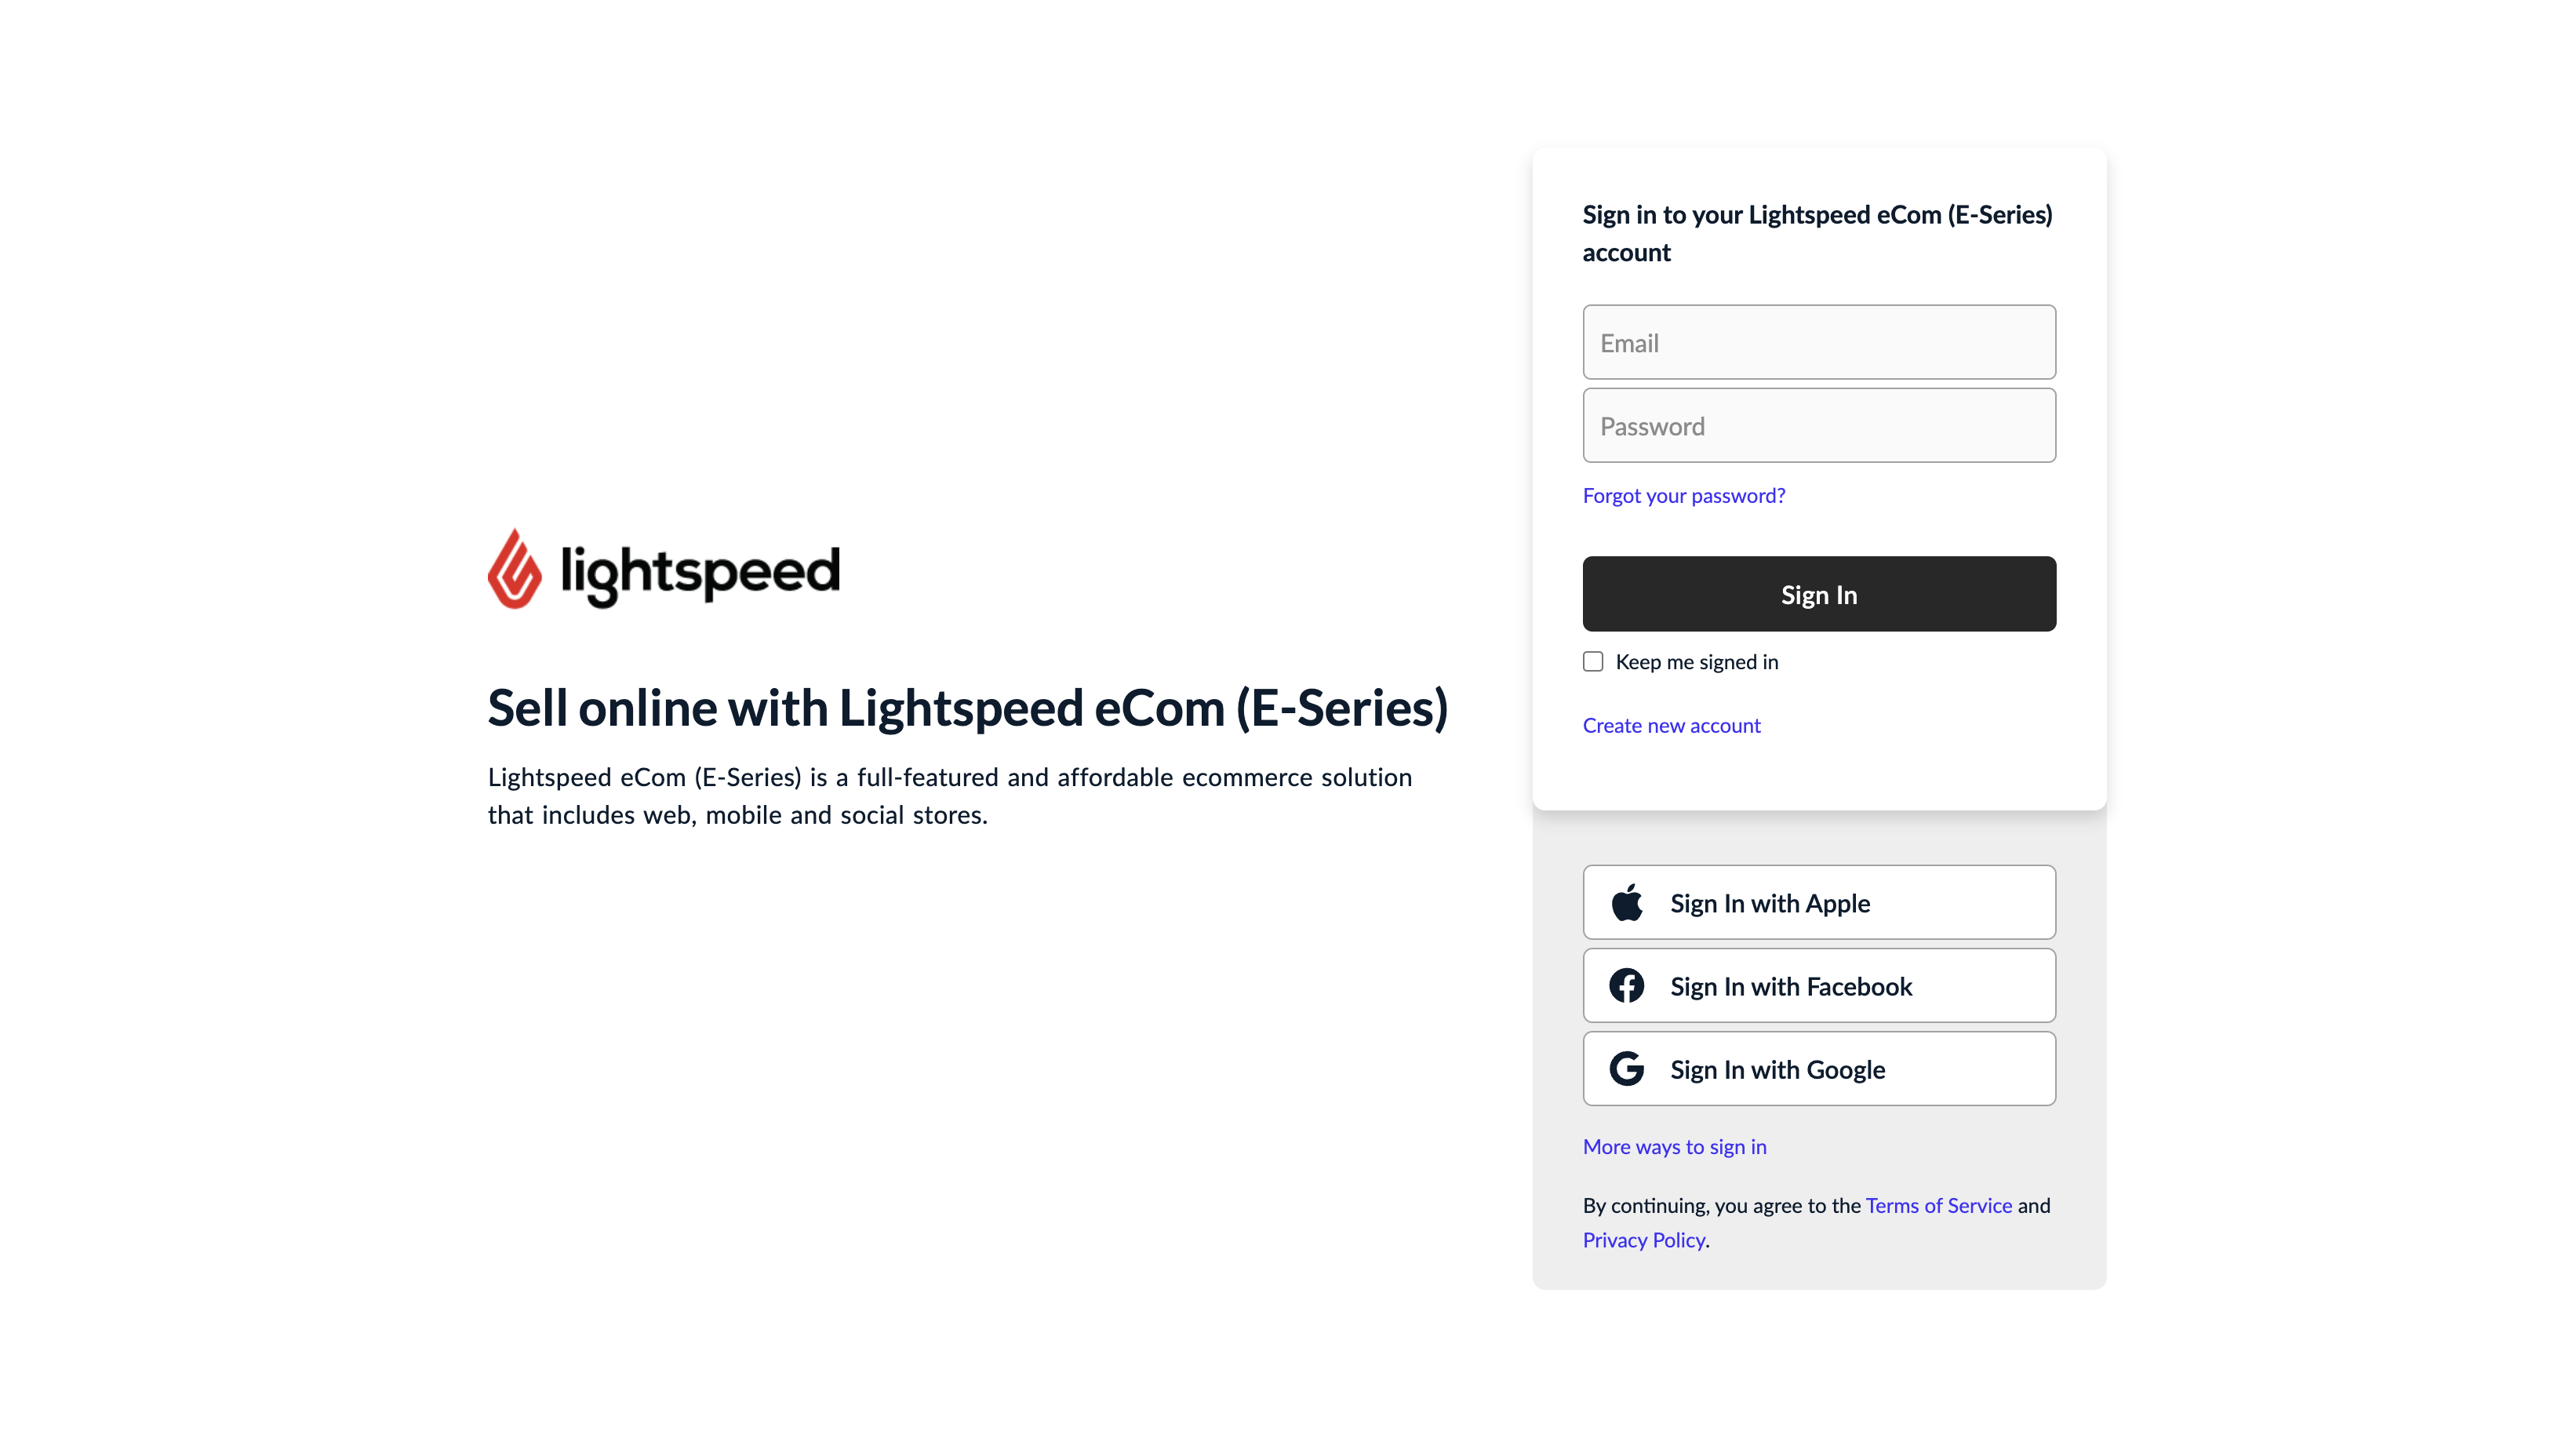
How to connect your Lightspeed E-series store?
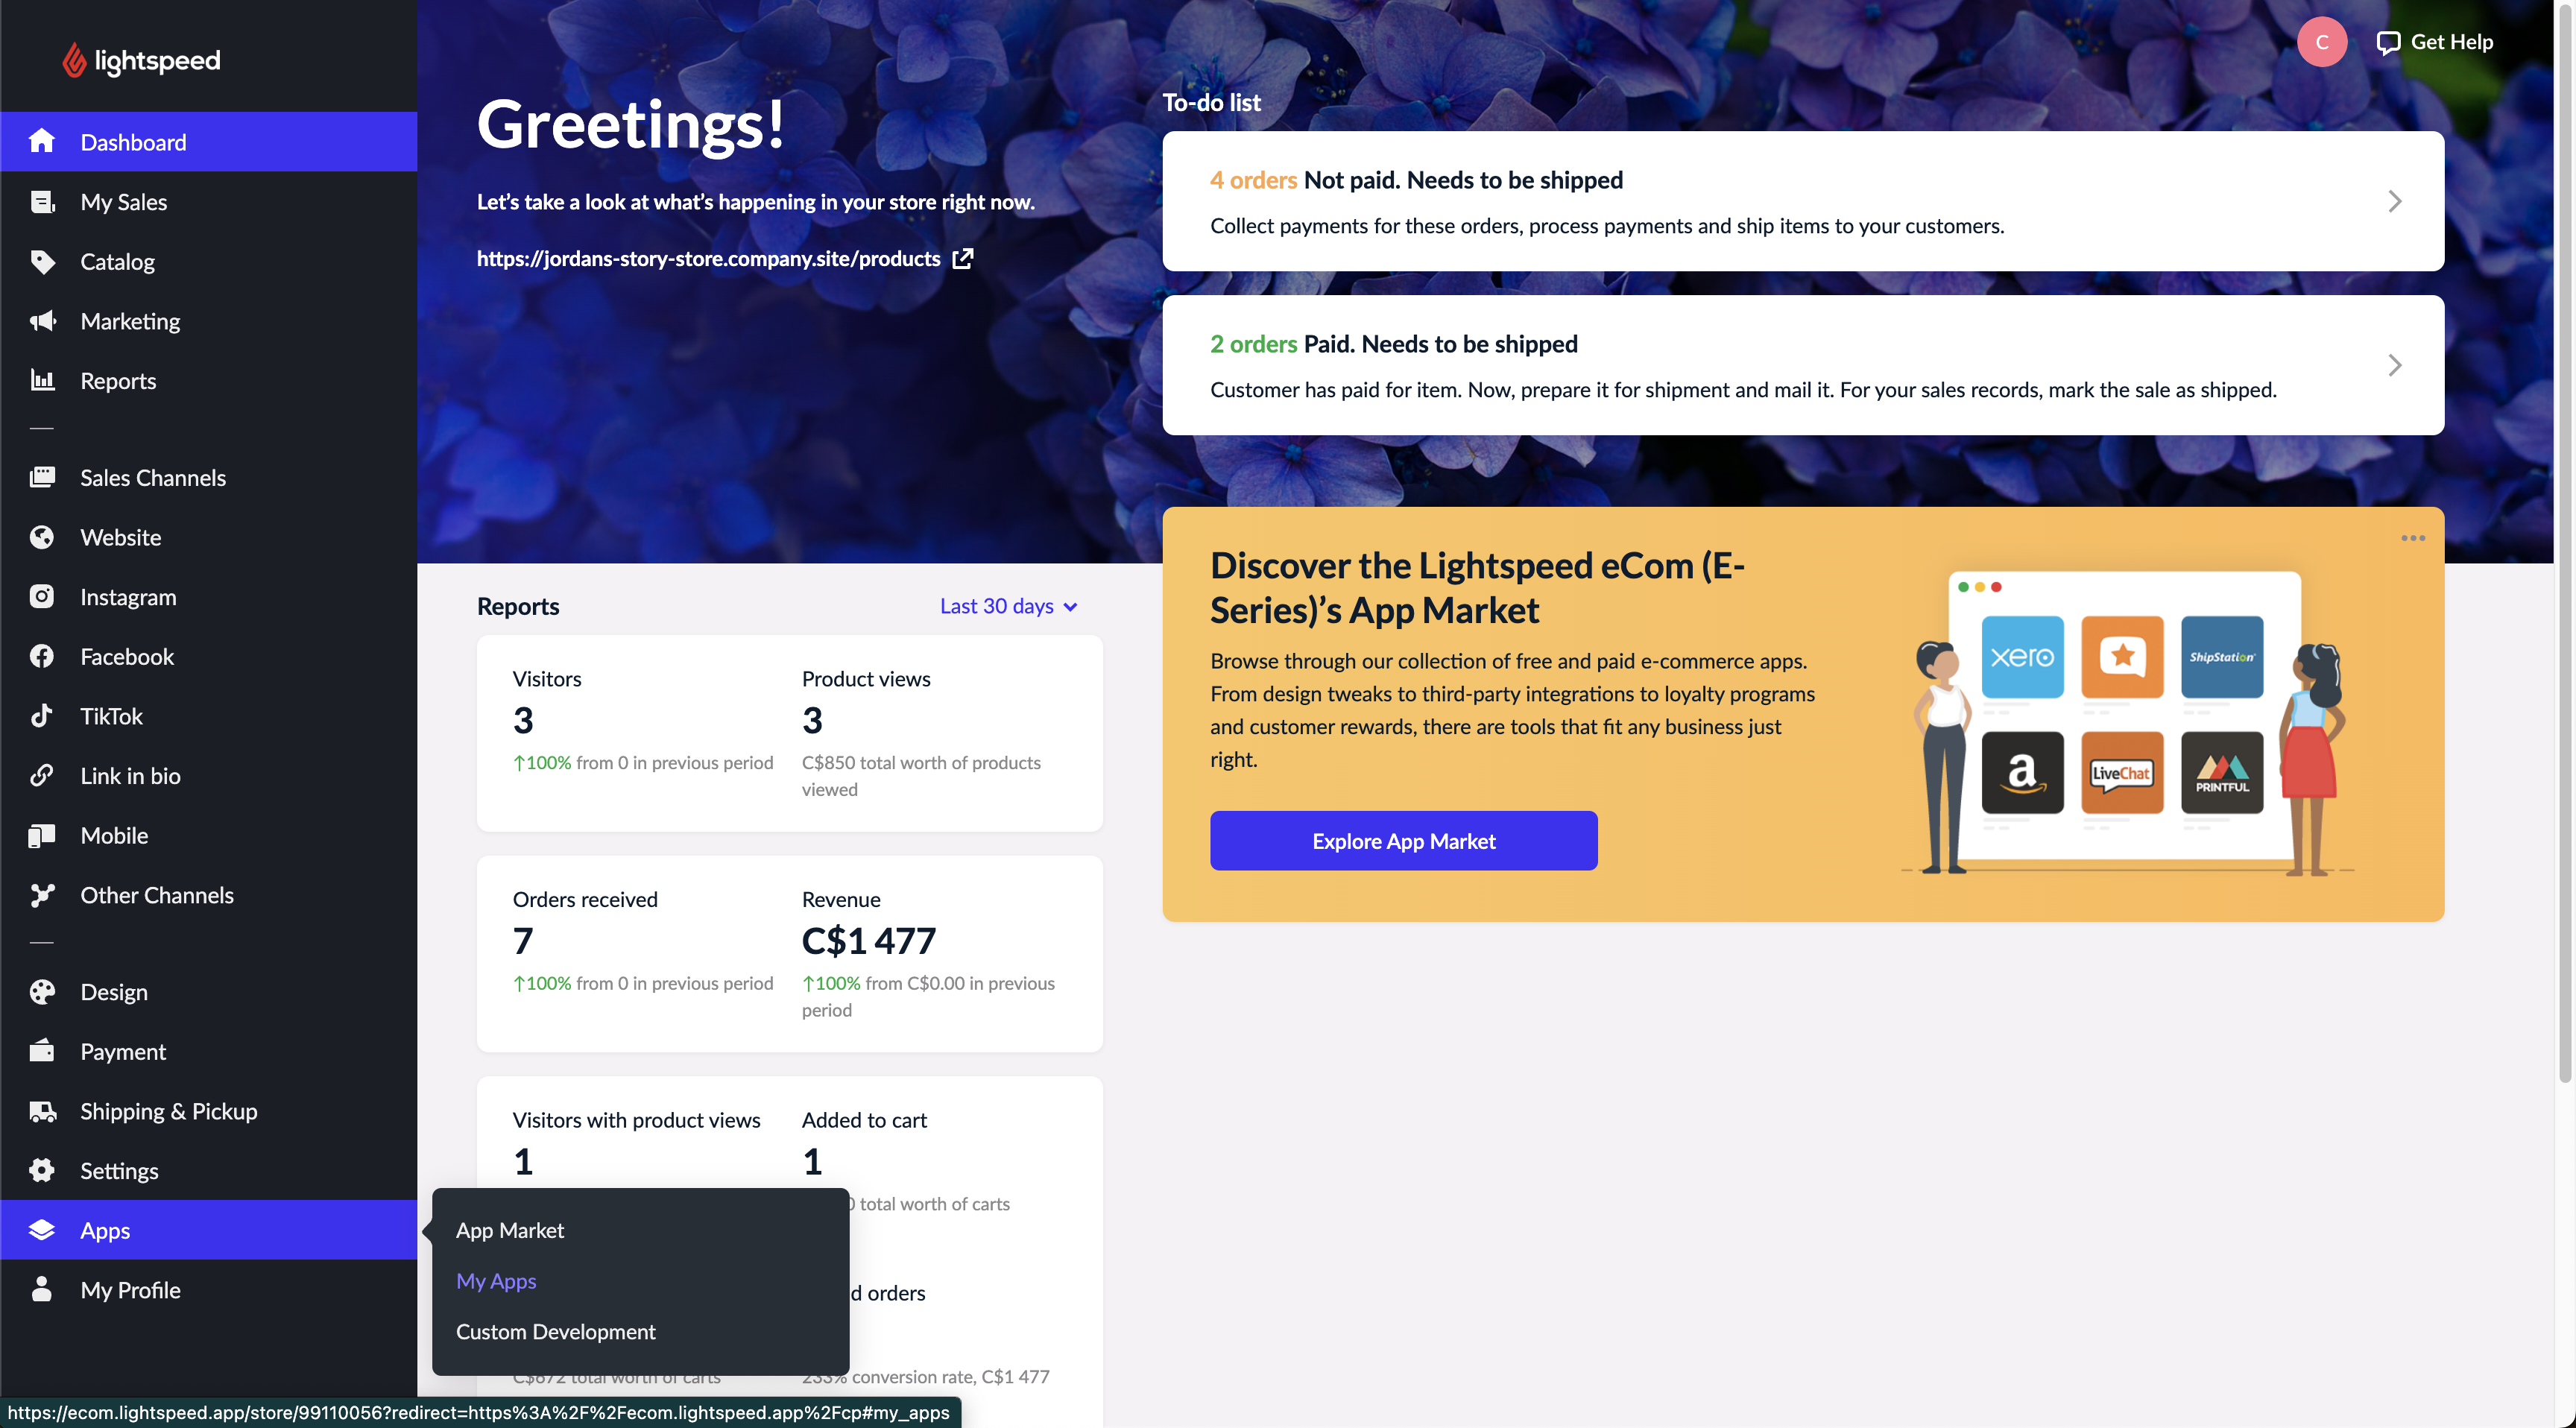
- Log in to your store’s admin page
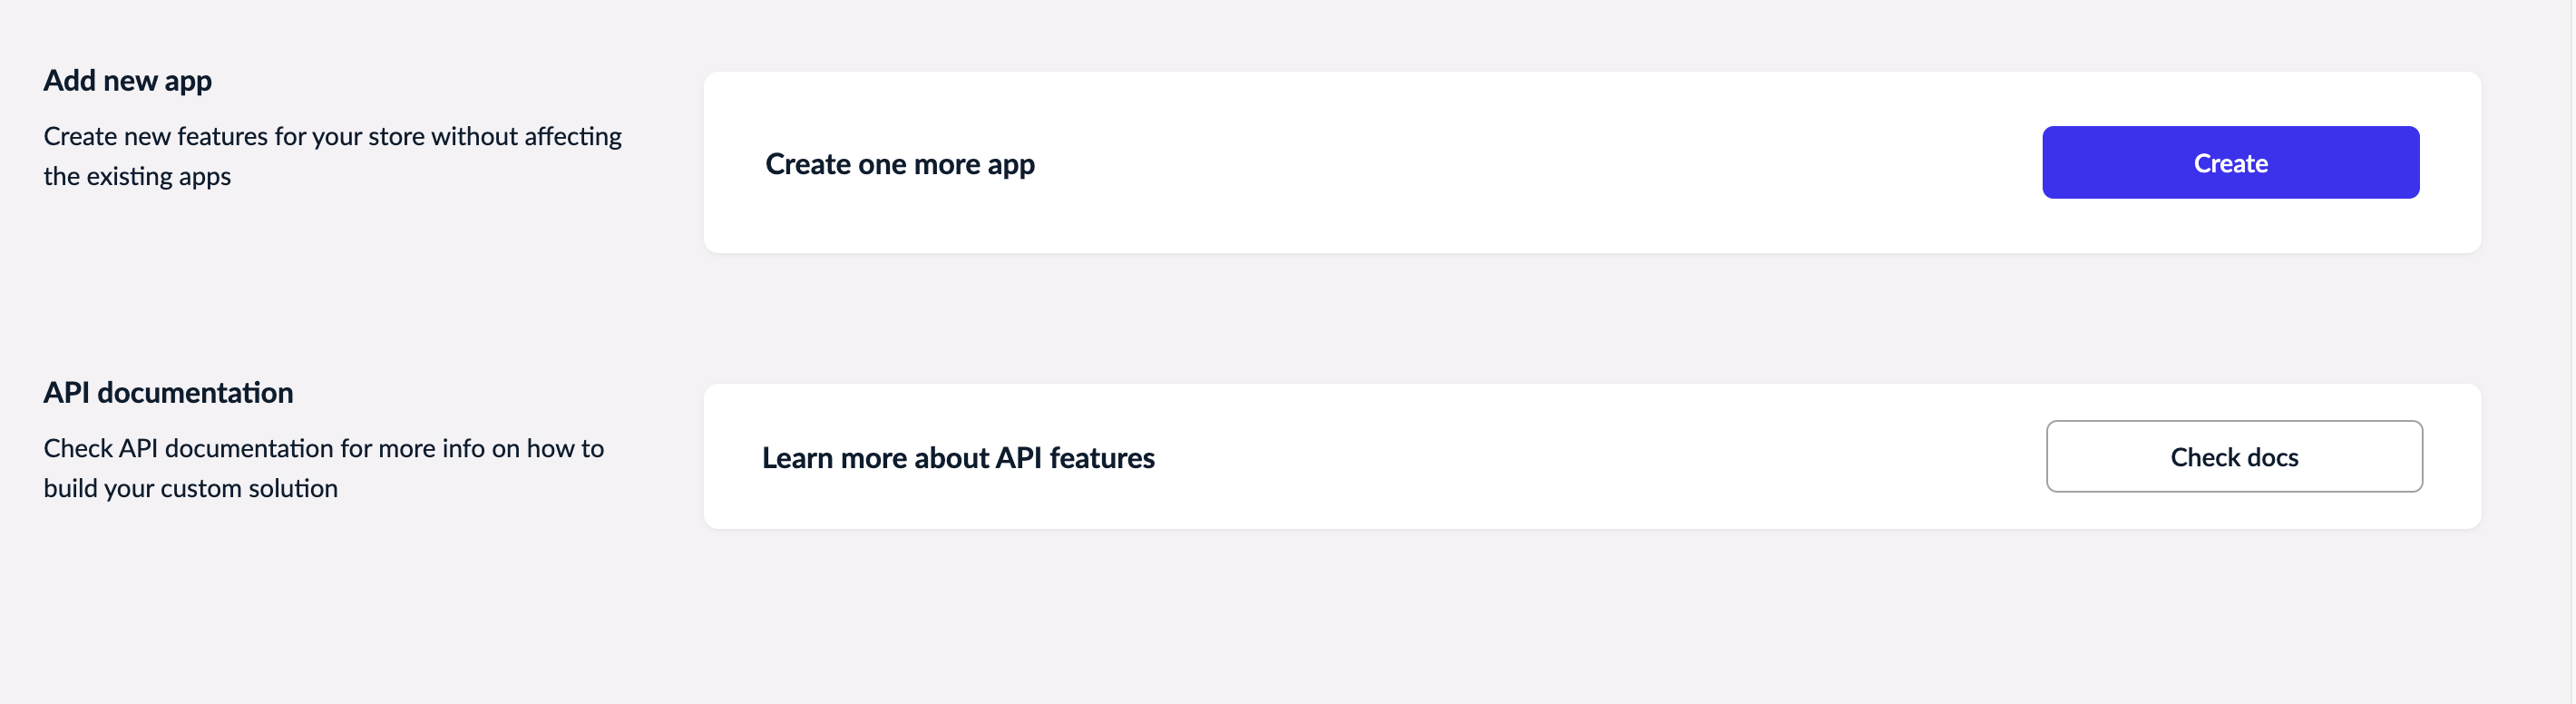
- Follow this link (https://my.ecwid.com/#develop-apps) and click Create in the Add New App section. (Please note that only accounts that are on a paid plan can create custom apps and gain access to the API).
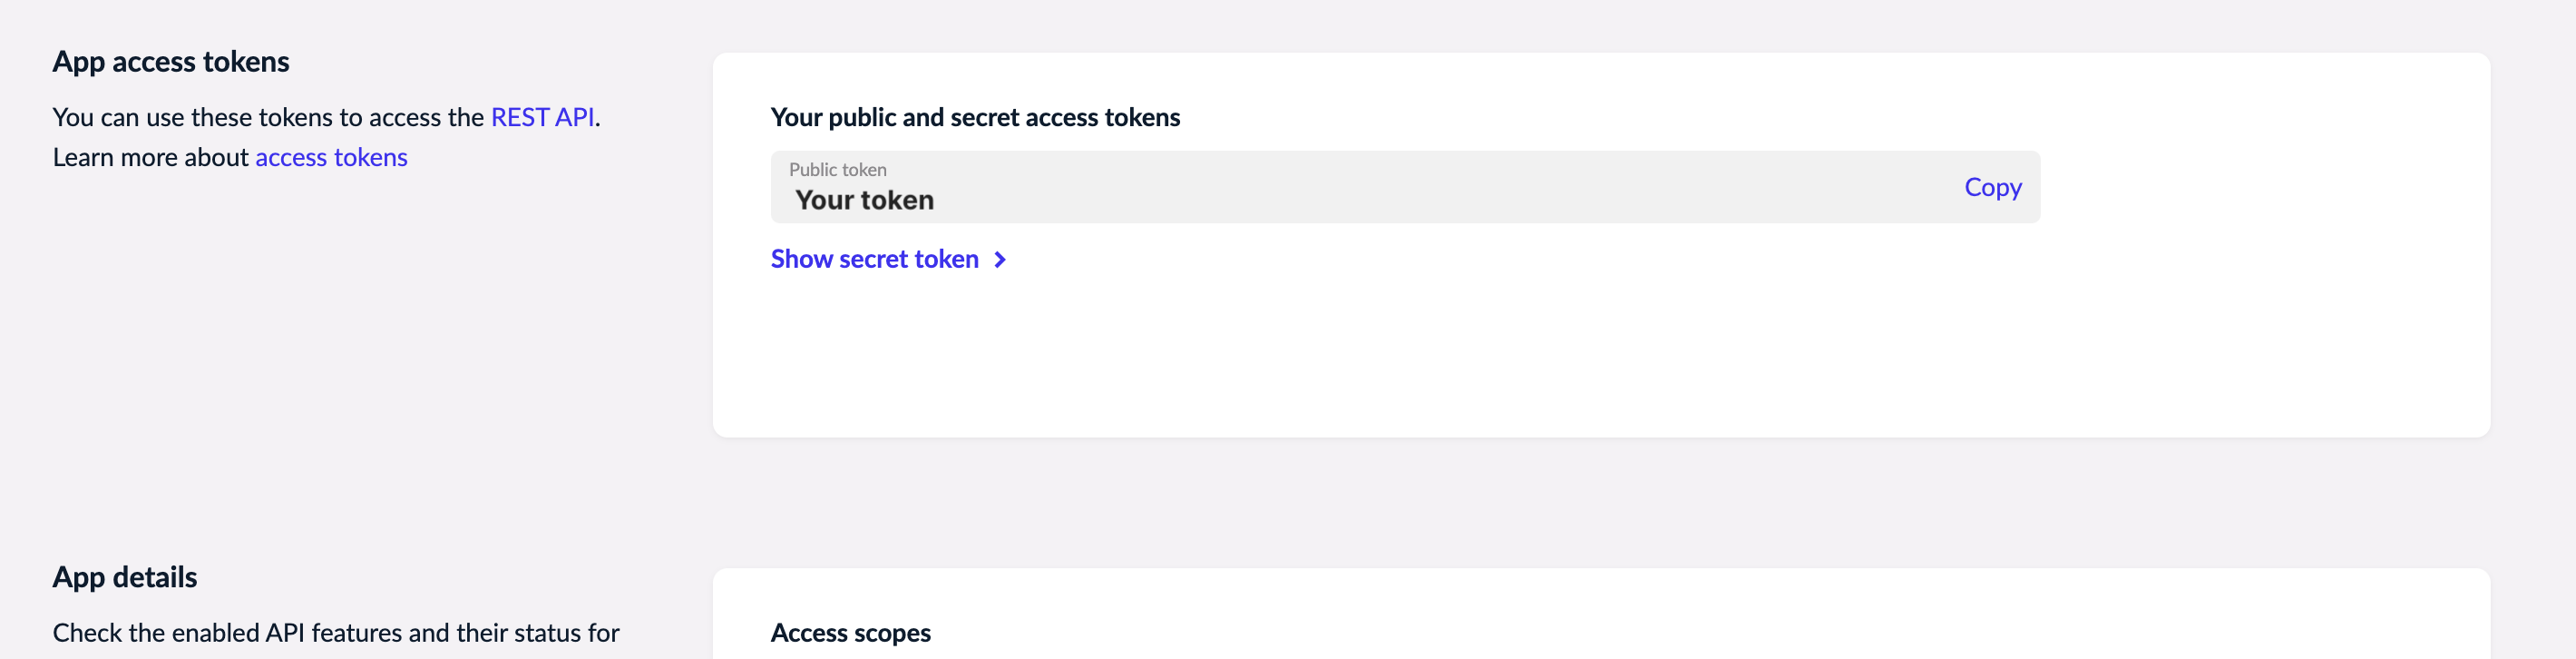
- After the app is created, a new page show open. Click Show secret token > to reveal your access token. This will be used to connect your store to Machool.
Steps to retrieve Store ID:
Scroll down to the bottom of admin page. It will be in the footer. It can also be found in the URL for your store admin page.

BigCommerce
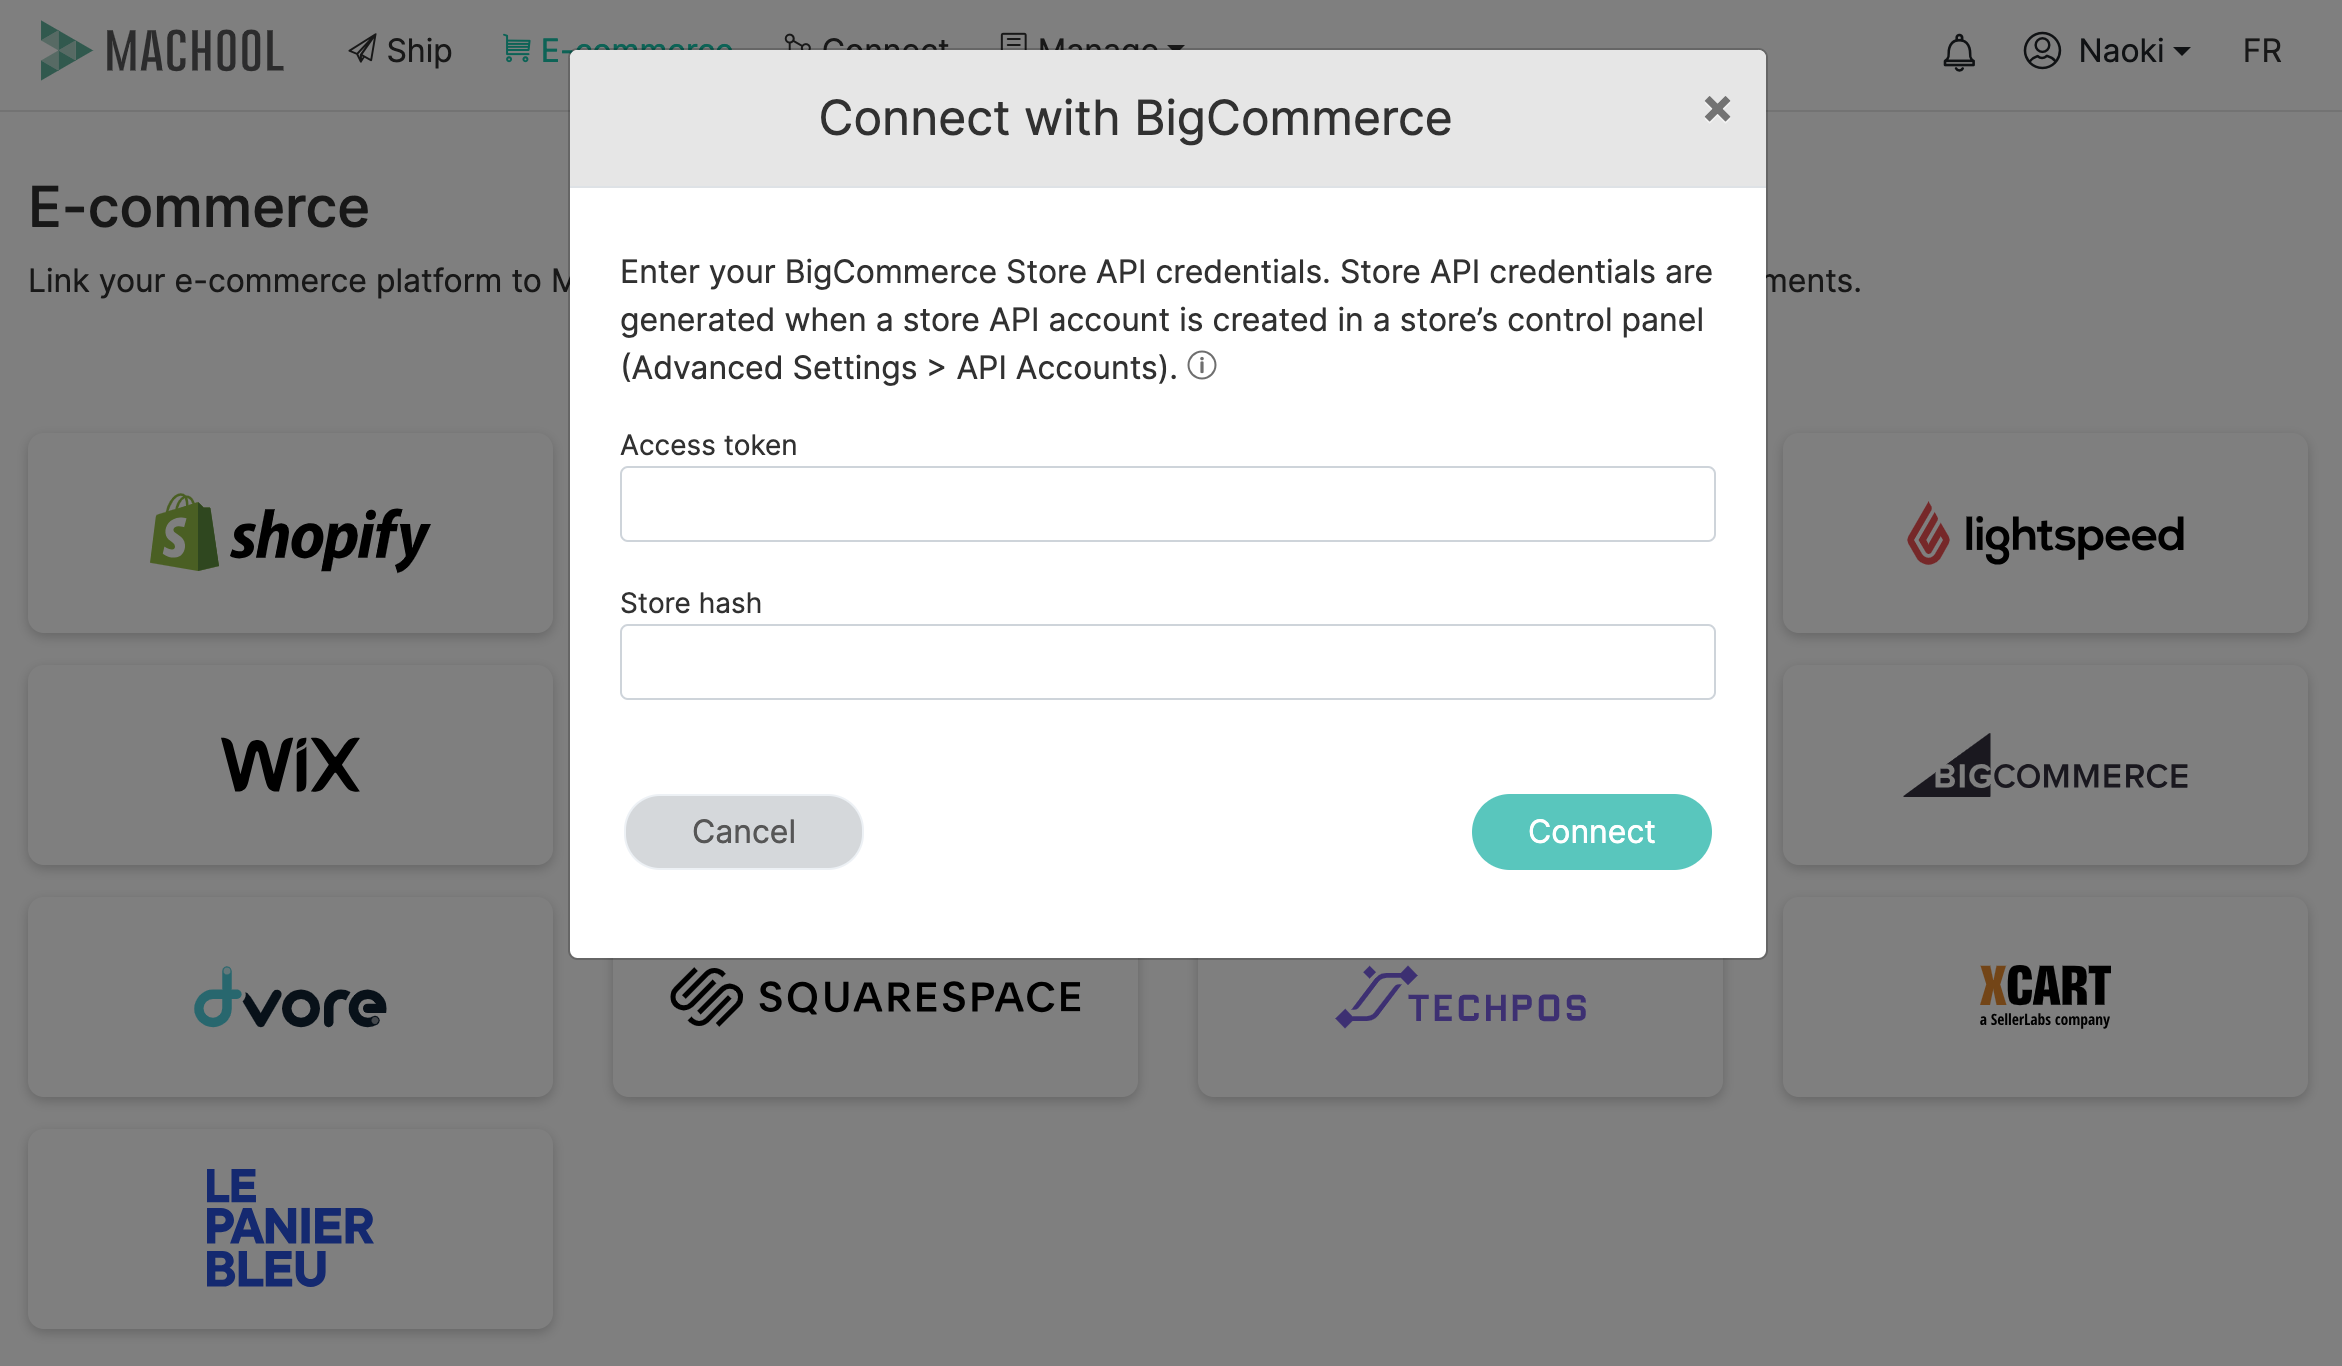
How to connect your BigCommerce store?
In your store’s control panel, go to Advanced Settings > API Accounts. The store API credentials are generated when a store API account is generated. You can find more information in Store API Accounts.
As permissions, please make sure to have set up:
- Information & settings: Read-only
- Orders: Modify
Squarespace
How to connect your Squarespace store?
In order to connect your Squarespace store to the Machool app, first you need to go to your Squarespace store administration page to get the API and Account ID. Please follow the instructions below:
- Go to your Squarespace store and log in as store admin.
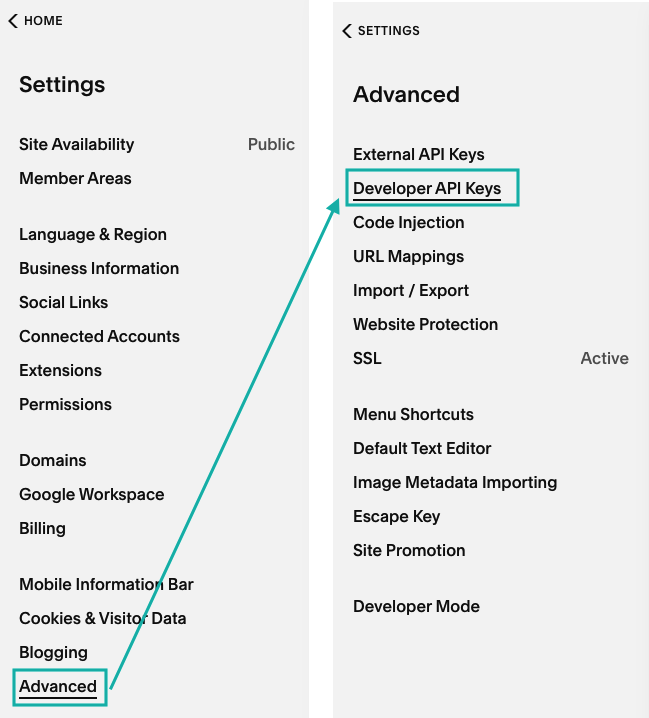
- Go to “System”, select “Developer API Keys” under “Advanced” to create your API key.
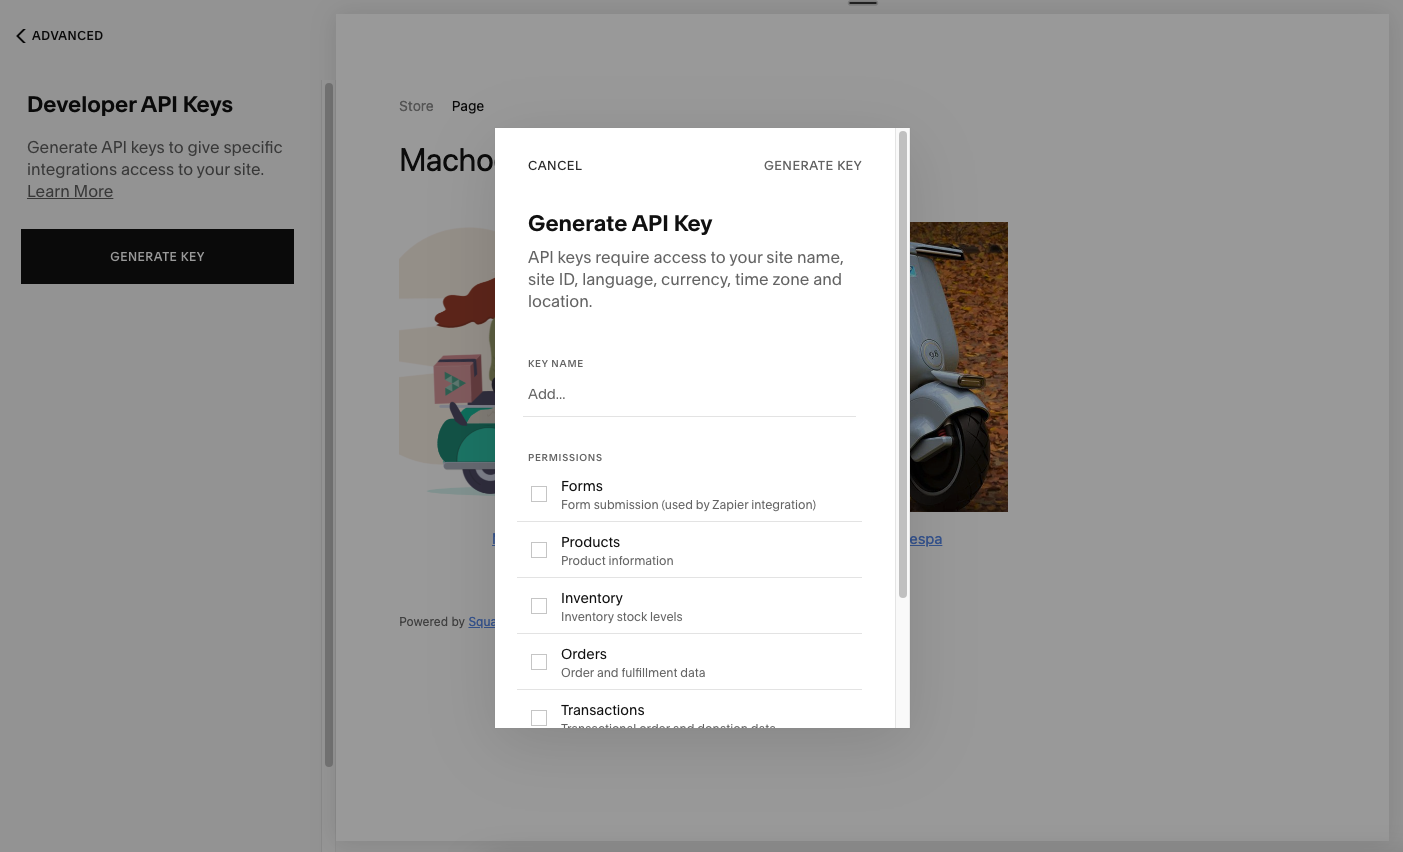
- Click the “Generate a Key” button.
- Under “Key Name”, enter a name for this integration, for example “Machool app” (the name is only for your reference).
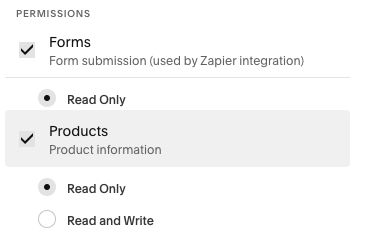
- Tick each “Permissions” one by one making sure that the option “Read only” is selected.
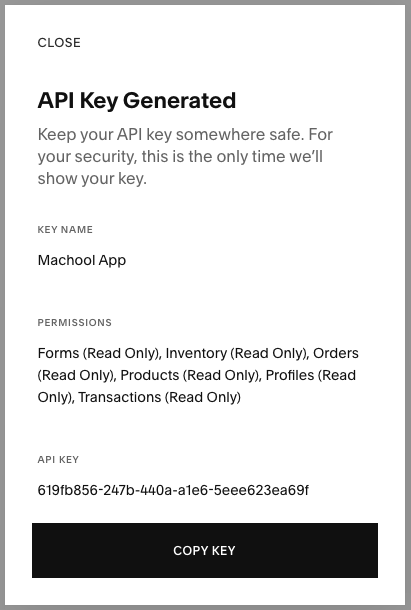
- Click “Generate a Key” on the top right corner of the popup window.
- Copy the “API KEY” and click on the “Close” button.
- You can find your Account ID in your store’s setting.Go to “Account Settings” and select “Account & Security”.

Once you have your key and account ID, add them in your Machool account in Manage -> E-commerce -> Squarespace, and paste them in the fields and click on Connect.
X-Cart
How to connect your X-Cart store?
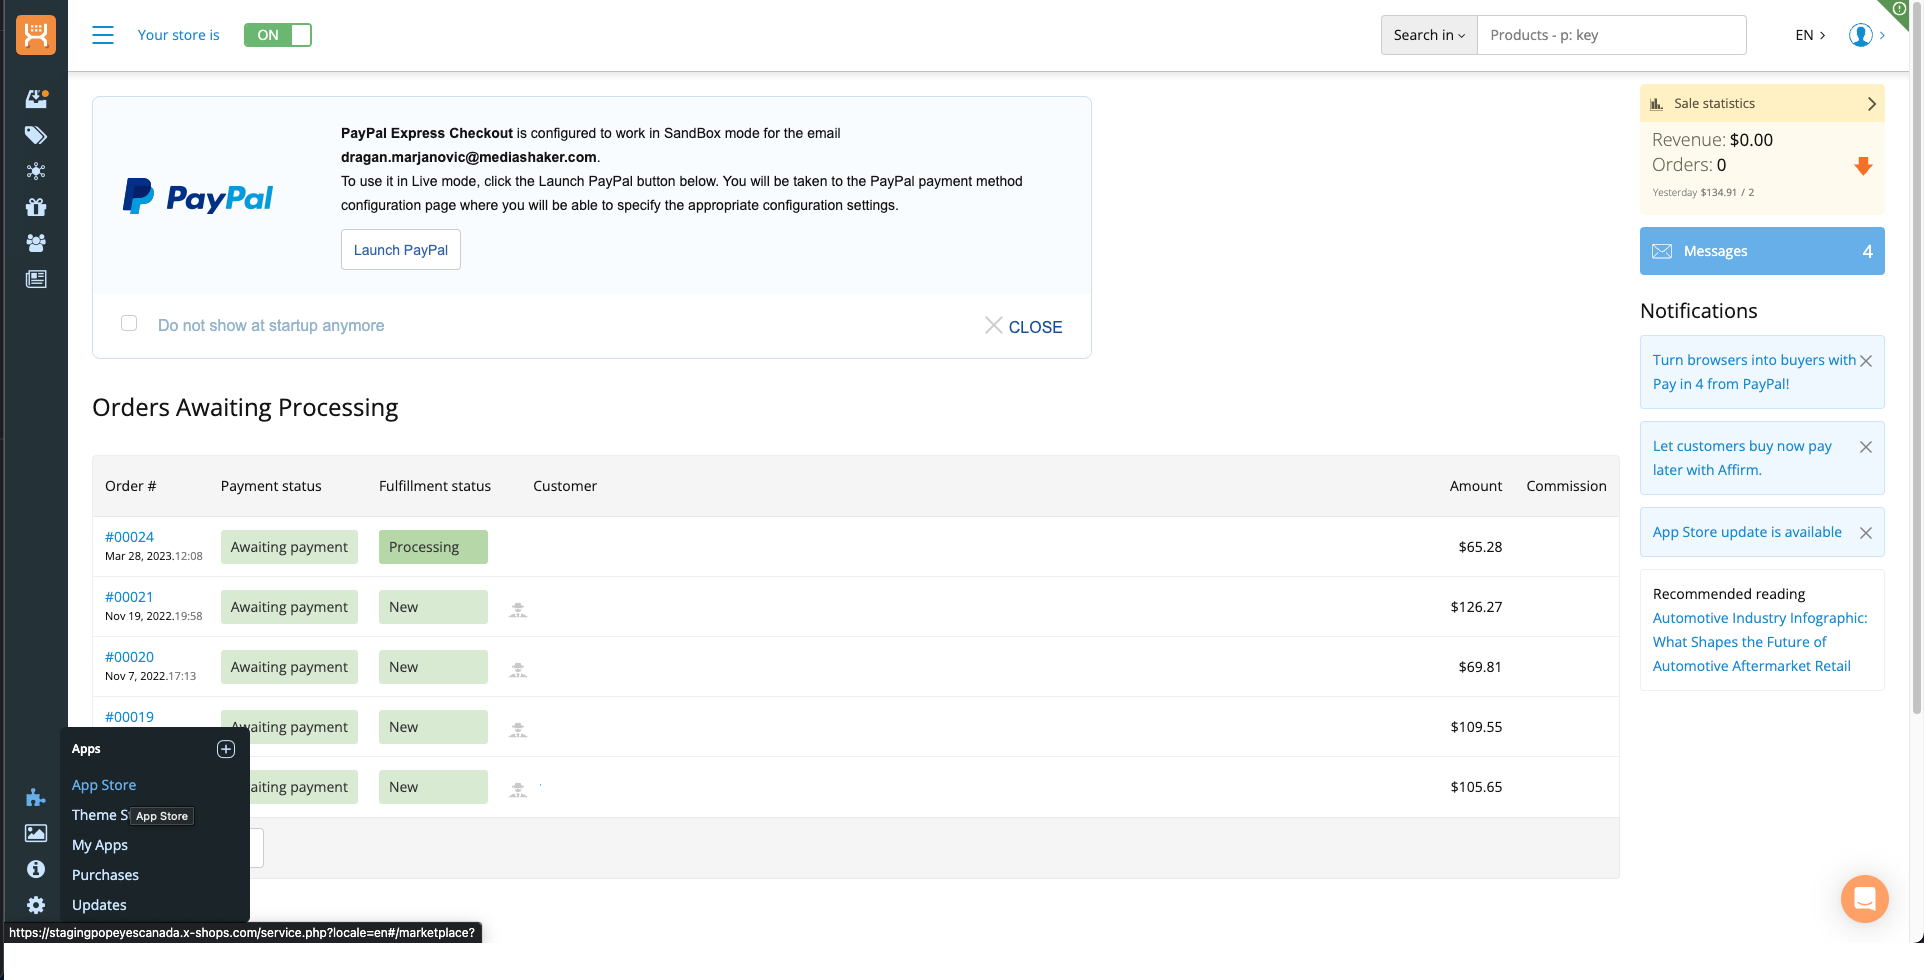
- Log in to your X-Cart store and access the store admin page, then go to the App Store from the bottom left-hand menu (puzzle piece icon):
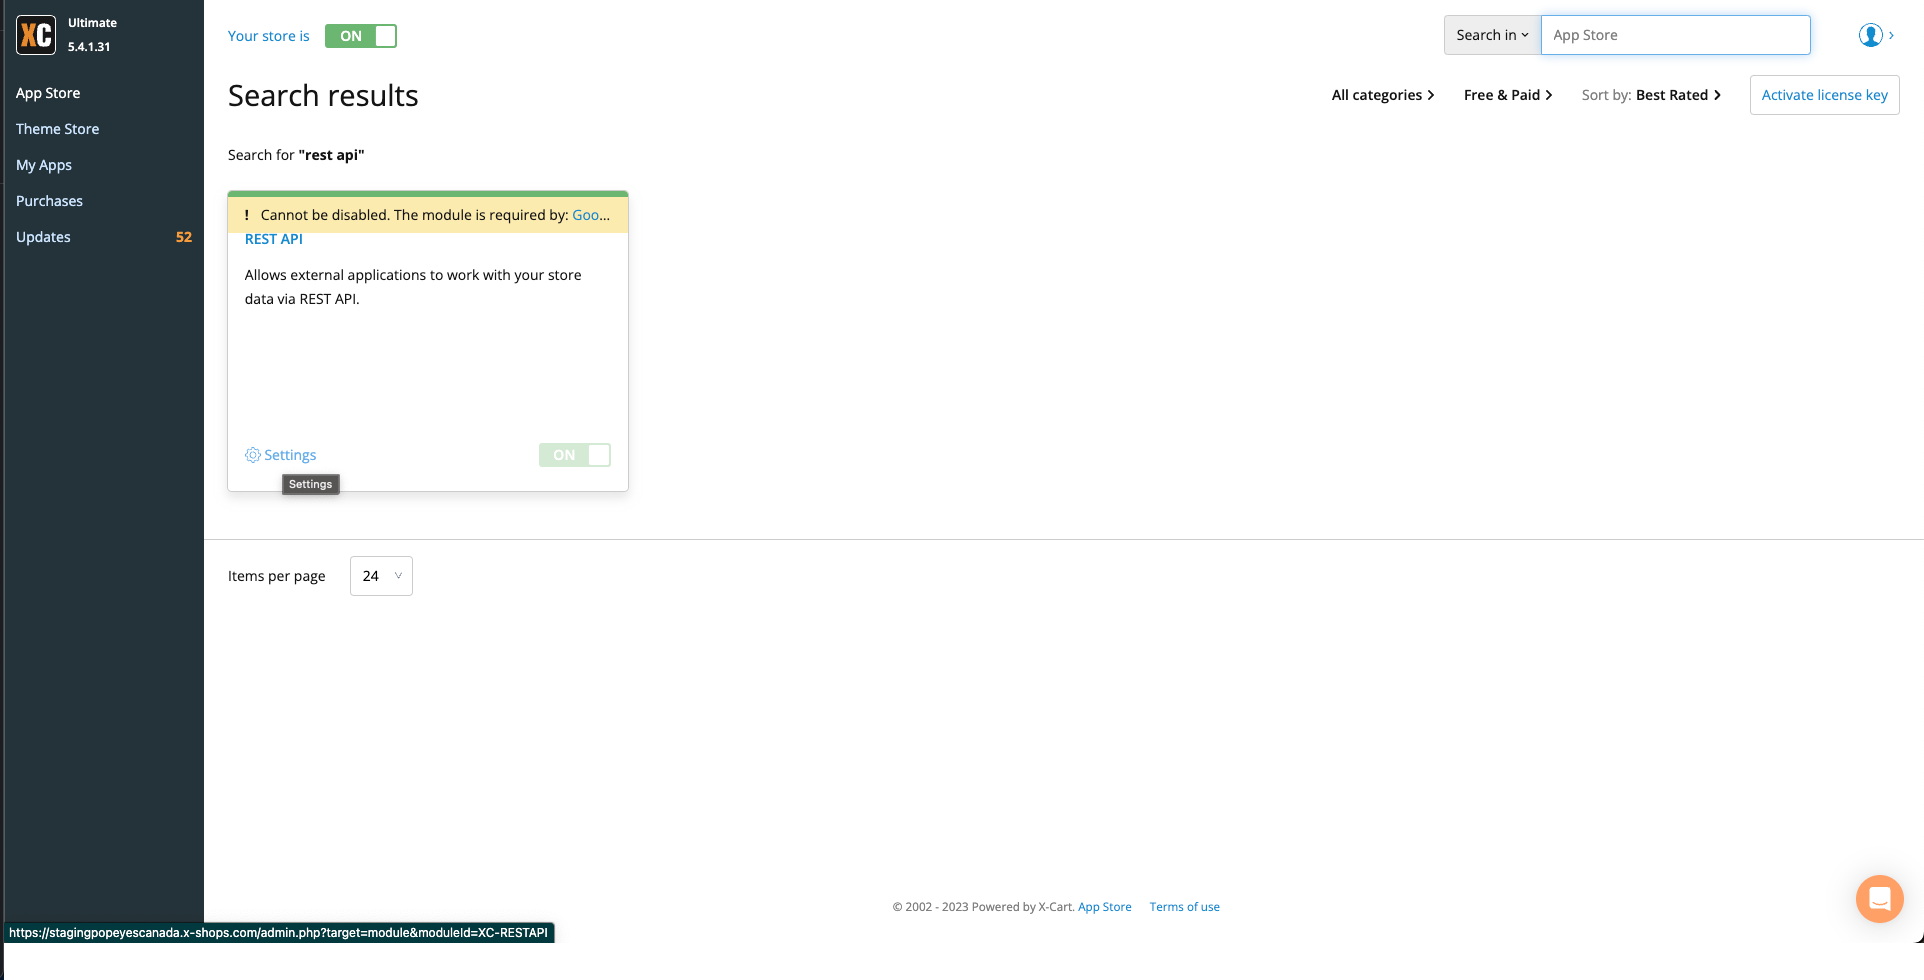
- In the App Store, search for the third-party app “REST API” and install the app to your store. This will allow your store and Machool to communicate via the Rest API.
- In the left-hand menu, select “My Apps” and locate the REST API app. Click “Settings” to access the app settings menu.
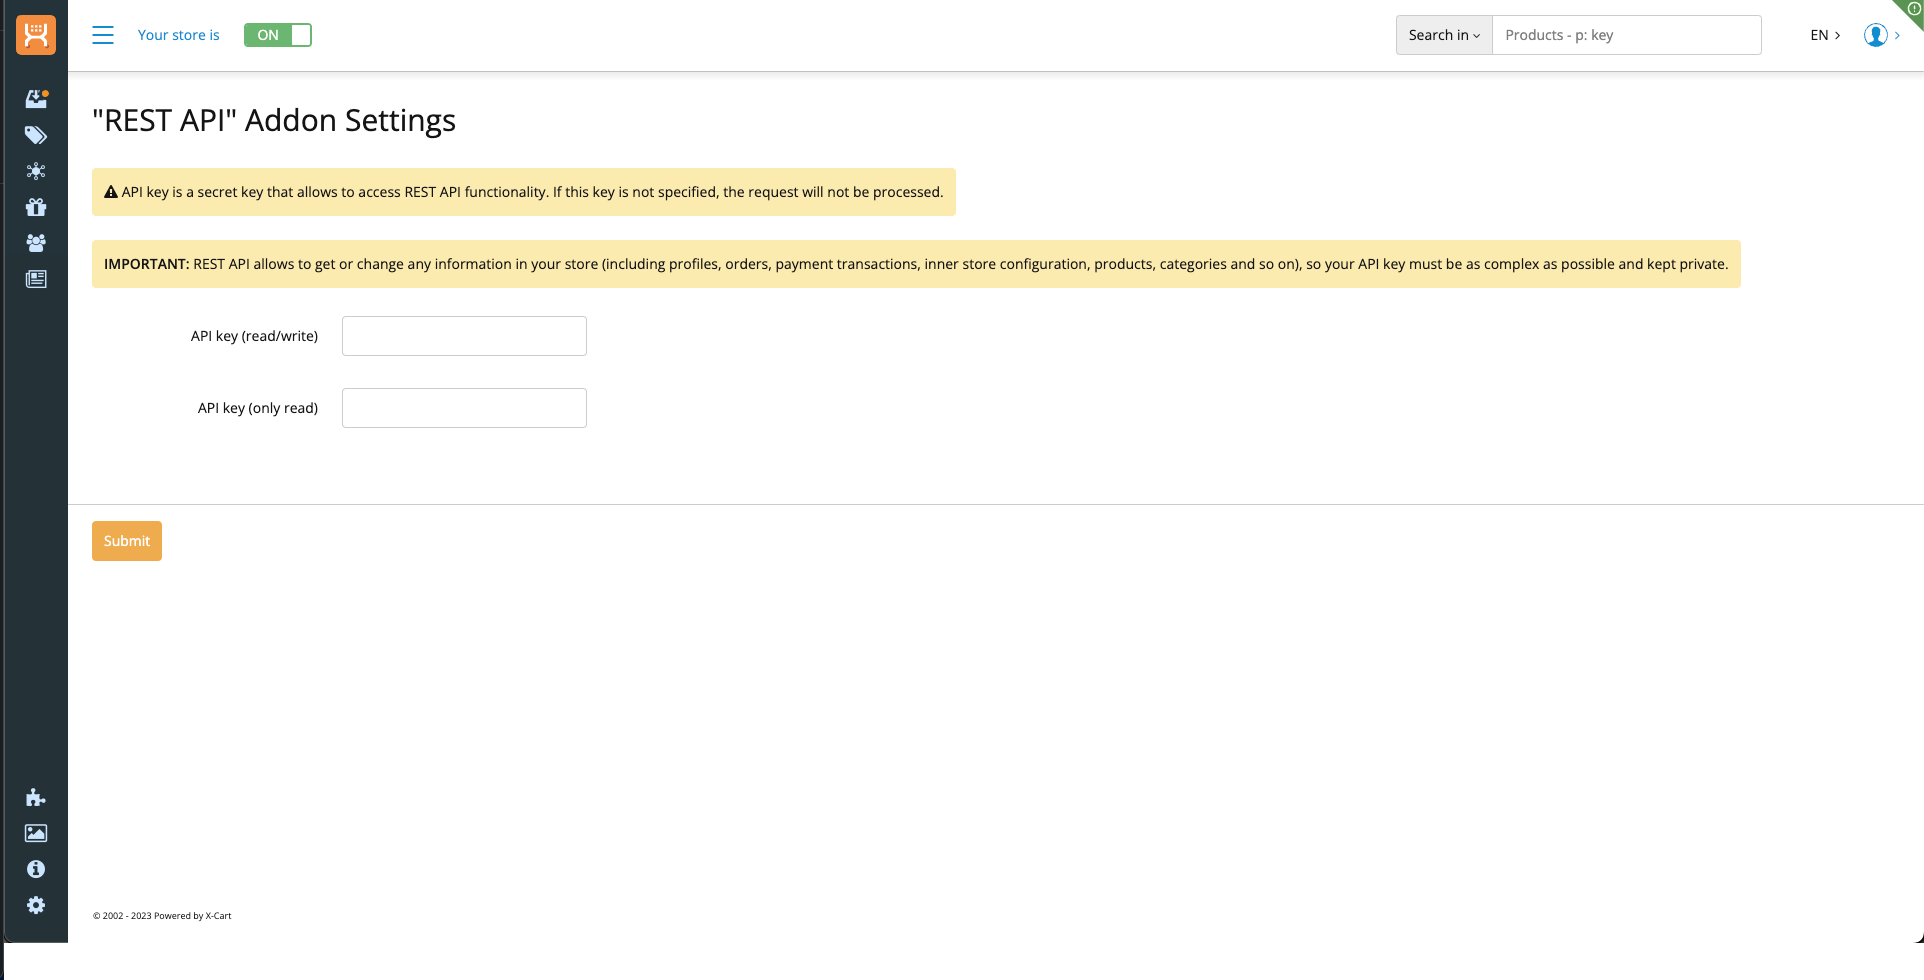
- Create a strong, unique identifier to use as a Read/Write API Key. This can be any string of characters, but we suggest using a mix of lowercase and uppercase letters, numbers and special characters to make it hard to guess. Copy and paste this in the “API key (read/write)” field and click Submit.
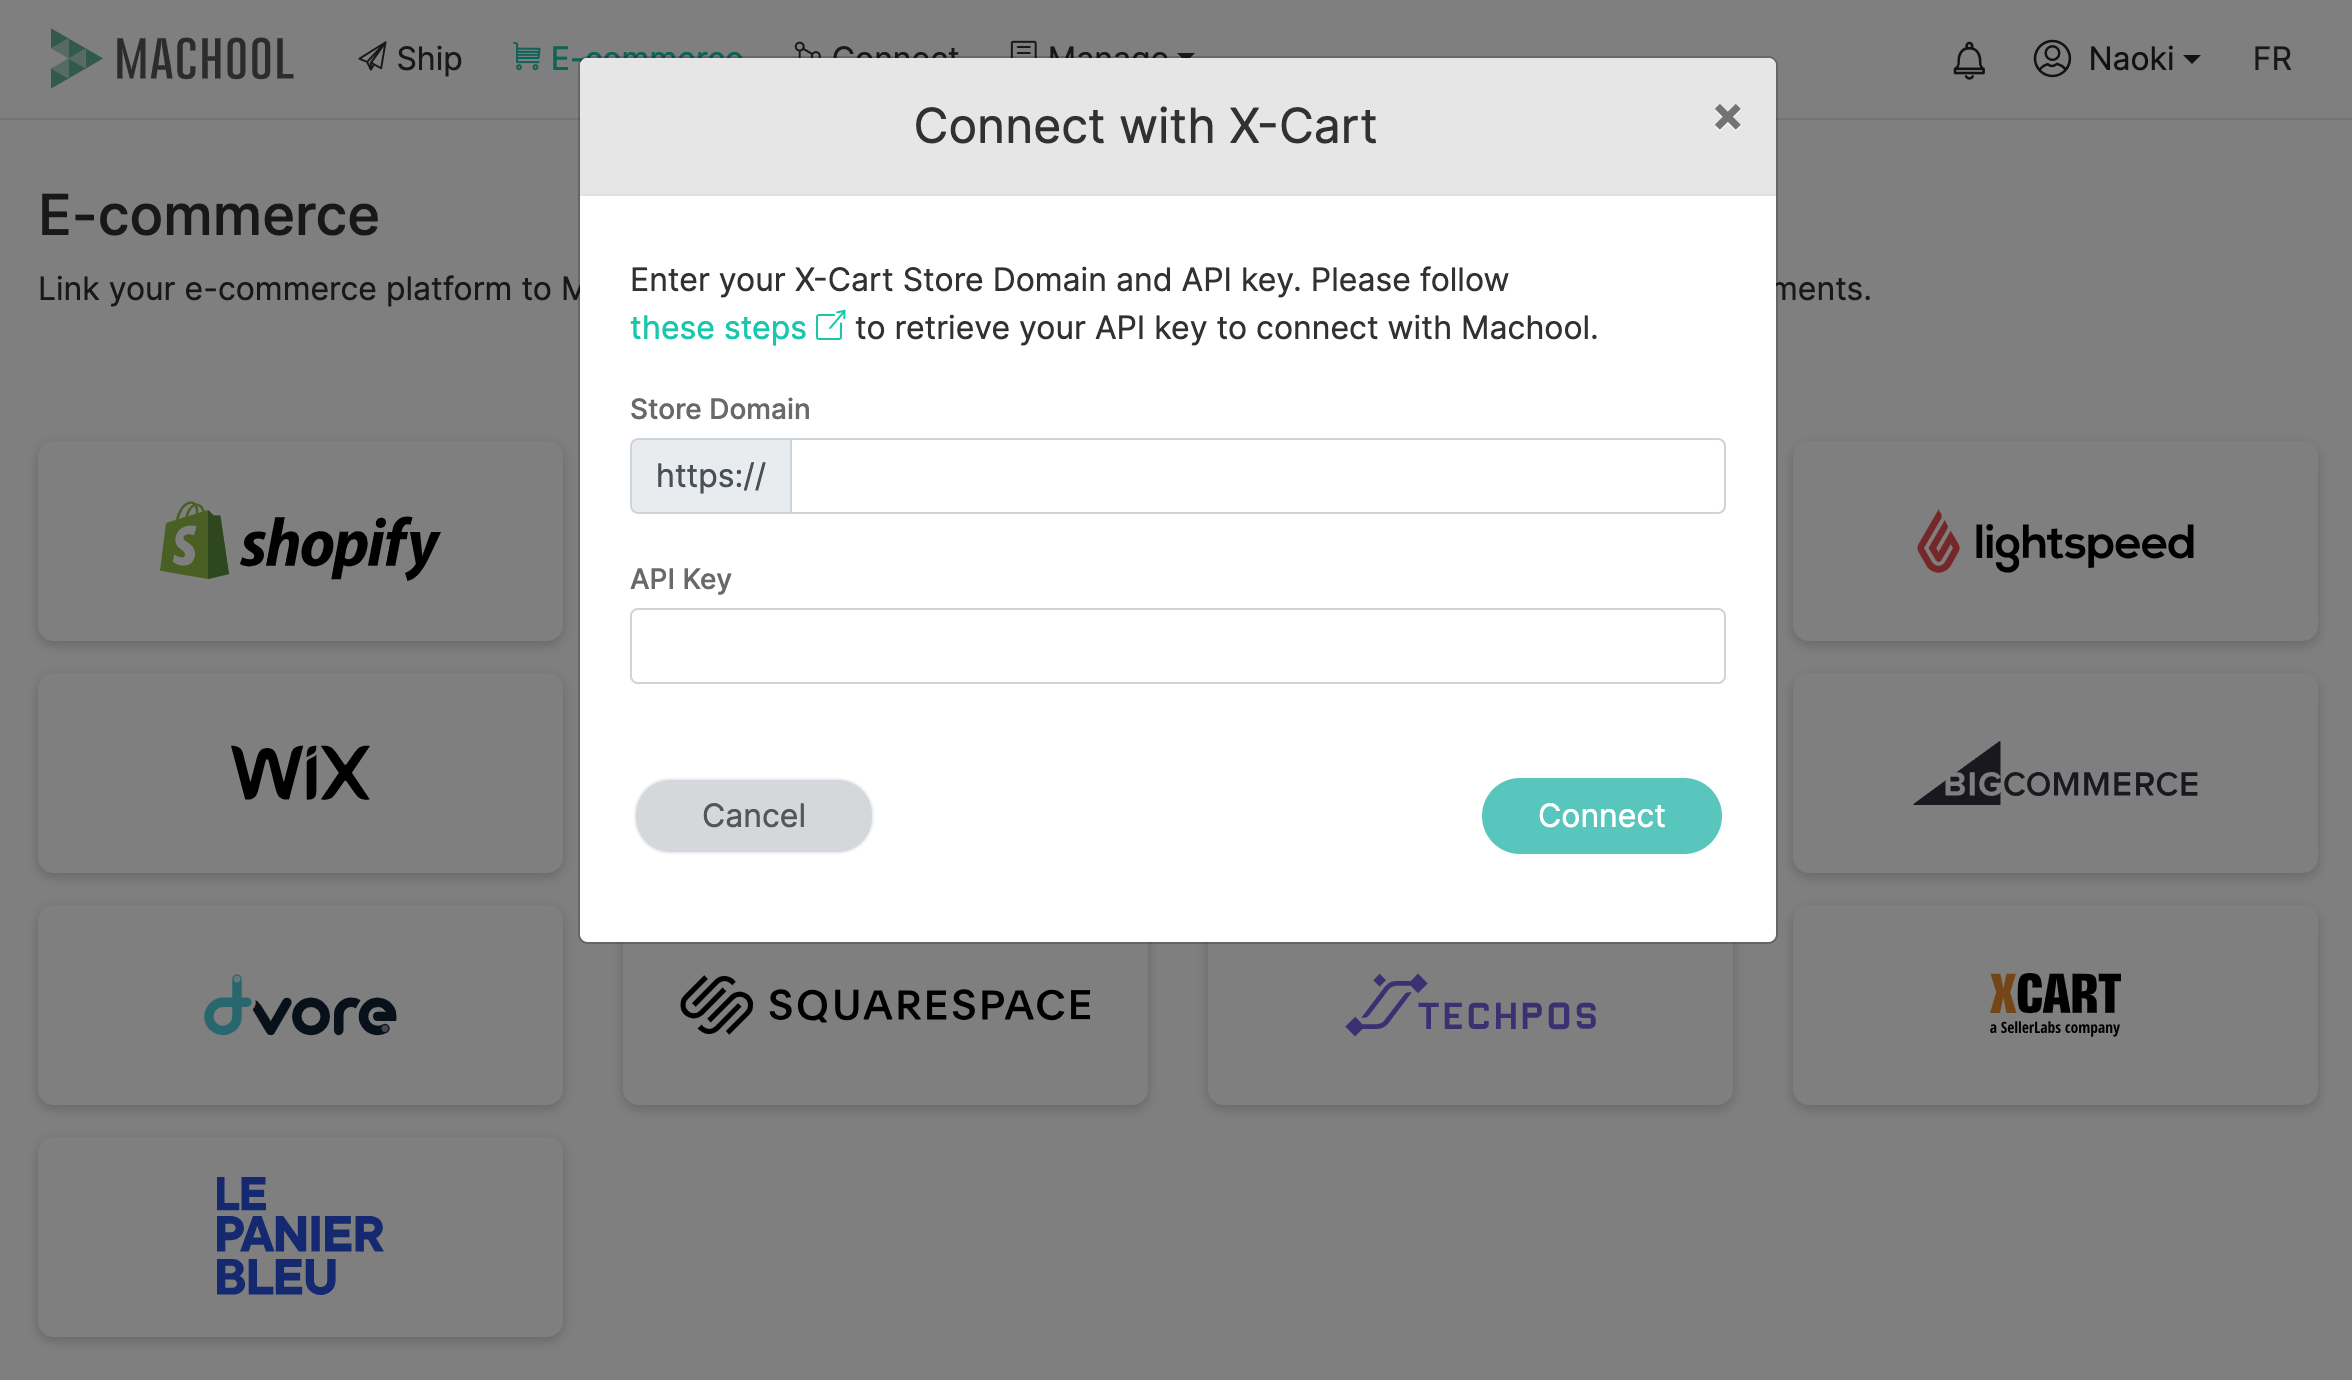
- Log in to Machool and access the E-Commerce page. Click the X-Cart logo and a modal window will open. Enter your X-Cart store URL and the Read/Write API Key you created at step 4, then click “Connect”.
- You can now view and fulfill your X-Cart orders in Machool!